jack and the beanstalk story with pictures pdf
This beloved classic fairy tale is presented in an interactive PDF format, bringing the story to life with vibrant illustrations. It engages young readers with visual storytelling, enhancing their understanding and imagination. The narrative follows Jack’s adventures, teaching valuable lessons about courage and problem-solving. The PDF version is a convenient and educational resource for parents and educators, making it an ideal way to share this timeless story with children.
1;1 Overview of the Classic Fairy Tale
Jack and the Beanstalk is a timeless fairy tale that captivates readers with its magical elements and moral lessons. It tells the story of a poor boy named Jack, whose family struggles to make ends meet. When Jack’s mother instructs him to sell their cow, he trades it for magic beans, which grow into a towering beanstalk. Climbing the beanstalk, Jack encounters a giant, a golden hen, and a magic harp, leading to a series of adventures. The story teaches courage, resourcefulness, and the consequences of one’s actions. The PDF version with pictures brings this classic tale to life, making it an engaging and educational experience for children, while preserving the essence of the original narrative.
1.2 Importance of Visual Storytelling in Children’s Literature
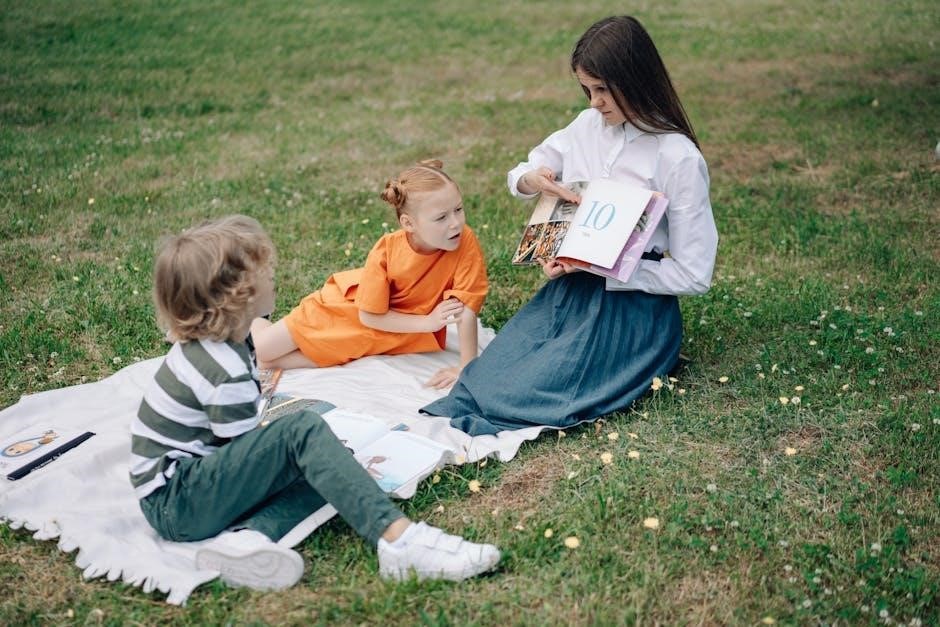
Visual storytelling plays a vital role in children’s literature, as it helps young readers connect with the narrative on a deeper level. Illustrations in stories like Jack and the Beanstalk bring characters and settings to life, making the tale more engaging and relatable for children. Pictures also serve as a bridge between text and imagination, aiding comprehension for early readers who may still be developing their literacy skills. The inclusion of images in the PDF version ensures that the story is not only entertaining but also educational, fostering a love for reading and learning in young minds.
1.3 Purpose of the Article
The purpose of this article is to explore the significance of the Jack and the Beanstalk Story with Pictures PDF in children’s literacy and education. By examining the story’s narrative, its visual elements, and its digital format, the article aims to highlight how this resource serves as a tool for learning and engagement. It also seeks to provide insights into the benefits of illustrated stories for children’s cognitive and creative development. Additionally, the article will guide readers on how to access and utilize the PDF version effectively, making it a comprehensive resource for parents, educators, and young readers alike.

The Story of Jack and the Beanstalk
Jack and the Beanstalk is a classic fairy tale about a poor boy who trades a cow for magic beans, leading to a giant beanstalk, adventures, and treasures.
2.1 The Poor Family’s Struggles
Jack lives with his widowed mother in a small, impoverished cottage. With no father to provide, the family faces extreme poverty, barely scraping by. Their only possession is a cow, which they rely on for milk to sell. When the cow stops producing milk, Jack’s mother sends him to town to sell it, hoping to secure food for the family. The harsh realities of their situation are vividly portrayed in the Jack and the Beanstalk story with pictures PDF, where illustrations of their meager home and barren fields emphasize their dire circumstances. The struggles of Jack’s family highlight themes of hardship and resourcefulness, setting the stage for his adventurous journey to secure a better life for them. The emotional weight of their poverty is evident, driving Jack’s determination to help his mother and improve their fate.
2.2 The Magic Beans and the Giant Beanstalk
After selling the family cow for what he believes are ordinary beans, Jack returns home to his mother’s disappointment. Unbeknownst to them, these are no ordinary beans—they are magical. Overnight, a towering beanstalk grows from the earth, reaching into the clouds. The vibrant illustrations in the Jack and the Beanstalk story with pictures PDF bring this miraculous growth to life, captivating young readers. The beanstalk serves as a gateway to a giant’s world above, sparking Jack’s curiosity and bravery. This pivotal moment marks the beginning of Jack’s adventures and the discovery of a world beyond his wildest imagination, setting the stage for encounters with a giant and extraordinary treasures. The magic beans symbolize the power of unexpected opportunities and transformation.
2.3 Jack’s First Encounter with the Giant
Upon climbing the beanstalk, Jack finds himself in a giant’s castle, where he encounters a colossal figure with a booming voice. The giant, shocked to see a human, demands to know how Jack reached his home. Illustrations in the Jack and the Beanstalk story with pictures PDF vividly depict the giant’s intimidating size and Jack’s trembling courage. Despite his fear, Jack cleverly distracts the giant, showcasing his wit. The giant’s famous phrase, “Fee-fi-fo-fum,” adds a memorable and dramatic tone to the scene. This encounter marks the beginning of Jack’s daring adventures, blending suspense and bravery in a way that captivates young readers and highlights the magic of the tale.
2.4 The Golden Egg-Laying Hen
During his adventures, Jack discovers a magical golden hen that lays eggs of immense value. The hen, a symbol of wealth and prosperity, becomes a crucial element in Jack’s journey. Illustrations in the Jack and the Beanstalk story with pictures PDF beautifully depict the hen’s shimmering golden feathers and the giant’s astonishment at its presence. Jack cleverly steals the hen, ensuring his family’s financial stability. The hen’s magical ability to produce golden eggs not only solves their poverty but also highlights themes of resourcefulness and cleverness. This chapter is a turning point, showcasing Jack’s growth and the story’s magical elements, which captivate readers and inspire imagination.
2.5 The Second Climb and the Magic Harp
Jack’s second climb up the beanstalk leads him to a magical harp with the ability to play enchanting melodies on its own. The harp, a symbol of beauty and artistry, captivates Jack, who decides to take it. The giant, upon discovering the harp’s absence, pursues Jack furiously. Illustrations in the Jack and the Beanstalk story with pictures PDF vividly portray the harp’s elegance and the intensity of the chase. This chapter highlights Jack’s growing courage and cleverness, as he outsmarts the giant once again. The magic harp adds a layer of wonder to the tale, making it a memorable part of the story for readers of all ages.
2.6 The Giant’s Chase and the Beanstalk’s Downfall
The giant, furious over the theft of his treasures, chases Jack down the beanstalk. The chase is intense, with the giant’s roars echoing through the sky. Jack, realizing the giant is closing in, grabs an axe and chops the beanstalk, causing it to collapse. The giant falls to his death, and the beanstalk crumbles. Illustrations in the Jack and the Beanstalk story with pictures PDF vividly depict the chaos and suspense of this climactic moment. This event marks the end of the giant’s reign and secures Jack’s safety. The story’s thrilling conclusion reinforces the themes of courage and quick thinking.
2.7 The Happy Ending and Moral Lessons
With the giant defeated and the beanstalk destroyed, Jack and his mother live happily ever after. The story concludes with Jack being hailed as a hero, and their financial struggles come to an end. The tale emphasizes moral lessons such as bravery, resourcefulness, and the consequences of one’s actions. Jack’s journey teaches children the value of courage and cleverness in overcoming adversity. The Jack and the Beanstalk story with pictures PDF beautifully illustrates this joyful resolution, making it a heartwarming experience for young readers. The story’s uplifting ending reinforces the importance of honesty and the rewards of standing up against challenges.

The Role of Illustrations in the Story
Illustrations in the Jack and the Beanstalk story with pictures PDF bring the tale to life, engaging young readers with vibrant visuals and key scenes, enhancing comprehension and enjoyment.
3.1 Enhancing the Story with Pictures
Illustrations in the Jack and the Beanstalk story with pictures PDF play a vital role in enhancing the narrative by providing visual context to key scenes and characters. Pictures help children visualize the giant beanstalk, the towering giant, and the magical golden egg-laying hen, making the story more engaging and relatable. The visuals break down complex descriptions, allowing young readers to better understand the plot. Additionally, the images evoke emotions, such as fear when encountering the giant or joy when Jack discovers the treasures. By combining text with imagery, the story becomes more immersive, fostering a deeper connection between the reader and the tale. This visual storytelling approach is particularly effective for early learners, as it aids in comprehension and sparks imagination. The PDF format ensures these illustrations are crisp and vibrant, enhancing the overall reading experience.
3.2 The Importance of Visual Aids for Children
Visual aids, such as those in the Jack and the Beanstalk story with pictures PDF, are essential for children’s learning and development. They capture young readers’ attention, making stories more engaging and relatable. Pictures help children connect emotionally with characters and scenes, fostering empathy and understanding. Visual aids also support language development by associating words with images, improving comprehension and vocabulary. Additionally, they cater to different learning styles, particularly benefiting visual learners. The combination of text and images in the PDF format enhances memory retention and encourages a deeper connection to the narrative; Visual storytelling is a powerful tool for educators and parents, making complex ideas accessible and fun for children. It also sparks creativity and imagination, which are crucial for cognitive growth. By integrating visuals, the story becomes a holistic learning experience.
3.3 Popular Illustration Styles for the Story
The Jack and the Beanstalk story with pictures PDF often features a variety of illustration styles that captivate young readers. Traditional watercolor and hand-drawn designs are popular, offering a classic, whimsical feel. Many versions incorporate vibrant digital art, creating dynamic and modern visuals. Some illustrators opt for a minimalist approach, using bold lines and simple shapes to focus on key story elements. Fairy tale-inspired art, with intricate details and magical themes, is also widely used. These styles not only enhance the narrative but also make the PDF visually appealing. The diversity of illustration styles ensures the story remains engaging for children while preserving its timeless charm. Each style brings a unique perspective to the beloved tale, making it accessible to diverse audiences.

The PDF Version of the Story
The Jack and the Beanstalk story with pictures PDF offers a convenient and engaging way to enjoy the classic tale. It combines vivid illustrations with the narrative, making it easily accessible on digital devices. This format is ideal for modern readers, especially children, as it preserves the story’s charm while adapting to contemporary reading habits. The PDF version ensures the story remains vibrant and easily shareable, catering to both traditional and tech-savvy audiences. Its portability and visual appeal make it a popular choice for storytelling in the digital age. The PDF format bridges tradition and innovation seamlessly.
4.1 Benefits of a Digital Format
The Jack and the Beanstalk story with pictures PDF offers numerous advantages, making it a preferred choice for many readers. Its digital format allows for easy access across devices like tablets, smartphones, and computers, ensuring the story is always within reach. The vivid illustrations and text remain crisp and clear, even when zoomed in, enhancing the visual storytelling experience. Additionally, the digital version saves physical storage space and is environmentally friendly. It also enables features like search functionality and bookmarking, making navigation seamless. Parents and educators can easily share the PDF with children or students, fostering a love for reading in a modern, convenient way. The digital format truly enhances the accessibility and engagement of this beloved tale.
4.2 How to Find the PDF Version Online
Locating the Jack and the Beanstalk story with pictures PDF is straightforward with a few simple steps. Start by searching on popular search engines using keywords like “Jack and the Beanstalk PDF with pictures” or “illustrated Jack and the Beanstalk story PDF.” Websites like Google Books, Scribd, or PDF sharing platforms often host such files. Additionally, educational or children’s literature websites may offer free downloads. Use filters like “free” or “colorful illustrations” to refine your search. Always ensure to download from trusted sources to avoid malware. Some platforms may require creating an account or completing a quick verification process. With these steps, you can easily access the story in a convenient digital format.
4.3 Tips for Creating Your Own Illustrated PDF
Creating your own Jack and the Beanstalk story with pictures PDF can be a fun and creative project. Start by selecting a suitable software like Adobe InDesign, Canva, or even PowerPoint. Script the story into a condensed version, ensuring it retains the key plot points and moral lessons. Choose high-quality illustrations that align with the narrative, either by sourcing free images or creating your own. Design each page with a balance of text and visuals, keeping the layout clean and child-friendly. Add interactive elements like clickable links or animations for a digital twist. Finally, proofread the content, save it as a PDF, and share it with children to enjoy. This personalized approach makes storytelling even more engaging.

Educational Value of the Story
The story of Jack and the Beanstalk offers valuable moral lessons, encourages reading skills, and promotes courage and resourcefulness in children, enhanced by visual storytelling in the PDF format.
5.1 Teaching Children About Courage and Resourcefulness
The story of Jack and the Beanstalk is a powerful tool for teaching children about courage and resourcefulness. Jack, a young boy, faces numerous challenges, from climbing the giant beanstalk to outsmarting the giant. His bravery and cleverness inspire children to confront their fears and think creatively. The visual elements in the PDF version enhance these lessons, as illustrations depict Jack’s determination and resourcefulness. This narrative helps children understand that even in difficult situations, courage and quick thinking can lead to success. The story fosters resilience and problem-solving skills, essential for personal growth and development.
5.2 Using the Story to Encourage Reading Skills
The Jack and the Beanstalk story with pictures PDF is an excellent resource for fostering reading skills in children. The combination of engaging text and vibrant illustrations makes the story accessible and appealing to young readers. The narrative’s simple yet imaginative language helps children develop vocabulary and comprehension. Additionally, the story’s predictable structure and repetitive phrases encourage early readers to predict outcomes and build confidence. The visual elements in the PDF version act as a guide, helping children connect the narrative with the characters’ actions and emotions. This interactive storytelling method motivates kids to engage deeply with the text, fostering a lifelong love for reading and learning.
5.3 Moral Lessons and Ethical Discussions
The Jack and the Beanstalk story with pictures PDF offers a wealth of moral lessons and ethical discussions for children. Jack’s bravery and resourcefulness highlight the importance of courage in the face of challenges. However, his initial trade of the family cow for magic beans sparks conversations about honesty and responsibility. The giant’s anger over stolen items raises questions about ownership and consequences of actions. The story also teaches the value of cleverness and determination, as Jack outsmarts the giant. These themes provide opportunities for parents and educators to guide children in understanding right from wrong and the importance of ethical decision-making. The visual aids in the PDF further enhance these discussions by illustrating key moral dilemmas.

Activities and Resources for Kids
- Engage kids with crafts like beanstalk planters and giant footprints.
- Download activity sheets with mazes, quizzes, and coloring pages.
- Explore interactive games and apps based on the story.
6.1 Story-Based Crafts and Games
Engage children with creative activities inspired by “Jack and the Beanstalk.” Craft ideas include making a paper beanstalk, designing a giant’s castle, or creating Jack and the giant as puppets. Kids can also plant beans in small pots to watch them grow, symbolizing the magic beanstalk. Games like “Pin the Beanstalk on the Giant” or “Jack’s Beanstalk Climb” encourage physical activity and storytelling. Additionally, role-playing scenarios allow children to act out their favorite parts of the story, fostering imagination and teamwork. These activities not only entertain but also help children connect with the narrative on a deeper level.

6.2 Reading Guides and Worksheets
Reading guides and worksheets complement the “Jack and the Beanstalk Story with Pictures PDF” by enhancing comprehension and engagement. These resources often include comprehension questions, vocabulary exercises, and character analysis prompts. Worksheets may focus on sequencing events, identifying themes, or discussing moral lessons. Additionally, activities like drawing scenes from the story or writing creative endings encourage children to think critically. Teachers and parents can use these tools to assess understanding and foster a deeper connection to the narrative. The visual elements in the PDF can also be incorporated into activities, such as labeling illustrations or matching pictures to story sections, making learning interactive and fun.
6.3 Interactive Digital Activities
Interactive digital activities offer a dynamic way for children to engage with the “Jack and the Beanstalk Story with Pictures PDF.” These activities can include animated versions of the story, quizzes, and games that bring the tale to life. For instance, children can participate in virtual climbs up the beanstalk, solve puzzles to help Jack escape the giant, or interact with characters through clickable elements. Some digital tools also allow kids to create their own animations or sequels to the story. These activities not only enhance storytelling but also promote problem-solving skills and creativity. Additionally, interactive quizzes can test comprehension and reinforce the moral lessons of the story, making learning both fun and effective. These digital enhancements make the classic tale more accessible and engaging for modern, tech-savvy children.

Cultural Impact of “Jack and the Beanstalk”
Jack and the Beanstalk’s cultural impact is immense, inspiring countless adaptations in film, theater, and literature. Its timeless themes resonate globally, cementing its legacy in popular culture, while the PDF version ensures accessibility for new generations to enjoy.
7.1 The Story’s Popularity Across Generations
The tale of Jack and the Beanstalk has captivated audiences for centuries, transcending age barriers; Its themes of courage, resourcefulness, and adventure appeal to children, while its moral lessons resonate with adults. The story’s simplicity and universal appeal have made it a beloved classic, passed down through generations. The inclusion of vivid illustrations in the PDF version enhances its charm, making it accessible to modern readers. This timeless narrative continues to enchant both young and old, ensuring its place in the hearts of readers worldwide. Its enduring popularity highlights the power of storytelling to connect people across time and culture.
7.2 Adaptations in Film, Theater, and Media
Jack and the Beanstalk has been adapted into various forms of media, captivating audiences beyond traditional storytelling. Films like Disney’s 1947 animated version and the 2001 live-action movie, Jack and the Beanstalk: The Real Story, offer fresh takes on the classic tale. Theater productions, including musicals and stage plays, bring the story to life with vibrant performances. In media, the story has been reimagined in TV series, video games, and even radio dramas, ensuring its relevance for modern audiences. These adaptations not only entertain but also introduce the tale to new generations, blending tradition with innovation. The story’s versatility in different mediums underscores its timeless appeal and enduring popularity.
7.3 The Story’s Influence on Modern Literature

Jack and the Beanstalk has left a lasting impact on modern literature, inspiring authors to explore similar themes of adventure, courage, and moral growth. The story’s motifs, such as the underdog overcoming adversity and the clash between good and evil, are frequently seen in contemporary children’s books and young adult fiction. Many writers incorporate magical realism, a key element of the tale, into their narratives. For instance, authors like Stephen King and J.K. Rowling have drawn inspiration from the story’s ability to blend fantasy with relatable human struggles. This timeless tale continues to influence literature by reminding writers of the power of simplicity and the universal appeal of a well-crafted hero’s journey.

Jack and the Beanstalk Story with Pictures PDF remains a timeless tale, inspiring imagination and moral lessons. Its visual and narrative charm fosters a love for reading in children, making it a cherished resource for generations.
8.1 Final Thoughts on the Story’s Significance
Jack and the Beanstalk Story with Pictures PDF holds a special place in children’s literature, blending adventure, morality, and visual charm. Its enduring appeal lies in its ability to captivate young minds with vibrant illustrations and a relatable hero. The story’s themes of courage, resourcefulness, and the consequences of actions resonate universally. The inclusion of pictures in the PDF version enhances storytelling, making it more accessible and engaging for modern children. This tale not only entertains but also teaches valuable life lessons, fostering a love for reading and sparking imagination. Its significance is undeniable, as it continues to inspire new generations of readers and remains a timeless classic in digital and traditional formats alike.
8.2 Encouraging a Love for Reading in Children
Using the Jack and the Beanstalk Story with Pictures PDF is an excellent way to nurture a love for reading in children. The vibrant illustrations and engaging storyline captivate young minds, making reading an enjoyable experience. The story’s moral lessons and adventurous plot encourage children to think critically while sparking their imagination. Reading aloud with parents or educators fosters bonding and helps develop language skills. The PDF format allows easy access on devices, making it convenient to share the story anytime, anywhere. By introducing children to such captivating tales, we lay the foundation for a lifelong love of reading and learning. This story, with its timeless appeal, is a perfect tool for inspiring a passion for books in young readers.