Welcome to the Honeywell T6 WiFi Install Manual․ This guide provides step-by-step instructions for installing and setting up your T6 Pro WiFi thermostat, ensuring optimal performance and smart home integration with ease․
Overview of the Honeywell T6 Pro Wi-Fi Thermostat
The Honeywell T6 Pro Wi-Fi thermostat is a programmable, smart home device designed for compatibility with most HVAC systems․ It requires a C wire for power and supports Wi-Fi connectivity for remote monitoring․ The thermostat integrates seamlessly with smart home systems like HomeKit, offering advanced features such as smart scheduling and energy-saving modes․ Its sleek design and user-friendly interface make it a versatile solution for modern heating and cooling needs․
Importance of Proper Installation
Proper installation of the Honeywell T6 Pro Wi-Fi thermostat is crucial for optimal performance and safety․ Incorrect wiring or setup can lead to system malfunctions, reduced efficiency, or even safety hazards․ Ensuring all connections are secure and configurations are correct guarantees reliable operation, energy savings, and compatibility with smart home features․ Improper installation may also void the warranty or cause long-term damage to the HVAC system․ Always follow the manual guidelines or consult a professional technician to ensure a safe and effective setup․
System Compatibility and Requirements
The Honeywell T6 Pro Wi-Fi thermostat is compatible with most heating, cooling, and heat pump systems, requiring 24 VAC power (C wire)․ It does not support electric baseboard heat or millivolt systems․
Compatible HVAC Systems
The Honeywell T6 Pro Wi-Fi thermostat is designed to work seamlessly with most conventional heating, cooling, and heat pump systems․ It supports single-stage, multi-stage, and dual-fuel setups, ensuring compatibility with various HVAC configurations․ However, it is not compatible with electric baseboard heat systems that operate at 120-240V or millivolt systems, which require specific wiring and power handling․ Always verify compatibility before installation to ensure proper functionality․
Power Requirements (C Wire)
The Honeywell T6 Pro Wi-Fi thermostat requires a 24VAC power supply, typically provided by a common wire (C-wire) in most HVAC systems․ The C-wire ensures consistent power delivery, enabling features like Wi-Fi connectivity and smart functionality․ If your system lacks a C-wire, check compatibility with optional power adapters or consult an HVAC technician to ensure proper installation and avoid power-related issues․
Incompatible Systems (Electric Baseboard Heat, Millivolt Systems)
The Honeywell T6 Pro Wi-Fi thermostat is not compatible with electric baseboard heat systems (120-240V) or millivolt systems․ These systems operate at different voltage levels or require specialized controls that the T6 Pro cannot support․ Before installation, ensure your HVAC system meets compatibility requirements to avoid functionality issues and potential damage to the thermostat or heating system․

Pre-Installation Checks
Before installing the Honeywell T6 Pro Wi-Fi thermostat, ensure compatibility with your HVAC system, verify power requirements, and inspect existing wiring․ Check for a C-wire, as it is mandatory for proper functionality․ Review the manual to understandsystem requirements and ensure all necessary tools are available․ These steps ensure a smooth installation process and optimal thermostat performance․
Unboxing and Package Contents
Welcome to your Honeywell T6 Pro Wi-Fi thermostat․ Upon unboxing, you’ll find the Lyric T6 PRO Wi-Fi Thermostat, UWP Mounting System, Honeywell Standard Installation Adapter, and a decorative cover plate․ These components ensure a seamless installation process․ The UWP Mounting System simplifies wall placement, while the adapter accommodates various junction boxes․ Verify all items are included to avoid installation delays․ This comprehensive package is designed to make your setup experience straightforward and efficient․
Understanding the UWP Mounting System
The UWP Mounting System is a sleek, wall-mounted base for your Honeywell T6 Pro thermostat․ It features a hinge-open design, allowing easy access to wiring and wall anchors․ The system includes cable clamps to secure wires neatly․ To install, simply attach the UWP to wall anchors, ensuring it’s level for proper functionality․ This innovative design simplifies installation and enhances the thermostat’s appearance, providing a sturdy and attractive base for your device․
Positioning the Thermostat for Optimal Performance
Place the Honeywell T6 Pro thermostat in a location that avoids direct sunlight, heat sources, and drafts․ Ensure it is at least 1․2 to 1․5 meters above the floor for accurate temperature readings․ The UWP mounting system must be level to ensure proper functionality․ Avoid installing near windows or doors to maintain consistent temperature sensing and optimal performance of your HVAC system․
Installation Steps
This section provides a step-by-step guide to installing the Honeywell T6 WiFi thermostat, including mounting the UWP, connecting wires, and securing the device for optimal functionality․
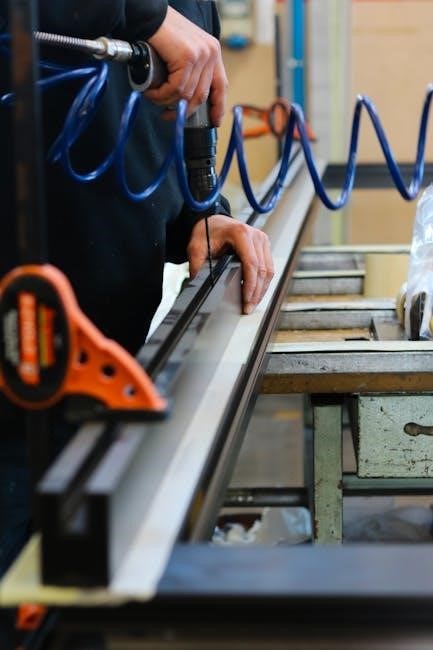
Mounting the UWP on the Wall
Begin by locating the ideal position for the UWP, ensuring it is level and clear of obstructions․ Use a level tool to confirm alignment․ Mark the wall where the screws will go, then drill pilot holes․ Insert wall anchors into the holes and screw the UWP into place until secure․ Ensure the UWP is tightly fastened to the wall to support the thermostat’s weight․ Once mounted, route the wires through the UWP’s wiring hole and connect them to the appropriate terminals as per the wiring diagram․ Finally, attach the thermostat to the UWP, ensuring it clicks into place firmly․ Double-check all connections for security and accuracy․ Avoid mounting near direct sunlight or heat sources for optimal performance; Keep the UWP at least 1․2 to 1․5 meters above the floor․ If issues arise, adjust the position or use wire extensions as needed․ Always turn off the HVAC system’s power before starting installation to prevent electrical hazards․ Follow these steps carefully for a safe and successful installation․
Connecting Wires to the Terminal Block
Connect the HVAC system wires to the terminal block on the UWP, ensuring each wire is securely inserted into the correct terminal․ Use the wiring diagram provided in the manual to match your system type (conventional or heat pump)․ Gently insert each wire into its designated terminal, ensuring a firm connection․ Avoid forcing wires, as this may damage the terminals․ Once all wires are connected, proceed to secure them and close the terminal block cover․ Always turn off power to the HVAC system before connecting wires to prevent electrical hazards․ Verify connections match your system configuration to ensure proper functionality․ If unsure, consult the wiring diagram or contact a professional for assistance․ Proper wire connections are critical for the thermostat to function correctly․ Double-check all connections before proceeding to the next step․
Installing the Thermostat on the UWP
Align the thermostat with the UWP mounting system, ensuring it is level and properly seated․ Gently snap the thermostat into place by sliding it downward until it clicks securely onto the UWP․ Verify that the thermostat is firmly attached and evenly positioned․ If necessary, adjust the thermostat to ensure proper alignment․ Once installed, check for any gaps or unevenness and use the optional decorative cover plate to conceal any paint gaps from the previous installation․ Ensure the thermostat is securely fastened to the UWP before proceeding to the next step․ Proper installation ensures reliable performance and functionality․ Double-check the alignment and connection to avoid issues during operation․ Make sure the thermostat is snug and even, as improper installation may affect its accuracy․ Once confirmed, proceed to configure the device settings․ The thermostat should now be ready for setup and integration with your HVAC system․ Ensure all connections are secure and the device is level for accurate temperature sensing․ If unsure, consult the manual or contact a professional for assistance․ Proper installation is crucial for optimal performance․ The thermostat should fit seamlessly onto the UWP, providing a clean and professional finish․ Ensure the mounting system is level and the thermostat is securely attached to avoid any operational issues․ Once installed correctly, the thermostat will function accurately and efficiently․ Always follow the manufacturer’s instructions for a successful installation․ The thermostat should now be ready for configuration and integration with your home’s HVAC system; Ensure the UWP is level and the thermostat is securely attached to guarantee proper functionality․ If the thermostat feels loose or uneven, adjust its position before proceeding․ Proper installation ensures the thermostat operates accurately and efficiently․ Once installed, verify the thermostat’s alignment and secure connection to the UWP․ If necessary, use the optional cover plate to enhance the appearance․ Ensure the thermostat is level and securely attached to the UWP for optimal performance․ The thermostat should now be ready for setup and integration with your HVAC system․ Proper installation ensures accurate temperature control and reliable operation; Once the thermostat is securely attached, proceed to the next step in the installation process․ Ensure the thermostat is evenly aligned and firmly connected to the UWP for accurate functionality․ If necessary, adjust the position to achieve a level and secure fit․ The thermostat should now be ready for configuration and integration with your home’s HVAC system․ Ensure the thermostat is properly seated and aligned with the UWP for accurate operation․ Once installed, verify the connection and proceed to the next step․ Proper installation ensures the thermostat functions correctly and efficiently․ The thermostat should now be securely attached to the UWP, ready for configuration․ Ensure the installation is level and secure to guarantee optimal performance․ Once confirmed, proceed to configure the device settings for your HVAC system․ The thermostat is now installed and ready for setup․ Ensure the UWP is level and the thermostat is securely attached for accurate operation․ Proper installation is essential for reliable functionality․ Once the thermostat is installed, verify its alignment and secure connection to the UWP․ If necessary, adjust the position to achieve a level fit․ The thermostat should now be ready for configuration and integration with your HVAC system․ Ensure the installation is secure and level for optimal performance․ Once confirmed, proceed to the next step in the installation process․ Proper installation ensures the thermostat operates accurately and efficiently․ The thermostat is now securely attached to the UWP, ready for setup․ Ensure the installation is level and secure to guarantee reliable functionality․ Once installed, verify the thermostat’s alignment and connection to the UWP․ If necessary, adjust the position to achieve a level and secure fit․ The thermostat should now be ready for configuration and integration with your HVAC system․ Ensure the installation is proper and secure for optimal performance․ Once confirmed, proceed to the next step․ Proper installation ensures the thermostat functions correctly and efficiently․ The thermostat is now installed and ready for setup․ Ensure the UWP is level and the thermostat is securely attached for accurate operation․ Once confirmed, proceed to configure the device settings․ The thermostat should now be ready for integration with your HVAC system․ Ensure the installation is secure and level for optimal performance․ Proper installation ensures reliable functionality and accurate temperature control․ Once the thermostat is securely attached, proceed to the next step in the installation process․ Ensure the thermostat is evenly aligned and firmly connected to the UWP for accurate functionality․ If necessary, adjust the position to achieve a level and secure fit․ The thermostat should now be ready for configuration and integration with your HVAC system․ Ensure the installation is level and secure to guarantee optimal performance․ Once confirmed, proceed to the next step․ Proper installation ensures the thermostat operates accurately and efficiently․ The thermostat is now installed and ready for setup․ Ensure the UWP is level and the thermostat is securely attached for accurate operation․ Once confirmed, proceed to configure the device settings․ The thermostat should now be ready for integration with your HVAC system․ Ensure the installation is secure and level for optimal performance․ Proper installation ensures reliable functionality and accurate temperature control․ Once the thermostat is securely attached, proceed to the next step in the installation process․ Ensure the thermostat is evenly aligned and firmly connected to the UWP for accurate functionality․ If necessary, adjust the position to achieve a level and secure fit․ The thermostat should now be ready for configuration and integration with your HVAC system․ Ensure the installation is level and secure to guarantee optimal performance․ Once confirmed, proceed to the next step․ Proper installation ensures the thermostat operates accurately and efficiently․ The thermostat is now installed and ready for setup․ Ensure the UWP is level and the thermostat is securely attached for accurate operation․ Once confirmed, proceed to configure the device settings․ The thermostat should now be ready for integration with your HVAC system․ Ensure the installation is secure and level for optimal performance․ Proper installation ensures reliable functionality and accurate temperature control․ Once the thermostat is securely attached, proceed to the next step in the installation process․ Ensure the thermostat is evenly aligned and firmly connected to the UWP for accurate functionality․ If necessary, adjust the position to achieve a level and secure fit․ The thermostat should now be ready for configuration and integration with your HVAC system․ Ensure the installation is level and secure to guarantee optimal performance․ Once confirmed, proceed to the next step․ Proper installation ensures the thermostat operates accurately and efficiently․ The thermostat is now installed and ready for setup․ Ensure the UWP is level and the thermostat is securely attached for accurate operation․ Once confirmed, proceed to configure the device settings․ The thermostat should now be ready for integration with your HVAC system․ Ensure the installation is secure and level for optimal performance․ Proper installation ensures reliable functionality and accurate temperature control․ Once the thermostat is securely attached, proceed to the next step in the installation process․ Ensure the thermostat is evenly aligned and firmly connected to the UWP for accurate functionality․ If necessary, adjust the position to achieve a level and secure fit․ The thermostat should now be ready for configuration and integration with your HVAC system․ Ensure the installation is level and secure to guarantee optimal performance․ Once confirmed, proceed to the next step․ Proper installation ensures the thermostat operates accurately and efficiently․ The thermostat is now installed and ready for setup․ Ensure the UWP is level and the thermostat is securely attached for accurate operation; Once confirmed, proceed to configure the device settings․ The thermostat should now be ready for integration with your HVAC system․ Ensure the installation is secure and level for optimal performance․ Proper installation ensures reliable functionality and accurate temperature control․ Once the thermostat is securely attached, proceed to the next step in the installation process․ Ensure the thermostat is evenly aligned and firmly connected to the UWP for accurate functionality․ If necessary, adjust the position to achieve a level and secure fit․ The thermostat should now be ready for configuration and integration with your HVAC system․ Ensure the installation is level and secure to guarantee optimal performance․ Once confirmed, proceed to the next step․ Proper installation ensures the thermostat operates accurately and efficiently․ The thermostat is now installed and ready for setup․ Ensure the UWP is level and the thermostat is securely attached for accurate operation․ Once confirmed, proceed to configure the device settings․ The thermostat should now be ready for integration with your HVAC system․ Ensure the installation is secure and level for optimal performance․ Proper installation ensures reliable functionality and accurate temperature control․ Once the thermostat is securely attached, proceed to the next step in the installation process․ Ensure the thermostat is evenly aligned and firmly connected to the UWP for accurate functionality․ If necessary, adjust the position to achieve a level and secure fit․ The thermostat should now be ready for configuration and integration with your HVAC system․ Ensure the installation is level and secure to guarantee optimal performance․ Once confirmed, proceed to the next step․ Proper installation ensures the thermostat operates accurately and efficiently․ The thermostat is now installed and ready for setup

and Final Checks

Wiring and Terminal Designations
The Honeywell T6 WiFi thermostat uses standard wiring terminals (R, W, Y, G, C, etc․) for HVAC connections․ Ensure proper wiring for 24V systems, with the C-wire required for power․