Category: PDF

PDF

cape cod league rosters 2024 pdf

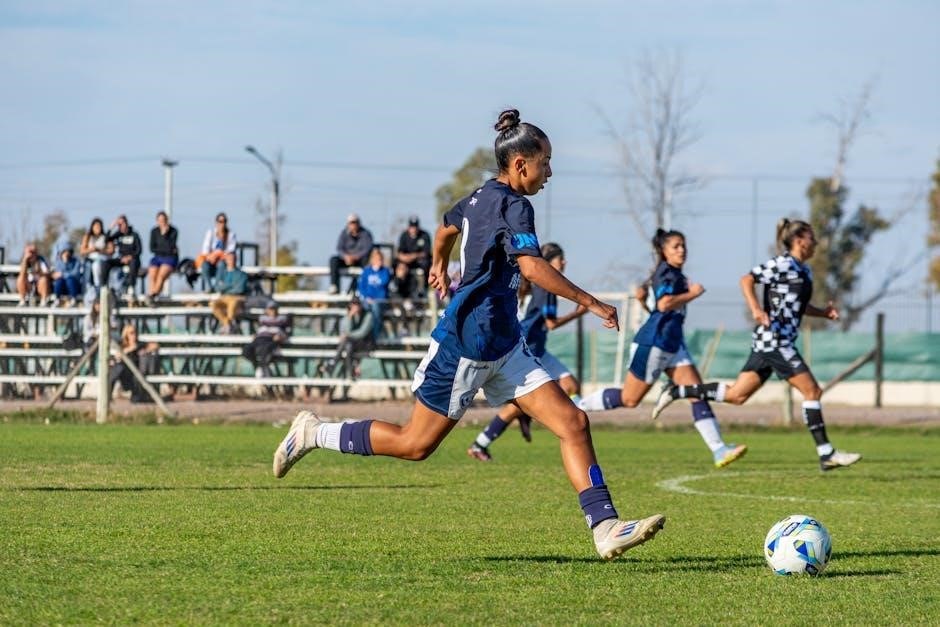
The Cape Cod League is a prestigious collegiate summer baseball league, showcasing top talent and serving as a pipeline to MLB. The 2024 season features 10 teams, a 40-game schedule, and rosters filled with elite college players, available in PDF format for fans and scouts.

1.1 Historical Overview of the Cape Cod Baseball League

The Cape Cod Baseball League, founded in 1923, is one of the oldest summer collegiate baseball leagues in the U.S. Originally known for its local talent, it evolved into a premier showcase for college players, adopting wooden bats in 1963. Its rich history includes legendary alumni who later became MLB stars, solidifying its legacy as a developmental powerhouse.

1.2 The Significance of the Cape Cod League in Collegiate Baseball

The Cape Cod League is a cornerstone of collegiate baseball, offering a competitive platform for top talent. It bridges college and professional baseball, attracting scouts and fans. The league’s reputation for elite play and development makes it a premier destination for aspiring MLB players, fostering growth and showcasing future stars annually.

2024 Cape Cod League Season Overview

The 2024 Cape Cod League season begins on June 15, featuring a 40-game schedule; New commissioner John Castleberry leads the league, with updated rosters and live broadcasts on the Cape Cod Baseball Network.

2.1 Key Dates for the 2024 Season

The 2024 Cape Cod League season starts on June 15 and concludes on August 4. Key events include Opening Day, the All-Star Game, and playoffs. The schedule is available in PDF format, ensuring fans stay updated on all matchups and special events throughout the summer.

2.2 New Commissioner and League Leadership

John Castleberry assumes the role of commissioner for the 2024 season, bringing extensive experience in collegiate baseball. His leadership focuses on enhancing player development and fan engagement while maintaining the league’s tradition of excellence. Castleberry’s vision aims to strengthen the Cape Cod League’s reputation as a premier platform for future MLB talent.

2.3 Changes and Expectations for the 2024 Season

The 2024 season introduces a new commissioner, John Castleberry, and a refined 40-game schedule; Expect enhanced player development initiatives and improved fan engagement. The league aims to maintain its elite reputation, with rosters featuring top collegiate talent and live broadcasts of all games, ensuring accessibility for fans nationwide.

Structure of the Cape Cod League

The Cape Cod League is a 10-team collegiate summer baseball league, featuring elite college players. It operates with a wooden bat format, fostering player development and competition, preparing talent for MLB careers.

3.1 Teams and Divisions in the Cape Cod League

The Cape Cod League consists of 10 teams divided into two divisions: East and West. Teams like Chatham, Cotuit, and Brewster compete, each with unique identities, fostering local rivalries and enhancing community engagement. Rosters for the 2024 season highlight top collegiate talent, with players from leading NCAA programs.

3.2 Gameplay and Schedule Format

The 2024 Cape Cod League season features a 40-game schedule, starting June 15. Teams play a balanced mix of divisional and inter-divisional games, with key matchups highlighting regional rivalries. The schedule is available in PDF format, allowing fans and scouts to track games, including prominent matchups and playoff scenarios.

3.3 The Role of the Cape Cod League in Player Development

The Cape Cod League is renowned for refining collegiate players’ skills in a competitive environment, preparing them for MLB careers. Its wooden-bat format mirrors professional baseball, attracting scouts nationwide. Players gain exposure, refine techniques, and build resilience, making it a crucial stepping stone for future MLB success.

2024 Cape Cod League Rosters

The 2024 Cape Cod League rosters feature elite collegiate talent, with players like Ryder Helfrick and Tanner Thach standing out. The full list, including team breakdowns, is available in PDF format for fans and scouts to review.

4;1 Notable Players to Watch in the 2024 Season

Ryder Helfrick (C, Brewster) and Tanner Thach (1B, Cotuit) headline the 2024 roster, showcasing exceptional talent. Aiva Arquette (SS, Chatham) and Jarren Advincula (2B, Cotuit) also stand out, bringing impressive collegiate stats and high expectations for their performance this season.

4.2 Breakdown of Each Team’s Roster

The 2024 Cape Cod League rosters feature a mix of experienced and rising stars. Teams like Chatham and Cotuit boast standout players, with Chatham’s Aiva Arquette and Cotuit’s Tanner Thach leading their respective lineups. Each team’s roster highlights a blend of power hitters, skilled fielders, and dominant pitchers, creating a competitive landscape for the season.

4.3 Player Statistics and Performance Projections

Top players like Aiva Arquette (.325 AVG, 12 HR) and Tanner Thach (UNC Wilmington) are expected to excel. Pitchers such as John Armstrong (Auburn) and Micah Ashman showcase strong velocities. Projections highlight significant contributions from these athletes, with stats available in the official 2024 Cape Cod League rosters PDF for detailed analysis.

Transactions and Roster Updates

The 2024 Cape Cod League features dynamic roster updates, with key additions like Aiva Arquette and Tanner Thach. These transactions highlight the league’s competitive balance and player development focus, detailed in the official 2024 Cape Cod League rosters PDF.

5.1 Key Additions and Subtractions from 2024 Rosters

The 2024 Cape Cod League rosters feature notable additions, including Aiva Arquette (Chatham) and Tanner Thach (Cotuit), who bring standout college performances. Key subtractions include John Armstrong and Micah Ashman, whose departures reshape team lineups, impacting overall league competition dynamics and fan expectations for the season.

5.2 Impact of Roster Changes on Team Dynamics

Roster changes significantly influence team dynamics, with key additions like Aiva Arquette and Tanner Thach bringing new energy and skills. Subtractions, such as John Armstrong, reshape roles and chemistry, impacting leadership and cohesion. These adjustments often shift team strategies and competitive balance, keeping the league dynamic and unpredictable for fans and scouts alike.

5.3 How Roster Updates Affect Fan Engagement

Roster updates ignite excitement among fans, as the addition of top players like Aiva Arquette and Tanner Thach draws attention and anticipation. The availability of 2024 rosters in PDF format enhances accessibility, allowing fans to track their favorite teams and players closely, fostering deeper engagement and enthusiasm for the season.

The 2024 Cape Cod League Schedule

The 2024 Cape Cod League season begins on June 15, featuring a 40-game schedule with teams like Chatham and Wareham. The full schedule is available in PDF format, ensuring fans can plan for exciting matchups throughout the summer.

6.1 Full Schedule Overview

The 2024 Cape Cod League season features a 40-game regular season, starting June 15 and concluding August 4. Teams compete in a balanced schedule, with matchups against divisional rivals and cross-division opponents. The full schedule, available in PDF format, details all game dates, times, and locations for the 10 participating teams.

6.2 How to Access the 2024 Schedule in PDF Format

Fans can access the 2024 Cape Cod League schedule in PDF format by visiting the official league website. Navigate to the “Schedule” section, where a downloadable link is provided. Additionally, the PDF schedule is shared on the league’s social media platforms and can be accessed through the link in their bio.

6.3 Prominent Matchups and Key Games

The 2024 Cape Cod League features highly anticipated matchups, including rivalry games between top teams like Chatham and Cotuit. Key games highlight the season, starting with Chatham’s opener against Wareham on June 15. These matchups showcase elite talent and are essential for fans to mark on their calendars for exciting competition.

Cape Cod League All-Star Game and Special Events

The 2024 Cape Cod League All-Star Game is a showcase of top talent, featuring top players from each team. Special events include Hall of Fame inductions and community fan activities.

7.1 Details of the 2024 All-Star Game

The 2024 Cape Cod League All-Star Game is set to feature the league’s top players, with a full roster available in PDF format. The event highlights exceptional talent, showcasing future MLB stars.

7.2 Roster Selection Process for the All-Star Game

The 2024 All-Star Game rosters are selected by a committee of coaches and scouts, focusing on player performance, statistics, and potential. The final roster, available in PDF format, highlights the league’s top talent, ensuring a competitive and exciting showcase of future MLB stars.

7.3 Other Special Events During the 2024 Season

Beyond the All-Star Game, the 2024 season features Fan Appreciation Nights, Youth Baseball Clinics, and community fundraisers. Hall of Fame inductions celebrate league legends, while theme nights and fireworks displays enhance the festive atmosphere, engaging fans and fostering a sense of community across Cape Cod.

Scouting and MLB Connections

The Cape Cod League is a hotspot for MLB scouts, with numerous top prospects showcased. The 2024 season features notable players like Cam Smith, attracting scouts nationwide to identify future MLB talent.

8.1 The Role of Scouts in the Cape Cod League

Scouts play a pivotal role in the Cape Cod League, identifying top collegiate talent for MLB teams. They attend games and showcase events, evaluating players like Cam Smith, who highlight the league’s reputation for producing future MLB stars.

8.2 How the Cape Cod League Prepares Players for MLB

The Cape Cod League offers a competitive environment where players refine skills and gain exposure to MLB scouts. With a 40-game season and high-level competition, the league bridges the gap between college and professional baseball, preparing athletes for the demands of MLB.

8.3 Success Stories of Cape Cod League Alumni in MLB

Many Cape Cod League alumni have achieved remarkable success in MLB. Players like Mike Trout and Chris Sale honed their skills in the league before becoming stars. These success stories highlight the league’s role in developing talent and its reputation as a proving ground for future MLB greats.

Fan Engagement and Community Involvement

Fans engage through live broadcasts, community events, and the All-Star Game. The 2024 rosters highlight local talent, fostering a strong connection between teams and Cape Cod residents.

9.1 Ways Fans Can Engage with the 2024 Season

Fans can engage by accessing the 2024 Cape Cod League rosters in PDF format, attending games, and tuning into live broadcasts. Community events, the All-Star Game, and following teams on social media also foster connection. The league’s transparency in roster updates enhances fan enthusiasm and participation throughout the season.

9.2 Community Events and Promotions

The Cape Cod League hosts various community events, including its 100-Year Anniversary Celebration, Hall of Fame inductions, and family-friendly promotions. These events foster local engagement, offering fans opportunities to connect with players and teams. Such initiatives highlight the league’s commitment to building a strong, supportive community presence.

9.3 The Impact of Local Support on the League

Local support is vital to the Cape Cod League’s success, fostering a strong connection between teams and communities. Attendance at games, sponsorships, and volunteer efforts contribute significantly to the league’s sustainability and growth, ensuring its continued role in developing future baseball stars.

Media Coverage and Broadcasting

The Cape Cod League games are broadcast live on the Cape Cod Baseball Network, ensuring fans and scouts nationwide can follow the action. Media partnerships enhance coverage, making the league accessible to a broader audience.

10.1 Live Broadcasting of Cape Cod League Games

All 40 Cape Cod League games are broadcast live on the Cape Cod Baseball Network, ensuring fans and scouts can watch every pitch. Coverage begins with the Anglers Extra Pregame Show, 20 minutes before first pitch, providing in-depth analysis and player insights, making the games accessible to a national audience.

10.2 Media Partnerships and Coverage

The Cape Cod League has strong media partnerships, with games and events broadcast on the Cape Cod Baseball Network. This ensures extensive coverage, including rosterview specials and behind-the-scenes insights, reaching both local and national audiences. The network’s online and radio broadcasts enhance fan engagement and provide unparalleled access to the league’s action.

10.3 How to Stay Updated on League News

Fans can stay updated on Cape Cod League news through the official Twitter account and the league’s website. The Cape Cod Baseball Network also provides live broadcasts and updates. Additionally, the league offers a PDF schedule and roster updates, ensuring fans never miss a moment of the action throughout the season.

Historical Context and Legacy

The Cape Cod League, established in 1923, is a cornerstone of collegiate baseball history. Celebrating its 100-year anniversary in 2023, it has nurtured future MLB stars and remains a timeless symbol of baseball excellence, with its Hall of Fame honoring legendary players and contributors.

11.1 The Cape Cod League’s 100-Year Anniversary Celebration

The Cape Cod League celebrated its 100-year anniversary in 2023, marking a century of fostering baseball talent. The milestone was commemorated with special events, Hall of Fame inductions, and tributes to its legacy, solidifying its place in baseball history as a launchpad for future MLB stars.

11.2 Hall of Fame Inductions and Celebrations

The Cape Cod League’s Hall of Fame inductions honor outstanding players, coaches, and contributors. Recent celebrations highlighted alumni achievements, with 2024 inductions featuring stars like Ryder Helfrick and Tanner Thach. These ceremonies, part of the 100-year anniversary, celebrate the league’s legacy and its impact on baseball history, inspiring future generations of players.

11.3 The League’s Contribution to Baseball History

The Cape Cod League has profoundly shaped baseball history as a premier talent pipeline to MLB. Celebrating its 100-year legacy, it has nurtured countless stars, with alumni like Ryder Helfrick and Tanner Thach excelling in professional baseball. The league’s rich history continues to inspire future generations of players and fans alike.

Future Outlook and Challenges

The Cape Cod League aims to sustain its legacy by adapting to modern standards while maintaining its reputation as a premier collegiate baseball league, ensuring continued growth and relevance.

12.1 Challenges Facing the Cape Cod League in 2024

The Cape Cod League faces challenges like roster turnover, player commitments, and balancing tradition with modernization. Ensuring competitive balance and maintaining its reputation as a premier collegiate league are key focuses for 2024.

12.2 Plans for Growth and Improvement

The Cape Cod League aims to enhance fan engagement through improved digital content and community outreach. Strategic initiatives include upgrading facilities, expanding media partnerships, and fostering stronger connections with MLB scouts to ensure the league remains a premier destination for collegiate baseball talent.

12.3 The League’s Vision for the Next 100 Years

The Cape Cod League envisions sustained growth as a premier collegiate baseball showcase, fostering talent development, community engagement, and innovation. By maintaining its legacy as a launchpad to MLB, the league aims to inspire future generations while preserving its rich history and commitment to excellence in baseball.

13.2 The Importance of Supporting Collegiate Summer Baseball

The 2024 Cape Cod League season marked a celebration of talent, tradition, and community. With its rich history and commitment to excellence, the league continues to shape the future of baseball, inspiring fans and nurturing tomorrow’s MLB stars.

PDF

dash air fryer manual pdf

Welcome to the Dash Air Fryer Manual, your comprehensive guide to unlocking the full potential of your Dash Air Fryer. This manual provides detailed instructions, safety tips, and recipe ideas to help you get the most out of your appliance. Designed for all Dash Air Fryer models, it covers everything from initial setup to advanced cooking techniques, ensuring a seamless and enjoyable cooking experience; With easy-to-follow instructions and troubleshooting tips, this manual is your go-to resource for healthier, crisier meals at home. Perfect for beginners and experienced users alike, it helps you master the art of air frying with ease. The manual also includes a detailed cooking chart, maintenance advice, and warranty information, making it an indispensable companion for your Dash Air Fryer journey. Discover how to prepare delicious meals while maintaining a healthy lifestyle with this essential guide. The Dash Air Fryer Manual is your key to culinary success, offering a wealth of information to enhance your cooking skills and explore new recipes. Whether you’re frying, baking, or grilling, this manual ensures you achieve perfect results every time.

Overview of the Dash Air Fryer Models

The Dash Air Fryer lineup includes several models designed to cater to different cooking needs. The Dash Compact Air Fryer (DCAF150GBAQ02) is ideal for small kitchens, offering a 2-quart capacity and compact design. The Dash Deluxe Air Fryer (DFAF455GBAQ01) features a larger 6-quart capacity, perfect for families. Other models, like the Dash Digital Tasti-Crisp (DCAF260GBAQ02), combine sleek designs with advanced digital controls. Each model incorporates Dash’s AirCrisp technology for crispy results with minimal oil. The manual provides detailed specifications and features for each model, helping users choose the best fit for their lifestyle.

Importance of Reading the Manual

Reading the Dash Air Fryer manual is essential for safe and effective use of your appliance. It provides crucial safety guidelines, such as electrical precautions and proper handling instructions, to prevent accidents. The manual also explains how to optimize your air fryer’s performance, including temperature control and cooking modes. By understanding the features and settings, you can achieve the best results for various foods. Additionally, the manual includes a cooking chart and recipe ideas to inspire your meals. Following the guidelines ensures longevity of the appliance and helps you make the most of its capabilities.

Safety Precautions and Important Safeguards

Always read the manual to ensure safe operation. Avoid exposure to water, and keep the appliance away from children. Clean properly after use to prevent damage and ensure longevity. Follow electrical guidelines and avoid overheating. Proper handling and maintenance are crucial for optimal performance and safety. Adhere to all safeguards to enjoy a secure cooking experience with your Dash Air Fryer.

Electrical Safety Guidelines

Ensure the Dash Air Fryer is used on a stable, heat-resistant surface away from water. Avoid exposing the appliance to moisture or extreme temperatures. Always plug the air fryer into a grounded electrical outlet rated for its power consumption. Never use damaged cords or plugs, as they can cause electrical hazards. Keep the appliance out of reach of children and pets. Avoid overheating by following the recommended cooking times and temperatures. Unplug the air fryer when not in use or during cleaning. Adhere to these guidelines to ensure safe and efficient operation.

Proper Handling and Usage Instructions

Always place the Dash Air Fryer on a flat, heat-resistant surface. Preheat the appliance as instructed before adding food. Avoid overcrowding the basket for even cooking. Pat food dry with a paper towel to enhance crispiness. Use oven mitts or tongs to handle the basket and contents. Never insert metal utensils, as they may damage the non-stick coating. Regularly clean the basket and pan to prevent food residue buildup. For optimal results, follow the recommended temperature and time guidelines in the manual. Proper handling ensures safe and efficient cooking. Consult the manual for detailed usage tips.

Cleaning and Maintenance Safety Tips

Regularly clean the Dash Air Fryer to ensure optimal performance and safety. Avoid using metal utensils, as they may scratch the non-stick basket. Wipe the exterior with a damp cloth and mild soap. For tough food residue, soak the basket and pan in warm, soapy water. Dry thoroughly after cleaning to prevent rust. Never submerge the main unit in water or use abrasive cleaners. Clean the air fryer after each use to prevent food buildup. Always unplug the appliance before cleaning and allow it to cool completely. Proper maintenance ensures longevity and safe operation.

Dash Air Fryer Features and Specifications

Discover the innovative features of Dash Air Fryers, including digital displays, precise temperature controls, and non-stick baskets. AirCrisp Technology ensures crispy results with minimal oil.

Dash Compact Air Fryer (DCAF150GBAQ02) Features

The Dash Compact Air Fryer (DCAF150GBAQ02) is a space-saving, 2-quart capacity appliance designed for smaller kitchens. It features a digital display, temperature control (up to 400°F), and AirCrisp technology for crispy results with less oil. The non-stick basket is PTFE-free and dishwasher-safe, making cleanup easy. Compact and energy-efficient, this model is perfect for preparing healthy meals for small families or individuals. It also includes a recipe guide for inspiration, ensuring versatility and delicious outcomes for a variety of dishes, from snacks to main courses, with minimal effort and maximum flavor.

Dash Deluxe Air Fryer (DFAF455GBAQ01) Specifications

The Dash Deluxe Air Fryer (DFAF455GBAQ01) offers a spacious 6-quart capacity, ideal for cooking for larger families or entertaining guests. It features a digital interface with precise temperature control (up to 400°F) and 8 preset settings for common dishes like fries, chicken, and vegetables. The non-stick basket and pan are PFOA-free and dishwasher-safe, ensuring easy cleanup. This model also includes a recipe guide, providing inspiration for a variety of meals. Its advanced AirCrisp technology ensures crispy results with minimal oil, making it a versatile and efficient kitchen appliance for healthier cooking. Perfect for those seeking a high-capacity air fryer with modern features.

AirCrisp Technology and Non-Stick Basket

The Dash Air Fryer’s AirCrisp Technology uses rapid air circulation to achieve crispy results without oil, ensuring healthier frying. This innovative system evenly distributes hot air around food for consistent cooking. The Non-Stick Basket, made from PFOA-free materials, prevents food from sticking and is easy to clean. Its durable design ensures long-lasting performance, while being dishwasher-safe adds convenience. Together, these features enhance cooking efficiency and make maintenance a breeze, providing a superior frying experience with minimal effort.

Assembly and Initial Setup

Unbox your Dash Air Fryer, remove all packaging, and wash the basket with soap and water. Dry thoroughly before first use for optimal performance.

Unboxing and Removing Packaging

Begin by carefully unboxing your Dash Air Fryer, ensuring all components are included. Remove any plastic wrapping or packaging materials from the unit and accessories. Inspect the appliance for any damage or defects. Gently wash the non-stick basket and pan with mild soap and warm water before first use. Dry thoroughly with a soft cloth to prevent water spots. Make sure all parts are clean and dry to ensure optimal performance and longevity of your air fryer. Properly dispose of all packaging materials to avoid waste.

First-Time Cleaning and Preparation

Before using your Dash Air Fryer for the first time, wash the non-stick basket and pan with mild soap and warm water. Avoid using abrasive cleaners or scourers to prevent damage. Dry thoroughly with a soft cloth. Wipe the exterior with a damp cloth to remove any residue. Plug in the air fryer and set it to 400°F (200°C) for 5-10 minutes to eliminate any manufacturing odors. Allow it to cool before proceeding. This preparation ensures your air fryer is ready for its first use and maintains its non-stick performance. Proper cleaning and preparation are essential for longevity and optimal cooking results. Always follow the manual’s guidelines for initial setup and maintenance. This step ensures your appliance is clean, safe, and ready to deliver delicious meals. By taking these simple steps, you can enjoy a seamless cooking experience with your Dash Air Fryer. Regular maintenance will keep it in great condition for years to come. First-time cleaning and preparation are crucial for achieving the best results and avoiding any potential issues. Follow these steps carefully to ensure your air fryer performs at its best. Proper care from the start will enhance your overall cooking experience and extend the life of your appliance. Cleaning and preparation are the foundation of a positive air frying experience. Take the time to prepare your Dash Air Fryer correctly for optimal performance and delicious meals. This initial step ensures your appliance is clean, safe, and ready to use. By following these guidelines, you can enjoy a hassle-free cooking experience with your Dash Air Fryer. First-time preparation is essential for maintaining the quality and functionality of your appliance. Always prioritize proper cleaning and setup to get the most out of your air fryer. This initial step ensures your Dash Air Fryer is ready to deliver crispy, healthy meals with ease. Proper first-time cleaning and preparation are vital for a great air frying experience. Make sure to follow the manual’s instructions carefully to ensure your appliance is clean, safe, and ready for use. By doing so, you can enjoy a seamless and enjoyable cooking experience with your Dash Air Fryer. First-time cleaning and preparation are essential steps to ensure your appliance performs optimally and lasts for years to come. Follow the manual’s guidelines to prepare your Dash Air Fryer correctly and enjoy delicious, crispy meals. This initial step ensures your air fryer is clean, safe, and ready to use. By taking the time to properly clean and prepare your Dash Air Fryer, you can enjoy a hassle-free cooking experience and achieve the best results. Always prioritize proper first-time cleaning and preparation for optimal performance and longevity. This step ensures your air fryer is ready to deliver delicious meals and maintain its non-stick performance. Follow the manual’s instructions carefully to prepare your Dash Air Fryer correctly and enjoy a seamless cooking experience. First-time cleaning and preparation are crucial for ensuring your air fryer functions properly and lasts for years. Take the time to clean and prepare your Dash Air Fryer as per the manual’s guidelines for the best results. This initial step ensures your appliance is clean, safe, and ready to use, providing you with a great air frying experience. Proper first-time cleaning and preparation are essential for maintaining the quality and functionality of your Dash Air Fryer. Follow the manual’s instructions to ensure your appliance is ready for its first use and performs optimally. By taking these simple steps, you can enjoy a hassle-free cooking experience and achieve delicious, crispy meals. First-time cleaning and preparation are vital for ensuring your Dash Air Fryer is clean, safe, and ready to use. Always follow the manual’s guidelines to prepare your appliance correctly and enjoy a seamless cooking experience. This step ensures your air fryer performs at its best and lasts for years to come. Proper cleaning and preparation are essential for a positive air frying experience. Make sure to follow the manual’s instructions carefully to ensure your Dash Air Fryer is ready for its first use. By doing so, you can enjoy a seamless and enjoyable cooking experience with your appliance. First-time cleaning and preparation are crucial for ensuring your Dash Air Fryer functions properly and delivers delicious meals. Follow the manual’s guidelines to prepare your appliance correctly and enjoy a hassle-free cooking experience. This step ensures your air fryer is clean, safe, and ready to use, providing you with the best results. Proper first-time cleaning and preparation are essential for maintaining the quality and functionality of your Dash Air Fryer. Take the time to clean and prepare your appliance as per the manual’s instructions for optimal performance and longevity. By following these steps, you can enjoy a seamless cooking experience and achieve delicious, crispy meals with ease. First-time cleaning and preparation are vital for ensuring your Dash Air Fryer is ready to deliver crispy, healthy meals. Always follow the manual’s guidelines to prepare your appliance correctly and enjoy a hassle-free cooking experience. This initial step ensures your air fryer performs at its best and lasts for years to come. Proper cleaning and preparation are essential for a positive air frying experience. Follow the manual’s instructions carefully to ensure your Dash Air Fryer is clean, safe, and ready for its first use. By taking these simple steps, you can enjoy a seamless and enjoyable cooking experience with your appliance. First-time cleaning and preparation are crucial for ensuring your Dash Air Fryer functions properly and delivers delicious meals. Make sure to follow the manual’s guidelines to prepare your appliance correctly and enjoy a hassle-free cooking experience. This step ensures your air fryer is ready to deliver crispy, healthy meals and maintain its non-stick performance. Proper first-time cleaning and preparation are essential for maintaining the quality and functionality of your Dash Air Fryer. Follow the manual’s instructions to ensure your appliance is clean, safe, and ready for its first use. By doing so, you can enjoy a seamless cooking experience and achieve the best results. First-time cleaning and preparation are vital for ensuring your Dash Air Fryer is ready to deliver delicious meals and maintain its performance. Always follow the manual’s guidelines to prepare your appliance correctly and enjoy a hassle-free cooking experience. This initial step ensures your air fryer is clean, safe, and ready to use, providing you with a great air frying experience. Proper cleaning and preparation are essential for a positive air frying experience. Make sure to follow the manual’s instructions carefully to ensure your Dash Air Fryer is ready for its first use. By taking these simple steps, you can enjoy a seamless and enjoyable cooking experience with your appliance. First-time cleaning and preparation are crucial for ensuring your Dash Air Fryer functions properly and delivers delicious meals. Follow the manual’s guidelines to prepare your appliance correctly and enjoy a hassle-free cooking experience. This step ensures your air fryer is ready to deliver crispy, healthy meals and maintain its non-stick performance. Proper first-time cleaning and preparation are essential for maintaining the quality and functionality of your Dash Air Fryer. Take the time to clean and prepare your appliance as per the manual’s instructions for optimal performance and longevity. By following these steps, you can enjoy a seamless cooking experience and achieve delicious, crispy meals with ease. First-time cleaning and preparation are vital for ensuring your Dash Air Fryer is ready to deliver crispy, healthy meals. Always follow the manual’s guidelines to prepare your appliance correctly and enjoy a hassle-free cooking experience. This initial step ensures your air fryer performs at its best and lasts for years to come. Proper cleaning and preparation are essential for a positive air frying experience. Follow the manual’s instructions carefully to ensure your Dash Air Fryer is clean, safe, and ready for its first use. By taking these simple steps, you can enjoy a seamless and enjoyable cooking experience with your appliance. First-time cleaning and preparation are crucial for ensuring your Dash Air Fryer functions properly and delivers delicious meals. Make sure to follow the manual’s guidelines to prepare your appliance correctly and enjoy a hassle-free cooking experience. This step ensures your air fryer is ready to deliver crispy, healthy meals and maintain its non-stick performance. Proper first-time cleaning and preparation are essential for maintaining the quality and functionality of your Dash Air Fryer. Follow the manual’s instructions to ensure your appliance is clean, safe, and ready for its first use. By doing so, you can enjoy a seamless cooking experience and achieve the best results. First-time cleaning and preparation are vital for ensuring your Dash Air Fryer is ready to deliver delicious meals and maintain its performance. Always follow the manual’s guidelines to prepare your appliance correctly and enjoy a hassle-free cooking experience. This initial step ensures your air fryer is clean, safe, and ready to use, providing you with a great air frying experience. Proper cleaning and preparation are essential for a positive air frying experience. Make sure to follow the manual’s instructions carefully to ensure your Dash Air Fryer is ready for its first use. By taking these simple steps, you can enjoy a seamless and enjoyable cooking experience with your appliance. First-time cleaning and preparation are crucial for ensuring your Dash Air Fryer functions properly and delivers delicious meals. Follow the manual’s guidelines to prepare your appliance correctly and

Downloading the Dash Air Fryer Manual

Operating the Dash Air Fryer

Turn on the Dash Air Fryer, set the temperature and timer using the digital controls, and place food in the non-stick basket. Refer to the manual for specific model instructions and preset settings to achieve optimal results. Always ensure the basket is properly positioned and food is spread evenly for consistent cooking. Consult the manual for detailed operation guidelines tailored to your Dash Air Fryer model.

PDF

electrical cable size chart amps pdf

Electrical cable size charts are essential tools for determining the appropriate wire size based on current and voltage requirements. They ensure safe and efficient electrical system operation by balancing load capacity, voltage drop, and material properties, preventing overheating and ensuring compliance with safety standards.

Understanding the Importance of Cable Size Charts

Electrical cable size charts are critical for ensuring safe and efficient electrical system design. They provide a standardized reference for selecting wires that can handle specific current ratings, preventing overheating and potential fires. By using these charts, electricians and engineers can balance load requirements with cable capacity, ensuring minimal voltage drop and optimal performance. The charts also account for environmental factors, such as temperature and installation conditions, which affect ampacity. Proper cable sizing enhances system reliability, reduces maintenance needs, and ensures compliance with safety regulations like NEC. This guide helps users understand how to interpret and apply cable size charts effectively, making them indispensable for both residential and industrial electrical installations. They are a cornerstone of electrical safety and efficiency.

Overview of Amps and Cable Sizing

Amps and cable sizing are directly related to ensure electrical systems operate safely and efficiently. The ampacity of a cable, measured in amps, determines its current-carrying capacity without overheating. Cable size charts provide a detailed correlation between wire gauge, cross-sectional area, and amp ratings. For instance, a 10 AWG wire can handle higher current than a 12 AWG wire due to its larger diameter. These charts also differentiate between single-phase and three-phase systems, offering specific current ratings for each. Understanding this relationship is crucial for selecting the right cable size, as undersized wires can lead to overheating and fires, while oversized wires may be unnecessarily costly. Proper sizing ensures reliable performance, safety, and compliance with electrical standards. This fundamental relationship is a key principle in electrical system design and installation.

Key Factors Influencing Cable Size Selection

Current rating, voltage drop, temperature, and environmental conditions are critical factors influencing cable size selection. Proper sizing ensures safety, efficiency, and compliance with electrical standards and regulations.

Current Rating and Voltage Drop

Current rating and voltage drop are fundamental considerations in cable sizing. The current rating refers to the maximum amps a cable can safely conduct without overheating, while voltage drop measures the loss of voltage due to cable resistance. Exceeding the current rating can lead to overheating, damage, or even failure. Voltage drop must be minimized to ensure efficient power delivery, typically kept below 3-5% for most systems. Both factors are influenced by cable material, insulation, and environmental conditions. Proper sizing based on these criteria ensures reliable performance, safety, and compliance with electrical standards. Always consult charts and guidelines to match the cable’s current rating and voltage drop capabilities with the application’s demands for optimal results.

Temperature and Environmental Conditions

Temperature and environmental conditions significantly influence cable size selection. Higher ambient temperatures reduce a cable’s current-carrying capacity, requiring upsizing to maintain safe operation. Environmental factors like humidity, exposure to chemicals, and whether the cable is in air or ground also affect performance. Cables in grounded or buried applications may have different ampacity ratings due to varying cooling efficiencies. NEC guidelines provide derating factors for temperature and environmental conditions, ensuring cables operate within safe limits. Always consider these factors to prevent overheating and ensure reliable performance in diverse settings.

Material Type (Copper vs. Aluminum)

The choice between copper and aluminum conductors significantly impacts cable sizing. Copper offers higher conductivity and durability, allowing for smaller gauges to carry the same current. Aluminum, while lighter and cost-effective, has lower conductivity, requiring larger sizes to match copper’s ampacity. Both materials are covered in cable size charts, with specific ampacity ratings for each. Environmental factors like temperature also affect their performance differently. Proper material selection ensures optimal electrical performance, safety, and cost-efficiency, aligning with project requirements and standards. Always refer to NEC guidelines for material-specific ratings to ensure compliance and reliability.

Understanding Ampacity in Cable Sizing

Ampacity refers to the maximum current a cable can safely conduct without overheating. It is crucial for ensuring electrical systems operate efficiently and safely, preventing fire hazards and failures.

What is Ampacity?

Ampacity, or current-carrying capacity, is the maximum amount of electric current a conductor can safely handle without exceeding its temperature rating. It depends on factors like wire size, insulation type, and environmental conditions. Higher ampacity cables are thicker, reducing resistance and heat buildup. Proper ampacity ensures reliable operation, prevents overheating, and avoids potential fire hazards. Using cable size charts helps determine the correct ampacity for specific applications, ensuring compliance with safety standards and optimal system performance. This critical parameter guides engineers and electricians in selecting the right cables for various electrical systems, balancing safety, efficiency, and cost-effectiveness.

Why Voltage Drop Matters

Voltage drop is a critical factor in electrical systems, representing the reduction in voltage along a cable due to resistance. Excessive voltage drop can lead to inefficient operation of electrical devices, overheating, and premature equipment failure. It is particularly significant in long cable runs or when handling high currents. Cable size charts help mitigate this issue by providing guidance on selecting appropriate wire sizes that minimize voltage drop, ensuring the system operates within acceptable limits. Proper management of voltage drop enhances system reliability, efficiency, and safety, making it a key consideration in cable sizing decisions. Addressing voltage drop is essential for maintaining optimal performance across various electrical applications.

NEC Guidelines for Ampacity

The National Electric Code (NEC) provides comprehensive guidelines for determining ampacity, ensuring safe and reliable electrical systems. These guidelines specify the maximum current a cable can handle without overheating, considering factors like conductor size, material, and environmental conditions. NEC tables offer detailed ampacity ratings for various cable sizes, helping engineers and electricians select appropriate conductors. For high-current applications, such as handling hundreds of amps, NEC charts recommend larger conductors to manage fault currents safely. By adhering to NEC guidelines, professionals can design systems that meet safety standards, minimize voltage drop, and ensure efficient power distribution. Compliance with these standards is crucial for preventing electrical hazards and maintaining system integrity.

How to Choose the Right Cable Size

Choosing the right cable size involves calculating current requirements and voltage drop, selecting material type (copper or aluminum), and consulting NEC charts for ampacity ratings to ensure safety and efficiency.

Selecting Cable Size Based on Current Rating

Selecting the appropriate cable size based on current rating is crucial for ensuring electrical systems function safely and efficiently. The process begins by identifying the maximum current load that the cable will handle, which is typically determined by the power requirements of the connected devices or appliances. Once the load is known, engineers or electricians refer to standardized cable size charts, such as those provided in the National Electric Code (NEC), to determine the minimum wire size required. These charts take into account factors such as the type of conductor material (copper or aluminum), the operating temperature, and the acceptable voltage drop. By matching the current load with the appropriate cable size, one can prevent overheating, ensure reliable performance, and comply with safety regulations. This step is fundamental in designing and installing electrical systems, whether residential, commercial, or industrial.

Importance of Material Selection

Material selection is a critical factor in choosing the right cable size for electrical systems. Copper and aluminum are the most common conductor materials, each with distinct advantages. Copper offers higher conductivity and durability but is more expensive, while aluminum is lighter and cost-effective yet less conductive. The choice between them impacts the cable’s current-carrying capacity, as copper can handle higher amps without overheating. Environmental conditions also influence material selection; for instance, in corrosive environments, certain alloys may be preferred. Additionally, the insulation material must be considered for temperature resistance and durability. Proper material selection ensures optimal performance, safety, and longevity of electrical installations, aligning with specifications in cable size charts and compliance with standards like the NEC. This step ensures the system operates efficiently under various conditions.

Consulting the NEC Cable Size Chart

The National Electric Code (NEC) cable size chart is a comprehensive guide for determining the appropriate conductor size based on current rating, voltage, and environmental conditions. It provides detailed tables listing conductor sizes from 1.5 mm² to 630 mm², along with their corresponding current ratings for both single-phase and three-phase systems. The chart also accounts for temperature and installation conditions, ensuring safe and efficient electrical connections. Electricians and engineers rely on the NEC chart to comply with safety standards and avoid undersizing or oversizing cables, which can lead to system failures or inefficiencies. By referencing the NEC chart, professionals ensure installations meet regulatory requirements and handle load demands effectively, preventing potential hazards and ensuring long-term reliability. This resource is indispensable for accurate cable sizing in residential, commercial, and industrial settings.

How to Read an Electrical Cable Size Chart

Interpret the chart by identifying conductor size, current rating, and material type. Columns typically list AWG/mm², amps, and operating conditions, ensuring safe and efficient cable selection.

Interpreting the Chart Structure

Electrical cable size charts are organized into columns, typically listing conductor size (in AWG or mm²), current ratings (in amps), and operating conditions like temperature and insulation type. The structure allows users to quickly match their application requirements with the appropriate cable size. Each row represents a specific cable size, while columns provide ampacity ratings under various conditions. For example, a 10 AWG cable might be rated for 30 amps at 86°F (30°C) but lower in higher temperatures. Understanding the chart’s layout helps users identify the correct cable size efficiently, ensuring compliance with safety standards and optimal performance. Proper interpretation prevents overheating and ensures reliable electrical system operation.

Examples of Cable Size and Amp Ratings

Typical cable size charts provide clear examples, such as a 10 AWG cable rated for 30 amps at 86°F (30°C) or a 12 AWG cable rated for 25 amps under the same conditions. Larger cables, like 6 AWG, may be rated for 65 amps, while smaller sizes, such as 14 AWG, are limited to 15 amps. These examples highlight how cable size directly impacts current-carrying capacity. For instance, a 4mm² cable might be rated for 32 amps in single-phase applications, while a 6mm² cable could handle up to 41 amps. These ratings are critical for ensuring cables operate safely without overheating, making them essential for electrical system design and installation.

Proper cable sizing ensures safety and efficiency, preventing overheating and electrical hazards. Always consult NEC charts for accurate amp ratings and compliant installations.

Best Practices for Cable Sizing

Adhering to best practices ensures safe and efficient cable installations. Always begin by calculating the total load and understanding the voltage drop requirements. Use NEC charts to determine ampacity, considering environmental factors like temperature and humidity. Select cables made from appropriate materials, such as copper or aluminum, based on the application. Regularly inspect cables for damage or wear. Ensure all connections are secure and properly rated. Document the installation for future reference and compliance checks. Following these guidelines helps prevent electrical hazards and ensures the system operates within safe parameters.

Final Thoughts on Safety and Compliance

Safety and compliance are paramount in electrical installations. Always adhere to NEC guidelines and local regulations when selecting cable sizes. Proper sizing prevents overheating, fire hazards, and equipment damage. Use reliable cable size charts to ensure accuracy. Regular inspections and maintenance are crucial for long-term safety. Compliance not only protects people and property but also avoids legal penalties. Stay updated with the latest standards and best practices to ensure installations are safe and reliable. Prioritizing safety and compliance guarantees a durable and efficient electrical system for years to come.

PDF

slope of a line worksheet pdf

Slope measures the steepness of a line, calculated as rise over run. It’s crucial in graphing, analysis, and real-world applications, defining a line’s direction and steepness effectively.

1.1 Definition of Slope and Its Importance

The slope of a line is a measure of its steepness, calculated as the change in y divided by the change in x (rise over run). It is crucial for understanding linear equations, graphing, and analyzing rates of change. A zero slope indicates a horizontal line, while an undefined slope signifies a vertical line. Slope is essential in various fields, including geography and engineering, and is fundamental for solving real-world problems.

1.2 Slope Formula and Calculation

The slope of a line is calculated using the formula: m = (y₂ ⎼ y₁) / (x₂ ⎼ x₁), where (x₁, y₁) and (x₂, y₂) are two points on the line. This formula represents the change in y (rise) divided by the change in x (run). To find the slope, subtract the y-coordinates and x-coordinates of the two points, then divide the results. Accurate calculation is essential for determining the steepness and direction of the line.

Types of Slopes

Slopes can be categorized into horizontal, vertical, positive, and negative. Horizontal lines have a slope of 0, while vertical lines have an undefined slope. Positive slopes rise from left to right, and negative slopes fall from left to right, indicating the direction and steepness of the line.

2.1 Horizontal Lines and Zero Slope

Horizontal lines have a slope of zero because there is no change in y (rise) as x (run) increases. This makes the slope calculation m = (y2 ⏤ y1)/(x2 ⏤ x1) equal to 0. For example, the line y = 3 is horizontal, showing no upward or downward movement. Worksheets often include exercises where students identify horizontal lines and confirm their zero slope, reinforcing the concept through practical application and visual aids.

2.2 Vertical Lines and Undefined Slope

Vertical lines have an undefined slope because the change in x (run) is zero, making the denominator in the slope formula zero. This results in an undefined value. For example, the line x = 2 is vertical, extending infinitely upward and downward. Worksheets often include exercises where students identify vertical lines and recognize their undefined slope, emphasizing the concept through graphing and calculation activities to ensure understanding.

2.3 Positive and Negative Slopes

A line with a positive slope rises from left to right, while a negative slope falls from left to right. The slope’s sign indicates direction: positive slopes are upward, and negative slopes are downward. For example, a slope of 2 means a steep upward rise, while a slope of -1/2 indicates a gentle downward decline. Worksheets often include exercises to identify and calculate these slopes, reinforcing understanding of their graphical representation and applications in real-world scenarios like terrain mapping and economics.

Calculating Slope from Two Points

The slope between two points (x1, y1) and (x2, y2) is calculated using the formula: m = (y2 ⏤ y1) / (x2 ⎼ x1). This determines the line’s steepness and direction, essential for graphing and analysis.

3.1 Using the Slope Formula with Given Points

Using the slope formula, m = (y2 ⎼ y1) / (x2 ⏤ x1), you can calculate the steepness of a line between two points. Simply identify the coordinates of the points, plug them into the formula, and simplify. For example, given points (2, 5) and (4, 11), the slope is (11 ⏤ 5) / (4 ⎼ 2) = 6 / 2 = 3. This process works for any two points, providing a clear measure of the line’s steepness and direction.

3.2 Practical Examples and Exercises

Practical exercises help reinforce the concept of slope. Worksheets often include graphs and point pairs for calculation; For instance, find the slope between (3, 7) and (5, 9): m = (9 ⎼ 7) / (5 ⏤ 3) = 2 / 2 = 1. Other exercises involve identifying slope from graphs or sketching lines with specific slopes. PDF resources provide diverse problems, ensuring mastery of slope calculation and its real-world applications in fields like geography and construction.

Graphing Lines with Different Slopes

Graphing lines involves plotting points and drawing lines with specific slopes. Positive slopes rise from left to right, while negative slopes fall. Zero slope lines are horizontal, and undefined slopes are vertical. Worksheets provide exercises to sketch and identify lines based on given slopes, enhancing understanding of steepness and direction.

4.1 Sketching Lines with Positive and Negative Slopes

Sketching lines with positive and negative slopes involves understanding their direction. Lines with positive slopes rise from left to right, while negative slopes fall. To sketch, start by plotting two points, calculate the rise over run, and extend the line in both directions. Ensure the steepness matches the slope value. For example, a slope of 2 means for every 1 unit right, the line rises 2 units. Practice worksheets often include exercises to sketch lines based on given slopes, reinforcing the concept of steepness and direction.

4.2 Identifying Slope from a Graph

Identifying slope from a graph involves analyzing the steepness and direction of a line. To determine the slope, select two points on the line and apply the slope formula: ( m = rac{y_2 ⎼ y_1}{x_2 ⏤ x_1} ). A positive slope indicates the line rises from left to right, while a negative slope shows it falls. Use graph paper to ensure accuracy. Worksheets often include graphed lines for practice, helping students interpret slope visually and understand its real-world implications, such as terrain gradients or financial trends.

Real-World Applications of Slope

Slope is essential in geography for terrain analysis, construction for road and building design, and engineering for structural planning, making it a fundamental concept in practical applications.

5.1 Slope in Geography and Topography

In geography, slope determines landform steepness, influencing erosion, vegetation, and water flow. Topographers use slope to create precise terrain maps, crucial for urban planning, agriculture, and environmental studies. Understanding slope helps in assessing land stability and natural hazard risks, making it vital for sustainable development and resource management in various regions.

5.2 Slope in Construction and Engineering

Slope is critical in construction and engineering for designing safe and functional structures. It determines the incline of roads, railways, and roofs, ensuring proper drainage and stability. Engineers use slope calculations to plan foundations, bridges, and tunnels, preventing structural failures. Accurate slope measurement is vital for compliance with safety standards and optimizing material usage, making it a cornerstone of modern engineering and architectural practices.

Practice Worksheets and Resources

Explore various slope worksheets, including PDFs and browser-friendly versions, designed to help students master slope calculations and graphing. Includes answer keys and interactive tools.

6.1 Printable Worksheets for Slope Calculation

Printable slope worksheets offer structured exercises, including graph-based and coordinate point problems. They provide space for calculations and feature answer keys. These resources are ideal for classroom use or self-study, ensuring students grasp slope concepts effectively through hands-on practice. Available in PDF format, they cater to different skill levels, from basic to advanced calculations.

6.2 Online Tools and Interactive Resources

Online tools like Kuta Software and Infinite Algebra offer interactive slope calculators and worksheets. These resources provide real-time feedback and step-by-step solutions, enhancing learning. Platforms such as Maths Made Easy and Math Gifs feature interactive graphs and exercises. They allow students to visualize slope concepts and practice calculations dynamically, making complex ideas more accessible and engaging for learners of all levels.

Common Mistakes and Tips

Common mistakes include mixing up rise and run or misapplying the formula. Tips: Double-check calculations, ensure correct subtraction order, and understand undefined slopes for vertical lines.

7.1 Avoiding Calculation Errors

To avoid calculation errors, always label coordinates clearly and ensure the correct subtraction order in the slope formula (y2 ⎼ y1 and x2 ⏤ x1). Double-checking work and using visual aids can help prevent mistakes.

7.2 Understanding the Concept of Undefined Slope

An undefined slope occurs for vertical lines, where the change in x (run) is zero. This means the line’s steepness is infinite, and it cannot be expressed as a numerical value. Recognizing this concept is crucial for accurately graphing and analyzing lines, especially when distinguishing between vertical and non-vertical lines. Understanding undefined slopes helps in avoiding errors in slope calculations and graph interpretations.

Educational Resources and Further Learning

Explore recommended websites like Kuta Software and Maths Made Easy for practice worksheets and interactive tools. Textbooks and study guides provide in-depth explanations and exercises for mastering slope concepts.

8.1 Recommended Websites and Tutorials

For comprehensive learning, visit websites like Kuta Software and Maths Made Easy. Kuta Software offers printable PDF worksheets and interactive tools for slope calculation. Maths Made Easy provides revision tests and detailed explanations. Additionally, websites like Math Gifs and Algebra.com feature visual aids, model problems, and practice exercises. These resources cater to various learning styles, ensuring a thorough understanding of slope concepts.

8.2 Textbooks and Study Guides

Recommended textbooks like “Punchline Algebra Book A” and study guides from educational institutions such as CHCA and St. Edward the Confessor Parish School provide detailed explanations and exercises on slope concepts. These resources include structured lessons, practice problems, and step-by-step solutions, making them ideal for students seeking in-depth understanding. They complement online worksheets and tutorials, offering a comprehensive learning experience.

PDF

goodhue county jail roster pdf

The Goodhue County Jail Roster is a public document listing current inmates‚ including details like name‚ intake date‚ charges‚ bail‚ and release information‚ ensuring transparency and accountability․

1․1 Overview of the Goodhue County Jail

The Goodhue County Jail‚ located in Red Wing‚ Minnesota‚ is part of the Goodhue County Justice Center․ It houses adult inmates‚ with a capacity of up to 90 individuals․ Juveniles are not held here and are transferred to specialized facilities․ The jail operates under the Goodhue County Sheriff’s Office‚ ensuring modern security and surveillance systems․ It provides a safe environment for inmates and supports judicial processes efficiently․

1․2 Purpose of the Jail Roster

The Goodhue County Jail Roster serves as a transparent record of individuals in custody‚ providing essential details like inmate names‚ charges‚ bail amounts‚ and intake dates․ Its purpose is to ensure public access to information‚ aid legal professionals‚ and assist families in locating loved ones․ It also supports law enforcement and court processes by maintaining accurate and up-to-date inmate data․

What is Included in the Goodhue County Jail Roster?

The roster includes inmate details‚ charges‚ bail information‚ intake and release dates‚ mugshots‚ and legal status‚ providing a comprehensive overview of current jail inhabitants․

2․1 Inmate Details

The Goodhue County Jail Roster provides detailed inmate information‚ including name‚ mugshot‚ intake date‚ charges‚ bail amount‚ and booking number․ This data is regularly updated to ensure accuracy and transparency‚ allowing the public‚ legal professionals‚ and family members to access essential details about individuals currently in custody․

2․2 Legal Status and Charges

The Goodhue County Jail Roster includes detailed information about an inmate’s legal status and charges‚ such as criminal offenses‚ case numbers‚ and severity of charges․ It also specifies whether bail has been set or if the inmate is being held without bail‚ providing clarity on their current legal standing and any ongoing judicial processes․

2․4 Bail and Release Information

The Goodhue County Jail Roster provides specific details regarding bail amounts‚ payment status‚ and release dates․ It outlines whether bail has been set‚ the total amount required‚ and if an inmate has been released‚ including the method of release‚ such as bail bond or court order‚ ensuring transparency in the judicial process and inmate status updates․

How to Access the Goodhue County Jail Roster

Access the Goodhue County Jail Roster online via the sheriff’s website‚ or download a PDF version․ Alternative methods include telephone inquiries or visiting the office directly․

3․1 Online Access to the Roster

The Goodhue County Jail Roster is accessible online through the sheriff’s official website․ Visit the inmate lookup section‚ enter the inmate’s name‚ and view details like mugshots‚ charges‚ and bail information․ The roster is updated regularly‚ ensuring accuracy and transparency for public access․ This convenient method allows users to search for inmates anytime‚ promoting ease and efficiency in obtaining necessary information․

3․2 Obtaining a PDF Version

The Goodhue County Jail Roster can be downloaded as a PDF from the sheriff’s website․ Visit the inmate roster page‚ select the desired date range‚ and download the report․ The PDF includes inmate details such as name‚ intake date‚ charges‚ bail‚ and status․ This format is convenient for offline access‚ printing‚ or sharing‚ and is regularly updated to reflect current inmate information․

3․3 Alternative Methods of Access

For those without internet access‚ alternative methods include visiting the Goodhue County Sheriff’s Office in person or contacting them via phone at 651-267-2600․ Additionally‚ some third-party services offer jail roster information‚ though they may require subscription or payment․ These methods ensure accessibility for individuals unable to use online platforms‚ providing equal access to public records and inmate information․

Understanding the Jail Roster Report

The Goodhue County Jail Roster Report provides detailed inmate information‚ including charges‚ bail status‚ and release dates‚ aiding in transparency and public awareness of legal proceedings․

4․1 Reading and Interpreting the Roster

Reading the Goodhue County Jail Roster involves understanding inmate details‚ charges‚ bail information‚ and release dates․ The roster is organized alphabetically or chronologically‚ making it easy to locate specific individuals․ Each entry typically includes the inmate’s name‚ booking date‚ charges filed‚ bail amount‚ and projected release date․ This information helps the public‚ legal professionals‚ and families stay informed about an inmate’s legal status and custody details․ Ensuring accuracy and transparency‚ the roster is regularly updated to reflect current inmate statuses and court proceedings․

4․2 Key Information to Look For

When reviewing the Goodhue County Jail Roster‚ key details to focus on include inmate names‚ intake dates‚ charges‚ bail amounts‚ and projected release dates․ Mugshots and arrest agency information are also provided․ This data helps verify an inmate’s legal status‚ track court proceedings‚ and understand custody conditions․ Ensuring accuracy‚ the roster offers a clear overview of an individual’s case‚ aiding families‚ legal teams‚ and the public in staying informed․

Recent Updates and Changes

Recent updates include new arrests‚ intake dates‚ and bail modifications․ The roster reflects current charges‚ such as criminal sexual conduct‚ with bail set at $200‚000․

5․1 Latest Arrests and Intake Dates

The latest arrests in Goodhue County include Justin M․ Dougherty‚ booked on 4/29/2025‚ and Jason M․ Boecker‚ arrested on 5/2/2025․ Both face serious charges‚ with bail set at $200‚000․ The roster is updated daily‚ reflecting new intakes and charges‚ ensuring accurate and timely information for the public․

5․2 Recent Releases and Transfers

Recent releases include Jeffery D․ Nelsen‚ who was released after serving his sentence․ Transfers involve inmates like Tramell J․ Askew‚ moved to Dakota County․ The roster updates regularly‚ reflecting releases‚ transfers‚ and case statuses‚ ensuring the public stays informed about inmate movements and current custody details․

Warrant List and Wanted Individuals

The Warrant List includes active warrants in Goodhue County․ Individuals should not be arrested based solely on this information․ Contact the Goodhue County Sheriffs Office at 651-267-2600 for verification․

6․1 Active Warrants in Goodhue County

The Goodhue County Warrant List details active warrants‚ including names‚ charges‚ and bail amounts․ It’s updated regularly and accessible online․ Warrants are issued for various offenses‚ from misdemeanors to felonies․ Law enforcement uses this list to apprehend individuals․ The public can view the list for information‚ but arrests require verification through the Sheriff’s Office․ This ensures due process and legal accuracy․

6․2 How to Verify Warrants

Verification of active warrants in Goodhue County can be done by contacting the Sheriff’s Office at 651-267-2600․ Individuals can provide suspect names or case details for confirmation․ This process ensures accurate information and prevents unlawful actions․ Public access to warrant lists is available online‚ but official verification is required for legal purposes‚ maintaining the integrity of the judicial process and public safety․

Contact Information and Resources

For inquiries‚ contact the Goodhue County Sheriff’s Office at 651-267-2600 or visit www․GoodhueSheriff․com for detailed resources and updates on inmate information․

7․1 Goodhue County Sheriff’s Office Contact

The Goodhue County Sheriff’s Office is located at 454 West Sixth Street‚ Red Wing‚ MN 55066․ You can reach them by phone at 651-267-2600 or via email for general inquiries; Office hours are Monday through Friday‚ 8:00 AM to 4:30 PM․ Visit their official website for additional resources and updates on the jail roster․

7․2 Additional Resources for Inmate Lookup

For further assistance‚ utilize the Goodhue County Sheriff’s Office online database or access the PDF version of the jail roster․ Additional tools include third-party inmate lookup services and the Minnesota Department of Corrections website‚ which provide comprehensive search options and updated records for public access․

Visitation and Communication Policies

Visitation requires an official state ID‚ and guidelines regulate communication․ Inmates can receive mail and money‚ with specific rules to ensure security and compliance with facility policies․

8․1 Visitation Guidelines

Visitation requires an official state ID and adherence to specific rules․ Visitors must present valid identification upon arrival․ The jail may restrict visitation based on security concerns or inmate status․ Scheduled visitation times are typically limited‚ and advance registration may be required․ All interactions are monitored to maintain facility safety and order․

8․2 Sending Money and Mail

Sending money to inmates requires using approved methods‚ such as money orders or online services․ Mail must include the inmate’s name and booking number‚ with restrictions on prohibited items like cash or contraband․ All correspondence is screened for security purposes․ Detailed guidelines are available on the Goodhue County Sheriff’s website to ensure compliance with facility regulations and inmate safety․

Legal and Custodial Procedures

The legal framework ensures inmates’ rights are protected‚ with clear procedures for bail‚ charges‚ and custody․ The roster PDF provides insights into these processes and inmate status․

9․1 Understanding Bail and Booking Processes

The bail process involves setting a monetary amount for an inmate’s release until trial‚ as listed in the roster․ Booking procedures include intake‚ charges‚ and initial custody details․ The roster PDF provides a transparent record of these legal steps‚ ensuring accountability and public access to inmate status and court proceedings in Goodhue County․

9․2 Rights and Responsibilities of Inmates

Inmates in Goodhue County have rights‚ including access to legal counsel‚ medical care‚ and visitation‚ as outlined in the jail roster PDF․ They must follow facility rules‚ attend court proceedings‚ and respect authority․ The roster ensures transparency‚ detailing inmate status and legal processes‚ while also emphasizing their responsibilities to maintain order and accountability within the detention system․

Historical and Statistical Data

The Goodhue County Jail Roster provides historical trends in inmate populations and statistical insights‚ offering a comprehensive archive of past reports for public review and analysis․

10․1 Trends in Jail Population

The Goodhue County Jail Roster reveals trends in inmate population‚ showing fluctuations over time․ It highlights average daily populations‚ peak periods‚ and demographic changes‚ aiding in resource planning and facility management․

10․2 Archive of Past Roster Reports

The Goodhue County Jail maintains an archive of past roster reports‚ accessible online․ These documents provide historical data on inmate populations‚ charges‚ and releases․ Archives are updated regularly‚ offering a comprehensive record for research and reference purposes‚ ensuring transparency and accountability in jail operations․

Frequently Asked Questions

How do I access the Goodhue County Jail Roster? The roster is available online and includes inmate details‚ charges‚ and bail information‚ updated regularly․

11․1 Common Questions About the Roster

Common questions include how to search for inmates‚ understand charges‚ and access bail information․ The roster‚ updated daily‚ provides inmate details‚ intake dates‚ and release statuses․ It also lists active warrants and contact information for the Goodhue County Sheriff’s Office․ Visitors can use the online database or call for assistance‚ ensuring transparency and public access to jail records․

11․2 Troubleshooting Access Issues

If you encounter issues accessing the Goodhue County Jail Roster‚ ensure your browser is updated and compatible․ Clear cache or try a different browser․ Verify the inmate’s name is spelled correctly․ For PDF versions‚ check the official website or contact the Goodhue County Sheriff’s Office at 651-267-2600 for assistance․ Technical difficulties can often be resolved by refreshing the page or confirming internet connectivity․

The Goodhue County Jail Roster ensures transparency and accountability by providing public access to inmate information‚ supporting community safety and informed decision-making with up-to-date records․

12․1 Importance of Transparency in Jail Records

Transparency in jail records‚ like the Goodhue County Jail Roster‚ ensures accountability and trust between law enforcement and the public․ By providing accessible inmate information‚ the roster promotes openness‚ allowing citizens to stay informed about arrests‚ charges‚ and legal proceedings․ This accessibility supports community safety‚ upholds justice‚ and reaffirms the public’s right to know‚ making the roster a vital resource for ensuring accountability and fairness․

12․2 Final Thoughts on Using the Roster

The Goodhue County Jail Roster is a vital tool for transparency‚ providing essential details about inmates and legal proceedings․ By using the roster responsibly‚ citizens can stay informed and ensure accountability within the justice system․ It serves as a reliable resource for navigating the complexities of criminal justice‚ promoting public safety‚ and fostering trust between law enforcement and the community․

PDF

kt tape: rotator cuff pdf

KT Tape is a popular solution for rotator cuff injuries, offering stability and pain relief․ Its breathable design supports the shoulder, promoting healing without restricting movement․ A non-invasive alternative to traditional methods, it’s widely used by athletes and therapists to enhance recovery and reduce discomfort effectively․

Overview of KT Tape and Its Role in Treating Rotator Cuff Injuries

KT Tape is a kinesiology tape designed to provide stability and support to the shoulder joint, particularly for rotator cuff injuries․ It works by gently lifting the skin to reduce pressure on pain receptors and improve blood flow․ This non-invasive solution helps alleviate discomfort while allowing for a full range of motion․ Often used by athletes and physical therapists, KT Tape is a versatile tool for both acute and chronic injuries․ It can be applied strategically to target specific muscles and ligaments, offering relief and promoting healing․ Its breathable fabric makes it suitable for extended wear, making it a popular choice for managing rotator cuff issues․

Benefits of Using KT Tape for Rotator Cuff Support

KT Tape is a kinesiology tape designed to provide stability and support to the shoulder joint, particularly for rotator cuff injuries․ It works by gently lifting the skin to reduce pressure on pain receptors and improve blood flow․ This non-invasive solution helps alleviate discomfort while allowing for a full range of motion․ Often used by athletes and physical therapists, KT Tape is a versatile tool for both acute and chronic injuries․ It can be applied strategically to target specific muscles and ligaments, offering relief and promoting healing․ Its breathable fabric makes it suitable for extended wear, making it a popular choice for managing rotator cuff issues․

Pain Relief and Reduced Inflammation

KT Tape helps alleviate pain and reduce inflammation in rotator cuff injuries by lifting the skin to decrease pressure on pain receptors․ This gentle lifting enhances blood flow, promoting healing․ The tape’s elastic properties provide consistent support, minimizing discomfort during movement․ By reducing swelling and relieving tension, KT Tape creates an environment conducive to recovery․ It’s particularly effective for acute injuries, offering immediate relief․ However, it’s not a standalone solution and works best as part of a comprehensive treatment plan, including physical therapy and rest․ Proper application ensures optimal results, making it a valuable tool for managing pain and inflammation associated with rotator cuff issues․

Enhanced Shoulder Stability and Mobility

KT Tape enhances shoulder stability by providing additional structural support to the rotator cuff muscles and tendons․ The tape’s elastic properties help maintain proper alignment, reducing the risk of further injury․ It allows for a full range of motion, making it ideal for both rehabilitation and athletic activities․ By stabilizing the shoulder joint, KT Tape boosts confidence during movement, encouraging patients to perform exercises and daily tasks without fear of strain․ This combination of support and mobility is crucial for recovery, enabling individuals to gradually strengthen their shoulders while minimizing discomfort and preventing setbacks․ Proper application techniques ensure maximum effectiveness in stabilizing the shoulder complex․

How to Apply KT Tape for Rotator Cuff Issues

Applying KT Tape for rotator cuff issues involves strategic placement to support the shoulder․ Begin by ensuring the skin is clean and dry for better adhesion․ Cut strips of tape as needed and place them around the affected area, following the natural muscle and tendon alignment to provide stability without restricting movement․ Apply the tape with a slight stretch to decompress the skin, which can help reduce swelling and pain․ Avoid applying the tape too tightly to prevent discomfort․ Following a step-by-step guide or instructional video can help ensure proper application for maximum effectiveness and comfort․

Step-by-Step Guide to Taping the Shoulder

To tape your shoulder with KT Tape, start by preparing your skin, ensuring it’s clean, dry, and free of oils or lotions․ Place the first strip horizontally across the deltoid muscle, just below the shoulder blade, anchoring one end near the spine of the scapula․ Gently stretch the tape outward, wrapping it around the front of the shoulder to provide support to the rotator cuff․ Next, apply a vertical strip from the acromion process down to the upper arm, ensuring it aligns with the rotator cuff tendons․ Finally, use a shorter strip to secure the area near the armpit for added stability․ Avoid stretching the tape too tightly to prevent discomfort․ Proper application should provide support without restricting movement, helping to alleviate pain and promote healing․

Preparation and Skin Readiness for Taping

Proper skin preparation is essential for effective KT Tape application․ Ensure the skin is clean, dry, and free of oils, lotions, or sweat, as these can reduce adhesion․ Shave or trim excess hair around the area to prevent irritation and ensure better contact․ Avoid applying tape on open wounds or sensitive skin․ Allow any lotions or creams to absorb fully before taping․ For best results, apply the tape 1 hour before activity to allow it to set properly․ Clean preparation ensures the tape adheres well, providing optimal support and pain relief for rotator cuff injuries․

Common Mistakes to Avoid During Application

When applying KT Tape for rotator cuff injuries, avoid common mistakes that can reduce its effectiveness․ Improper skin preparation, such as not cleaning or drying the area, can lead to poor adhesion․ Applying the tape too tightly may cause discomfort or restrict movement․ Using untrimmed or uneven strips can result in uneven support or irritation․ Avoid applying tape over open wounds, sensitive skin, or areas with hair, as this can cause discomfort or skin reactions․ Additionally, not waiting the recommended time before activity can diminish the tape’s effectiveness․ Ensuring proper technique and avoiding these errors will maximize the benefits of KT Tape for shoulder support․

Best Practices for Wearing KT Tape

For optimal results, wear KT Tape up to 5 days, apply 1 hour before activity, and keep skin clean and dry to ensure proper adhesion and comfort․

Recommended Wearing Time and Reapplication Tips

KT Tape can be worn for up to 5 days, providing continuous support and relief․ Reapply after swimming or excessive sweating․ Remove gently with oil to prevent skin irritation․

Caring for Your Skin While Using KT Tape

Proper skin care is essential when using KT Tape․ Ensure skin is clean, dry, and free of lotions or oils before application for better adhesion․ Avoid applying tape on open wounds, irritated skin, or recently shaved areas to prevent discomfort․ After removing the tape, gently cleanse the skin with soap and water to remove any residue․ Moisturize to soothe any irritation․ If skin becomes red or itchy, discontinue use and consult a healthcare professional․ Regular exfoliation can also help maintain skin health for future taping sessions․ Proper care ensures comfort and effectiveness of the KT Tape application․

When to Use KT Tape for Rotator Cuff Injuries

KT Tape is ideal for both acute and chronic rotator cuff injuries, providing support during recovery or as a preventative measure for athletes․ Use it up to 5 days for optimal results․

Acute vs․ Chronic Rotator Cuff Injuries

Acute rotator cuff injuries are sudden, often caused by falls or direct trauma, leading to sharp pain and limited mobility․ KT Tape helps reduce inflammation and provides immediate stability․ Chronic injuries develop over time due to repetitive strain or poor posture, causing persistent discomfort․ KT Tape offers ongoing support, reducing stress on the shoulder during activities․ For acute cases, apply tape for up to 5 days to aid recovery․ For chronic issues, use it as needed, ensuring skin health and avoiding irritation․ Proper application techniques are essential for both conditions to maximize therapeutic benefits and prevent further injury․

KT Tape as a Preventative Measure

KT Tape is not just for injuries; it’s also a valuable tool for preventing rotator cuff strains․ By providing additional stability, it reduces the risk of overuse injuries, especially during repetitive movements․ Athletes and individuals with physically demanding jobs often use it as a proactive measure to protect their shoulders․ Applying KT Tape before activities can help maintain proper shoulder mechanics, minimizing the likelihood of fatigue-related damage․ Regular use can strengthen the shoulder’s resilience, making it less prone to chronic issues․ This approach is particularly effective for those with a history of shoulder problems, offering a non-invasive way to safeguard against future injuries․

KT Tape is a practical, non-invasive solution for rotator cuff support, offering pain relief, stability, and prevention benefits․ Its ease of use and effectiveness make it a valuable tool for both recovery and prevention․

Final Thoughts on KT Tape for Rotator Cuff Support

KT Tape provides a non-invasive, effective solution for rotator cuff injuries, offering pain relief, enhanced stability, and improved mobility․ Its breathable, waterproof design supports the shoulder during recovery and prevents further strain․ Easy to apply and removable without irritation, KT Tape is ideal for athletes, physical therapists, and individuals seeking a practical solution for shoulder discomfort․ Whether for acute injuries or chronic conditions, KT Tape is a cost-effective, drug-free alternative that promotes healing and prevents reinjury, making it a valuable tool for maintaining shoulder health and performance․

PDF

protein cheat sheet pdf

Protein is an essential nutrient, serving as the building block for tissues, antibodies, and enzymes. It plays a vital role in muscle growth and recovery, making it crucial for overall health and bodily functions. A protein cheat sheet provides a concise guide to understanding protein’s role, optimal intake, and diverse sources, helping individuals meet their nutritional goals effectively.

1.1 What is Protein and Why is it Essential for the Body?

Protein is a fundamental nutrient composed of amino acids, which are crucial for building and repairing tissues, producing enzymes and hormones, and maintaining bodily functions. The human body requires essential amino acids, obtained through diet, as it cannot produce them independently. Protein is vital for muscle growth, immune function, and overall health. Adequate intake varies by age, weight, and activity level, emphasizing the need for a balanced diet with high-quality protein sources to sustain optimal health and function.

1.2 The Role of Protein in Muscle Building and Recovery

Protein is indispensable for muscle building and recovery, as it provides the essential amino acids needed to repair and grow muscle tissue. After exercise, protein aids in muscle synthesis, reducing soreness and enhancing strength. Adequate intake ensures muscles recover efficiently, supporting fitness goals. Foods like lean meats, fish, eggs, and dairy are excellent sources, while protein powders offer convenience for post-workout recovery. Meeting daily protein needs is crucial for active individuals aiming to build or maintain muscle mass effectively.

Types of Protein Sources

Protein sources are diverse, ranging from animal-based options like meats, dairy, and eggs to plant-based choices such as legumes, beans, and grains. Fish and seafood provide high-quality protein, while nuts, seeds, and non-meat alternatives offer convenient and nutritious solutions. Understanding these sources helps individuals tailor their diets to meet protein needs effectively, ensuring a balanced and varied intake for optimal health and performance.

2.1 Animal-Based Proteins: Meats, Dairy, and Eggs

Animal-based proteins, such as meats, dairy, and eggs, are among the highest-quality sources due to their complete amino acid profiles. Lean meats like chicken and turkey, as well as fatty meats like beef and pork, provide robust protein content. Dairy products, including milk, yogurt, and cheese, are excellent sources, while eggs are renowned for their bioavailability and versatility. These options are ideal for building and repairing muscle tissue, making them a cornerstone of many high-protein diets.

2.2 Plant-Based Proteins: Legumes, Beans, and Grains

Plant-based proteins, such as legumes, beans, and grains, offer a nutritious and sustainable option for meeting protein needs. Legumes like lentils, chickpeas, and black beans are rich in protein and fiber. Whole grains, including quinoa and farro, provide additional protein, while options like tofu and tempeh add variety. Combining different plant-based sources can enhance amino acid profiles, making them a versatile choice for vegetarian and vegan diets. These foods are also environmentally friendly and budget-friendly.

2.3 Fish and Seafood as High-Quality Protein Sources

Fish and seafood are excellent high-quality protein sources, rich in essential nutrients like omega-3 fatty acids. Options such as salmon, cod, shrimp, and tuna provide lean protein that supports muscle growth and overall health. These foods are versatile, low in fat, and adaptable to various diets, making them a great choice for those seeking to boost their protein intake while enjoying numerous health benefits.

2.4 Nuts, Seeds, and Other Non-Meat Options

Nuts, seeds, and other non-meat options are excellent protein sources for those avoiding animal products. Almonds, chia seeds, and flaxseeds are high in protein and healthy fats. Quinoa, tofu, and tempeh also offer significant protein content; These options are versatile, supporting plant-based diets while providing essential nutrients. Including them in meals ensures a balanced intake of protein and fiber, making them ideal for maintaining overall health and meeting dietary goals effectively.

How to Calculate Your Daily Protein Needs

Protein needs vary based on weight, activity, and goals. Generally, 1.2-2.2 grams per kilogram is recommended. Adjust intake for sedentary, active, or athletic lifestyles, and consult a nutritionist for personalized advice.

3.1 Factors Influencing Protein Requirements

Protein requirements are influenced by age, weight, gender, and activity level. Athletes and those who are highly active may need up to 2.2 grams per kilogram of body weight daily, while sedentary individuals require less. Additionally, factors like muscle-building goals, overall health, and recovery needs also play a role in determining the ideal protein intake for different individuals. Consulting a nutritionist can help tailor these needs for optimal results.

3.2 A Simple Guide to Calculating Your Protein Intake

To calculate your protein intake, start with the recommended 0.8 grams per kilogram of body weight for sedentary individuals. Adjust based on activity level: 1.2-1.6 grams for active persons and 1.6-2.2 grams for athletes. For example, a 70kg active individual would aim for 84-112 grams daily. Use a protein cheat sheet or tracking app to monitor intake and ensure you meet your goals consistently. This straightforward approach helps personalize your protein needs effectively.

Creating a Protein-Rich Meal Plan

Plan meals with balanced protein sources, including eggs, lean meats, legumes, and dairy. Incorporate variety to ensure consistent intake and meet daily protein goals effectively.

4.1 Breakfast Ideas for High Protein Start

Begin your day with protein-packed breakfasts like scrambled eggs, Greek yogurt parfaits, or protein smoothies. Add nuts, seeds, or chia pudding for extra protein. Oatmeal with peanut butter or cottage cheese also provides a boost. A protein-rich breakfast helps kickstart metabolism and keeps energy levels consistent throughout the morning, supporting muscle repair and growth. Incorporate variety to keep meals exciting and ensure you meet your daily protein goals from the very start.

4.2 Lunch and Dinner Options to Meet Protein Goals

Incorporate protein-rich lunches and dinners with options like grilled chicken, turkey wraps, or fish such as salmon and tilapia. Pair these with quinoa, brown rice, or roasted vegetables for balanced meals. Plant-based alternatives include lentil stir-fries, tofu dishes, or chickpea salads. Ensure variety by rotating protein sources and sides to keep meals interesting. Consistent protein intake supports muscle repair and growth, helping you maintain your daily nutritional goals effectively and deliciously.

4.3 Snacks to Keep Your Protein Levels Consistent

Keep protein levels steady with snacks like nuts, seeds, Greek yogurt, or hard-boiled eggs. Protein shakes, beef or turkey jerky, and cottage cheese are convenient options. Fresh fruits paired with peanut butter or hummus also provide a protein boost. These snacks are easy to prepare, portable, and help maintain consistent protein intake throughout the day, supporting muscle repair and energy levels without requiring elaborate preparation.

The Role of Protein Supplements

Protein supplements like whey, casein, and plant-based powders offer convenience for meeting protein goals. They support muscle growth, recovery, and are ideal for busy lifestyles or dietary gaps.

5.1 Whey Protein, Casein, and Plant-Based Powders

Whey protein is a fast-absorbing, complete protein ideal for post-workout recovery. Casein digests slowly, providing sustained amino acid release. Plant-based powders like pea, rice, and hemp cater to vegans, offering hypoallergenic options. These supplements are convenient for meeting protein goals, especially for those with busy schedules or dietary restrictions. They come in various flavors and formulations, making them versatile for different fitness and nutritional needs.

5.2 How to Choose the Best Protein Powder for Your Needs

When selecting a protein powder, consider your lifestyle, fitness goals, and dietary preferences. Evaluate protein sources like whey, casein, or plant-based options. Check the protein content per serving and ensure it aligns with your daily needs. Opt for low-added-sugar and minimally processed varieties. Read labels for certifications like NSF or Informed-Choice to ensure quality. Choose unflavored or versatile flavors for flexibility in recipes. Consult reviews or experts to find the best fit for your preferences and goals.

Tracking Your Protein Intake

Effectively tracking your protein intake involves using tools like apps and creating a personalized protein cheat sheet. Start by determining your daily protein goals based on factors such as age, weight, and activity level. Use apps like MyFitnessPal to log your meals and monitor your protein consumption throughout the day. Additionally, develop a cheat sheet listing common foods and their protein content to simplify tracking. Set reminders and establish routines to maintain consistency. Regularly review your progress to ensure you’re meeting your goals and make adjustments as needed. By combining these strategies, you can efficiently manage and optimize your protein intake for better health and fitness outcomes.

6.1 Apps and Tools for Monitoring Protein Consumption

Utilize apps like MyFitnessPal, Lose It!, or MyNetDiary to track your daily protein intake. These tools allow you to log meals, scan barcodes, and set protein goals. Features include customizable dashboards, macro breakdowns, and reminders to stay on track. Some apps also offer insights into other nutrients, ensuring a balanced diet. By leveraging these resources, you can maintain consistency and make informed food choices to meet your protein objectives effectively.

6.2 Creating a Personal Protein Cheat Sheet

Create a personalized protein cheat sheet by listing high-protein foods, their serving sizes, and protein content. Organize by food categories like meats, dairy, legumes, and grains. Include tips for combining foods to meet daily goals. Add notes on cooking methods and portion control. This handy guide ensures quick reference, helping you track intake efficiently. Update it as your preferences or dietary needs evolve to maintain relevance and effectiveness in your protein-focused journey;

Common Mistakes to Avoid

Avoid overconsumption of protein, neglecting balanced nutrition, and relying solely on supplements. Track intake consistently to prevent exceeding dietary needs and ensure a well-rounded diet.

7.1 Overconsumption of Protein and Its Effects

Overconsumption of protein can strain kidney function and lead to dehydration. It may also result in an imbalanced diet, displacing essential carbs and fats. High intake can cause bloating, and excess protein is stored as fat. Moderation is key to avoid these effects while meeting nutritional goals effectively.

7.2 Neglecting Balanced Nutrition While Focusing on Protein

Overemphasizing protein can lead to neglect of essential nutrients like fiber, vitamins, and minerals. A diet lacking variety may cause deficiencies, hindering overall health. It’s crucial to balance protein intake with whole grains, fruits, and vegetables to ensure proper bodily functions and prevent long-term health issues. A well-rounded approach supports optimal wellness and sustains energy levels effectively.

Consistency and variety are key to meeting protein goals. Stay motivated, track progress, and use a cheat sheet for personalized nutrition and long-term success effectively.

8.1 Maintaining Consistency and Variety in Protein Intake

Maintaining consistency in protein intake is crucial for steady progress. Incorporate a variety of sources, including lean meats, fish, legumes, and plant-based options, to ensure balanced nutrition. Use a cheat sheet to track daily goals and simplify meal planning. Rotate proteins to avoid monotony and optimize nutrient intake. Consistency paired with variety fosters sustainable habits, supporting muscle repair, energy levels, and overall health. A well-rounded approach ensures long-term success and keeps meals enjoyable.

8.2 Staying Motivated to Meet Your Protein Goals

Staying motivated to meet protein goals requires setting realistic targets and celebrating small achievements. Use a protein cheat sheet to track progress and simplify meal planning. Share goals with a friend or join a community for accountability. Reward yourself for milestones reached, like trying new recipes or hitting weekly targets. Remind yourself of the benefits, such as improved energy and muscle growth. Consistency is key, so stay positive and focused on long-term success.

PDF

envision algebra 1 textbook pdf

The Envision Algebra 1 textbook is a comprehensive resource designed for grades 8 and 9, focusing on real-world applications and problem-based learning to master algebraic concepts effectively․

1․1 Overview of the Textbook

The Envision Algebra 1 textbook is part of the Florida B․E․S․T․ curriculum, designed for high school students to explore algebraic concepts through real-world applications and problem-based learning․ It aligns with the Mississippi College- and Career-Readiness Standards for Mathematics, ensuring a comprehensive understanding of algebra․ The textbook is structured to extend students’ abilities in solving equations, inequalities, and systems, while introducing functions and their graphs․ Topics such as linear equations, quadratic equations, and systems of equations are covered in depth․ The PDF version offers an interactive and accessible format, making it easier for students to engage with the material․ Additional resources, such as practice materials and assessment tools, are included to support learning․ This textbook is widely used in schools and is available in both print and digital formats for flexibility․

1․2 Key Features of the Envision Algebra 1 Curriculum

The Envision Algebra 1 curriculum stands out for its innovative approach to teaching algebra; It integrates real-world applications with problem-based learning, enabling students to connect mathematical concepts to practical scenarios․ The curriculum emphasizes critical thinking and collaboration, fostering a deeper understanding of algebraic principles․ Key features include interactive digital tools, such as the Interactive Student Edition, which offers animations and simulations to visualize complex concepts․ The textbook also provides differentiated instruction to cater to diverse learning needs․ Additionally, there are abundant practice materials and assessment resources, including selected answers, to support both teachers and students․ The curriculum is aligned with the Common Core State Standards for Mathematics, ensuring a rigorous and comprehensive education in algebra․ These features collectively create an engaging and effective learning experience tailored to modern educational demands․

Structure and Content of the Envision Algebra 1 PDF

The Envision Algebra 1 PDF is structured to cover essential algebraic concepts, including solving equations, linear functions, and systems․ Chapters are organized sequentially, building foundational skills progressively for better understanding and retention;

2․1 Topics Covered in the Textbook

The Envision Algebra 1 textbook covers a wide range of topics to ensure a solid foundation in algebra․ It begins with solving equations and inequalities, extending to linear equations, functions, and systems of equations․ The curriculum also includes quadratic equations, polynomials, and rational expressions, providing a comprehensive understanding of algebraic principles․ Real-world applications are integrated throughout the lessons to enhance problem-solving skills and practical knowledge․ The textbook aligns with educational standards, ensuring students master essential concepts progressively․ Each chapter builds on previous knowledge, fostering a deep understanding of algebraic structures and their applications․ The content is designed to prepare students for advanced math courses while emphasizing critical thinking and analytical skills․ This structured approach makes the Envision Algebra 1 textbook an effective tool for learning algebra․

2․2 Organization of Chapters and Lessons

The Envision Algebra 1 textbook is organized into clear, logically structured chapters that guide students through foundational algebraic concepts․ Each chapter is divided into lessons, focusing on specific skills and topics, such as solving equations, graphing functions, and analyzing systems of equations․ Real-world examples are incorporated to contextualize learning․ Lessons are designed to build progressively, ensuring students grasp each concept before advancing․ The textbook includes topic reviews, practice exercises, and assessments at the end of each chapter to reinforce understanding․ This organized approach helps students navigate the curriculum efficiently, making it easier to track progress and identify areas for further review․ The structure supports both teacher instruction and independent study, providing a balanced and comprehensive learning experience․

Benefits of Using the Envision Algebra 1 Digital Version

The digital version of Envision Algebra 1 offers enhanced accessibility, interactive tools, and real-time updates, making learning flexible and engaging for students in a modern educational environment․

3․1 Accessibility and Convenience of the PDF Format

The Envision Algebra 1 textbook in PDF format ensures unparalleled accessibility and convenience for students and educators․ It can be easily downloaded or accessed online, allowing users to study anywhere, anytime, without the need for physical copies․ The PDF version is compatible with multiple devices, including tablets, laptops, and smartphones, making it ideal for modern learning environments․ Additionally, the digital format enables features like keyword searching, bookmarking, and highlighting, which enhance the learning experience․ Students can quickly locate specific topics or concepts, saving time and improving productivity․ The PDF also supports interactive elements, such as clickable links and embedded resources, further enriching the educational content․ This flexibility and ease of use make the Envision Algebra 1 PDF a preferred choice for both in-class and remote learning scenarios․

3․2 Interactive Elements and Resources

The Envision Algebra 1 digital version incorporates a variety of interactive elements designed to enhance student engagement and understanding․ These include embedded videos, animations, and interactive simulations that bring algebraic concepts to life․ Students can explore complex topics, such as solving linear equations or graphing functions, through hands-on activities․ Additionally, the PDF features clickable links to external resources, such as practice worksheets, tutorial guides, and online assessments․ Interactive quizzes and exercises are integrated directly into the text, allowing students to test their knowledge and receive immediate feedback․ These tools cater to diverse learning styles, providing visual, auditory, and kinesthetic opportunities for mastery․ The interactive nature of the digital textbook fosters a dynamic and immersive learning experience, making algebra more accessible and enjoyable for all students․

Teaching Resources and Supplements

The Envision Algebra 1 textbook is supported by a range of teaching resources, including additional practice worksheets, assessment tools, and interactive activities to enhance instruction and student engagement․

4․1 Additional Practice Materials

The Envision Algebra 1 textbook offers a variety of additional practice materials to reinforce learning․ These include worksheets, interactive activities, and problem sets that cover topics like solving linear equations, graphing, and quadratic equations․ The resources are designed to help students master algebraic concepts through hands-on practice․ Many of these materials are available in digital formats, making them easily accessible for both teachers and students․ The practice materials align with the curriculum, ensuring students can apply what they learn in class․ Additional resources, such as online quizzes and printable worksheets, provide extra support for students who need more practice․ These materials are organized by topic, allowing teachers to assign targeted exercises based on student needs․ The abundance of practice options ensures that students can build confidence and fluency in algebraic skills․ This comprehensive approach to practice reinforces the textbook’s focus on problem-based learning and real-world applications․

4․2 Assessment and Evaluation Tools

The Envision Algebra 1 textbook provides a range of assessment and evaluation tools to monitor student progress․ These tools include quizzes, tests, and cumulative assessments, which are available in both print and digital formats․ The digital version offers interactive quizzes with immediate feedback, helping students identify areas for improvement․ Teachers can access answer keys and scoring rubrics to evaluate student performance accurately․ Additionally, the textbook includes benchmark assessments to measure understanding at key points in the curriculum․ These tools align with the learning objectives and ensure students are on track to master algebraic concepts․ The assessments are designed to be flexible, allowing teachers to adjust them based on classroom needs․ By using these resources, educators can track progress, identify gaps, and provide targeted support to students․ This comprehensive approach to assessment supports both teaching and learning effectively․

How to Access the Envision Algebra 1 Textbook

To access the Envision Algebra 1 textbook, students and educators can utilize multiple platforms․ The digital version is available through Pearson’s official website, where users can log in to access the Interactive Student Edition․ Additionally, the textbook can be downloaded as a PDF from various educational resources or purchased directly from the publisher․ Some schools provide access through their learning management systems, such as Pearson Realize․ For offline use, the PDF format allows students to study without internet connectivity․ Visit the Pearson website, navigate to the Algebra 1 section, and follow the prompts to download or access the textbook․ Ensure you have the necessary login credentials for digital versions․ This flexibility ensures that learners can engage with the material in a way that suits their needs․ The textbook is also available through select online marketplaces, offering both digital and print options․

PDF

house plans for free pdf

Free house plans in PDF format offer a convenient way to visualize and customize your dream home․ These downloadable plans include detailed layouts, elevations, and structural elements, allowing you to explore various architectural styles and designs without cost․ Perfect for homeowners, architects, and contractors, they provide a flexible starting point for your construction project․

What Are Free House Plans?

Free house plans are downloadable PDF files that provide detailed architectural designs for constructing homes․ These plans typically include floor layouts, foundation details, plumbing systems, and exterior elevations․ They cater to various styles, such as modern, farmhouse, or cottage designs, and are available for different bedroom and bathroom configurations․ Ideal for homeowners, architects, and contractors, these plans offer a cost-effective way to visualize and plan construction projects․ They can be customized to suit specific needs and are often shared with professionals for precise execution․

Benefits of Using Free House Plans

Free house plans offer numerous advantages, including cost savings and flexibility․ They provide a starting point for designing your home, allowing you to explore various styles and layouts without financial commitment․ These plans are easily accessible and can be customized to meet specific needs․ They also save time by providing pre-designed structures, reducing the need for costly consultations; Additionally, free house plans are ideal for homeowners, architects, and contractors, enabling seamless collaboration and efficient project execution․

Popular Styles of Free House Plans

Free house plans offer a variety of styles, including Modern, Southern Farmhouse, and Cottage designs, catering to diverse tastes and preferences, easily accessible online․

Modern House Plans

Modern house plans emphasize sleek designs, open layouts, and minimalistic aesthetics․ These plans often feature large windows, geometric shapes, and eco-friendly elements․ Available for free download in PDF format, modern house plans cater to contemporary tastes, offering flexibility for customization․ They include detailed floor plans, exterior elevations, and structural elements, making it easy to visualize and execute your dream home․ Perfect for urban and suburban settings, modern designs blend functionality with style, providing a perfect blend of comfort and sophistication for homeowners seeking a trendy living space․

Southern Farmhouse Plans

Southern Farmhouse plans combine timeless charm with practical layouts, often featuring wrap-around porches, gabled roofs, and cozy interiors․ These designs emphasize functionality and warmth, making them ideal for families seeking a welcoming home․ Available in free PDF downloads, Southern Farmhouse plans include detailed floor layouts, exterior elevations, and structural elements․ They cater to both rural and suburban settings, offering a blend of traditional aesthetics and modern comfort․ Perfect for those who appreciate classic country-style living, these plans provide a perfect balance of simplicity and elegance․

Cottage House Plans

Cottage house plans are perfect for those seeking a cozy, charming home with a warm, inviting atmosphere․ These designs often feature compact layouts, with one or two bedrooms, ideal for small families or individuals․ Many free PDF cottage plans include porches, gabled roofs, and traditional detailing, blending simplicity with character․ They are versatile, suitable for both rural and suburban settings, and can be easily customized to suit personal preferences․ Downloadable cottage house plans provide a great starting point for creating a quaint, affordable dream home with timeless appeal․

Features of Free House Plan PDFs

Free house plan PDFs typically include detailed foundation plans, plumbing layouts, and exterior/interior elevations, providing a comprehensive guide for construction and design․ These files are ready for customization and sharing with professionals․

Foundation Plan

A foundation plan is a crucial component of free house plan PDFs, detailing the layout and structural elements of the base․ It includes slab, crawl space, or basement designs, showcasing footings, walls, and other critical components․ This plan ensures the house is built on a stable and durable base, adhering to local building codes․ Contractors and architects use this plan to verify dimensions and materials, ensuring compliance with structural integrity requirements before construction begins․

Plumbing Plan

A plumbing plan within free house plan PDFs outlines the water supply, drainage, and waste systems․ It details pipe layouts, fixture locations, and connections, ensuring proper water distribution and sewage disposal․ This plan is essential for contractors to install systems correctly․ It may include water heaters, sinks, toilets, and showers, ensuring compliance with local plumbing codes․ Verifying these details is crucial before construction to avoid costly modifications later․

Exterior and Interior Elevations

Exterior and interior elevations in free house plan PDFs provide detailed views of a home’s front, side, and rear facades, showcasing materials, heights, and architectural style․ These drawings highlight roof pitches, window placements, and door designs, offering a visual guide for construction․ Interior elevations focus on room-specific features like kitchen layouts, cabinetry, and built-in shelves․ Measurements and notes are often included, ensuring clarity for builders․ These elevations help visualize the final appearance and structural integrity of the home, aiding in compliance with local building codes and design preferences․

How to Download Free House Plans

Visit the website, browse through various house plans, and select the desired design․ Follow the download link, complete the subscription or verification process, and access the PDF files instantly․

Steps to Download PDF Plans

To download free house plans, visit a reputable website offering free PDF downloads․ Browse the catalog, select your preferred design based on bedrooms, style, or size․ Click the download link, review the plan details, and proceed to the checkout or subscription page․ Some sites require email verification or newsletter subscription․ Once verified, the PDF will be available for instant download․ Ensure the plan includes all necessary details like floor layouts, elevations, and structural elements․ Always check for compliance with local building codes and regulations before construction begins․

Verification and Subscription Process

Downloading free house plans often requires a simple verification and subscription process․ Users typically create an account by providing an email address and completing a short registration form․ Some platforms may ask for basic information to tailor their services․ After signing up, you’ll receive a confirmation email to verify your account․ Once verified, you can access and download PDF house plans instantly․ This process ensures that users receive updates and exclusive content, while also maintaining the security and quality of the plans provided․

Customizing Free House Plans

Free house plans in PDF allow customization using tools like AutoCAD or SketchUp․ Users can modify layouts, adjust dimensions, and tailor designs to suit specific needs and preferences․

Tools for Customization

Free house plans in PDF can be customized using tools like AutoCAD and SketchUp, allowing users to edit layouts, adjust dimensions, and add custom features․ These software options enable precise modifications, such as resizing rooms, altering facades, or reconfiguring floor plans to meet specific needs․ Many PDF plans are compatible with these tools, providing flexibility for homeowners, architects, and contractors to tailor designs effectively․ This ensures that the final blueprint aligns with personal preferences and construction requirements․

Sharing Plans with Architects and Contractors

Sharing free house plans in PDF format with architects and contractors ensures seamless collaboration․ These plans are ready to download and include detailed elements like floor layouts, elevations, and structural details, making it easy for professionals to understand and execute the design․ Compatibility with tools like AutoCAD allows for further customization, ensuring the final project meets all specifications․ This efficient sharing process helps bring your vision to life effectively and streamlines the construction process․

Legal Considerations

Downloading free house plans requires adherence to legal standards․ Ensure plans comply with local building codes and regulations․ Verify dimensions and structural elements with professionals before construction begins․

Plan Review and Permit Process

The permit process involves submitting your house plans for review by local building authorities․ Contractors must verify all dimensions and structural elements to ensure compliance with safety standards․ Avoid scaling measurements from printed plans, as they may expand during printing․ Ensure all plans comply with local building codes and regulations before construction begins․ This step is crucial for obtaining necessary permits and avoiding legal issues during the building process․

Verification of Dimensions and Structural Elements

Verifying dimensions and structural elements is critical before construction begins․ Contractors must ensure all measurements are accurate and comply with local building codes․ Avoid scaling distances from printed plans, as they may expand during printing․ Verify foundation layouts, plumbing systems, and elevations for consistency․ This step ensures the plan is feasible and meets safety standards․ Any discrepancies must be addressed to prevent construction delays or legal issues․ Accurate verification guarantees a structurally sound and compliant building design․

Popular Free House Plan Websites

Houseplansdirect and American Design Concepts are top sites offering free house plans in PDF format․ They provide a wide range of styles, making it easy to download and customize your ideal home design․

Houseplansdirect

Houseplansdirect is a leading platform offering a wide range of free house plans in PDF format․ It provides instant downloads, making it easy to access detailed designs․ The site features various architectural styles, from modern to farmhouse plans, catering to different preferences․ Users can download 3-bedroom house plans, 2bhk layouts, and more, all ready for customization․ The plans are ideal for sharing with architects or contractors, ensuring seamless execution․ By subscribing to their newsletter, users gain access to these free resources, helping them bring their dream home to life efficiently․

American Design Concepts

American Design Concepts offers a variety of free house plans in PDF format, along with construction drawings․ Users can download plans or request custom designs tailored to their needs․ The platform provides detailed PDFs, including floor plans, sections, and elevations, ensuring clarity and precision․ Plans are verified by contractors for accuracy and structural integrity․ This service is ideal for those seeking flexible and reliable designs, with options to adapt layouts to suit personal preferences and building requirements․ It’s a trusted resource for homeowners and professionals alike․

Free house plans in PDF format provide an accessible and convenient way to bring your dream home to life․ Explore, download, and customize today!

Final Thoughts on Free House Plans

Free house plans in PDF format are a fantastic resource for anyone looking to construct their dream home․ They offer a cost-effective and convenient way to explore various architectural styles and designs․ Whether you’re a homeowner, architect, or contractor, these plans provide a flexible starting point for your project․ With detailed layouts, elevations, and structural elements, they allow you to visualize and customize your home with ease․

Downloading free house plans is a great way to save time and money while ensuring your vision comes to life․ Explore the wide range of styles, from modern to farmhouse designs, and find the perfect fit for your needs․ Remember to verify dimensions and structural elements with professionals before construction․ Start your journey today and turn your dream home into a reality!

Encouragement to Explore and Download

Exploring and downloading free house plans in PDF format is a fantastic way to kickstart your dream home project․ With a wide variety of styles, from modern to Southern farmhouse designs, you can find the perfect blueprint to suit your preferences․ These plans are readily available, offering detailed layouts, elevations, and structural elements to help you visualize your space․ Customize them to fit your needs, share with architects or contractors, and bring your vision to life․ Start your journey today and make your dream home a reality!

PDF

hyaluronidase protocol pdf

Overview of Hyaluronidase and Its Role in Aesthetic and Medical Protocols

Hyaluronidase is a key enzyme used to dissolve hyaluronic acid fillers and manage vascular complications. It plays a crucial role in both aesthetic and medical applications, ensuring safety and efficacy in procedures.

Hyaluronidase is an enzyme that breaks down hyaluronic acid, a key component of connective tissue. Its mechanism involves hydrolyzing hyaluronic acid into smaller fragments, reducing viscosity and enhancing diffusion. In aesthetics, it is used to dissolve hyaluronic acid fillers and correct complications. Medically, it aids in subcutaneous fluid administration, improving hydration and drug dispersion. High-dose protocols are employed in emergencies like vascular occlusion, reversing ischemia. This versatility makes hyaluronidase indispensable in both fields, ensuring precise and effective outcomes. Its applications highlight its dual role in aesthetics and medicine, addressing both corrective and therapeutic needs with precision and safety.

1.2. Importance of Hyaluronidase in Dermal Filler Dissolution and Vascular Complications

Hyaluronidase is critical for resolving complications from hyaluronic acid dermal fillers, such as overcorrection or vascular occlusion. Its ability to enzymatically degrade hyaluronic acid makes it the primary tool for dissolving unwanted filler material. In cases of vascular compromise, hyaluronidase can restore blood flow by breaking down the filler and relieving pressure on blood vessels. High-dose pulsed protocols are often employed in emergencies to rapidly address ischemic tissue. This enzyme’s rapid action underscores its importance in both corrective aesthetics and medical emergencies, ensuring patient safety and minimizing long-term damage. Its role is indispensable in modern aesthetic and medical practices for managing complications effectively and safely.

Hyaluronidase Protocols for Aesthetic Applications

Hyaluronidase protocols in aesthetics involve high-dose treatments for reversing filler complications, with specific dosage guidelines and administration techniques to ensure safety and effectiveness in cosmetic procedures.

2.1. Reversing Hyaluronic Acid Filler Complications: High-Dose Pulsed Protocol

The high-dose pulsed protocol for reversing hyaluronic acid filler complications involves administering large volumes of hyaluronidase (450-1500 units) into ischemic tissue. Injections are repeated every 15-20 minutes, ensuring diffusion and resolution of symptoms. This method is critical for addressing vascular occlusions and restoring blood flow. Aseptic techniques are essential, using cannulas or needles to reach appropriate depths. The protocol emphasizes hourly injections until tissue perfusion improves. Proper dosage and administration techniques are vital to avoid further complications. Understanding tissue penetration and perfusion is key for effective treatment. Referral to specialized care may be necessary if symptoms persist beyond 2 hours. This approach ensures safety and efficacy in aesthetic emergencies.

2.2. Dosage Guidelines and Administration Techniques for Aesthetic Use

Dosage guidelines for hyaluronidase in aesthetic use vary based on the severity of complications. Typically, 450-1500 units are administered via high-dose pulsed injections. Proper preparation involves dissolving hyaluronidase in saline or sterile water, with aseptic techniques essential. Injections should target ischemic tissue using fine needles or cannulas to ensure precise delivery. Administering 0.5 to 1ml per injection site is recommended, with repeat doses every 15-20 minutes as needed. Allergy testing is crucial prior to administration to minimize anaphylaxis risks. Practitioners must adhere to standardized protocols to ensure safety and efficacy, tailoring treatments to individual patient needs. Correct technique and dosing are critical to avoid adverse effects and achieve optimal outcomes in reversing filler complications.

Hyaluronidase Protocols for Medical Applications

Hyaluronidase is used in medical settings for subcutaneous fluid administration and hydration enhancement. It facilitates drug dispersion and tissue permeability, aiding in ophthalmic and specialized procedures effectively.

3.1. Subcutaneous Fluid Administration and Hydration Enhancement

Hyaluronidase facilitates subcutaneous fluid administration by breaking down hyaluronic acid, enhancing hydration and drug dispersion. It improves tissue permeability, ensuring medications reach target areas effectively. This method is particularly useful in patients requiring rapid rehydration or those with limited intravenous access. The enzyme promotes uniform distribution of fluids, reducing swelling and discomfort. Proper dosage and administration techniques are crucial to optimize therapeutic outcomes. Hyaluronidase’s role in medical protocols highlights its versatility in addressing hydration challenges and improving patient care.

3.2. Use of Hyaluronidase in Ophthalmic and Other Specialized Procedures

Hyaluronidase is utilized in ophthalmology to reduce intraocular pressure and as an adjuvant in cataract surgery, enhancing visualization. It facilitates the breakdown of hyaluronic acid, improving surgical outcomes. In otolaryngology, it aids in reducing swelling and improving drug delivery in conditions like TMJ disorders. Its application in specialized procedures highlights its versatility in medical fields, ensuring precise tissue manipulation and enhanced therapeutic effects. Adherence to specific protocols is crucial to optimize its efficacy and safety in these sensitive applications.

Safety and Precautions in Hyaluronidase Administration

Allergy testing is mandatory before administration to minimize anaphylaxis risks. Proper injection techniques and adherence to dosage guidelines are critical to ensure safe and effective outcomes.

4.1. Allergy Testing and Anaphylaxis Risk Management

Allergy testing is essential before hyaluronidase administration to prevent severe allergic reactions. A forearm prick test or intradermal injection with a small dose is recommended. If anaphylaxis occurs, immediate intervention with epinephrine and emergency care is critical. Patients with a history of allergies or previous reactions to hyaluronidase should be closely monitored. Proper training and preparedness for anaphylaxis management are vital for healthcare providers. Adherence to safety protocols ensures patient well-being and minimizes risks associated with hyaluronidase use.

4.2. Contraindications and Special Considerations

Hyaluronidase is contraindicated in patients with known hypersensitivity to the enzyme or its components. Caution is advised in cases of active inflammation, infections, or skin conditions at the injection site. Pregnant or breastfeeding women should be treated with caution due to limited safety data. Patients with a history of severe allergic reactions require extra vigilance. Additionally, hyaluronidase should not be used in conjunction with certain medications that may interfere with its efficacy. Special considerations include patient age, overall health, and the underlying condition being treated. Proper patient selection and adherence to contraindications are crucial to minimize risks and optimize therapeutic outcomes.

Step-by-Step Hyaluronidase Protocol for Vascular Occlusion

Diagnose vascular obstruction promptly, then administer high-dose hyaluronidase injections hourly into ischemic tissue. Monitor for blood flow restoration and repeat as needed to ensure resolution.

5.1. Diagnosis and Initial Management of Vascular Obstruction

The diagnosis of vascular obstruction requires immediate clinical assessment, including signs like skin discoloration, pain, and blanching. Confirm obstruction via imaging if necessary. Initial management involves halting filler injection and preparing for hyaluronidase administration. Conduct a thorough physical exam to assess tissue viability and blood flow. Monitor for ischemic changes and document findings. Ensure patient stability and prepare for emergency interventions if needed. Administer oxygen and analgesics as required. Prompt diagnosis is critical to prevent tissue necrosis and long-term damage. Time-sensitive action is essential to restore blood flow and minimize complications.

5.2. Hourly High-Dose Hyaluronidase Injections for Ischemic Tissue

Hourly high-dose hyaluronidase injections are critical for ischemic tissue management. Administer 450-1500 units of hyaluronidase, reconstituted in saline, directly into affected areas. Use aseptic technique with a cannula or needle to ensure precise delivery. Monitor tissue response and adjust dosage as needed. Repeat injections every 30 minutes to an hour, depending on symptom resolution; Continue until blood flow is restored and ischemia subsides. Maintain patient monitoring for anaphylaxis risks, though rare. This aggressive approach aims to rapidly dissolve HA fillers, relieve obstruction, and salvage tissue. Consistent, high-dose administration is vital for effective outcomes in vascular compromise scenarios. Immediate intervention can prevent permanent damage and improve patient recovery.

Hyaluronidase remains vital in aesthetic and medical protocols, with emerging research exploring its expanded applications and safety optimizations, ensuring its continued relevance in modern practice and innovation.

6.1. Emerging Trends and Research in Hyaluronidase Applications

Recent advancements in hyaluronidase research focus on optimizing its use in aesthetic and medical fields. Studies explore modified high-dose protocols to enhance efficacy in dissolving hyaluronic acid fillers and managing vascular occlusions. Innovations in formulation and administration techniques aim to improve patient outcomes and minimize risks. Additionally, investigations into its inhibitory activity and structural modifications open new avenues for therapeutic applications. The development of standardized guidelines ensures safe practices, while ongoing clinical trials assess long-term benefits and potential expansions into new medical areas, solidifying hyaluronidase’s role as a versatile and evolving tool in modern medicine and aesthetics.

6.2. The Role of Hyaluronidase in Modern Aesthetic and Medical Practice

Hyaluronidase has become a cornerstone in both aesthetic and medical practices due to its versatility and efficacy. In aesthetics, it is primarily used to reverse hyaluronic acid filler complications, addressing issues like vascular occlusions and uneven results. Its ability to dissolve fillers safely and effectively has made it indispensable in corrective procedures. Medically, hyaluronidase enhances fluid dispersion in subcutaneous tissues, aiding hydration and drug delivery. It also finds applications in ophthalmology and emergency medicine. With standardized protocols and high-dose pulsed regimens, hyaluronidase ensures precision and safety, making it a critical tool for practitioners. Its role continues to expand, supported by research and clinical guidelines, solidifying its importance in modern practice.