sock length guide
Sock Length Guide: A Comprehensive Overview (Updated November 2, 2026)
Navigating the world of socks requires understanding length variations – from virtually invisible no-shows to statement-making over-the-knee styles, impacting both function and fashion․
Sock length is a surprisingly crucial element of both style and practicality․ Choosing the right height impacts comfort, performance, and overall aesthetic․ From barely-there no-show socks designed for a hidden look, to supportive knee-highs and bold over-the-knee options, the spectrum is vast․
Understanding these differences, and when to utilize each length, is key to a well-coordinated and comfortable wardrobe․ This guide will explore each type in detail․
No-Show Socks: The Invisible Option
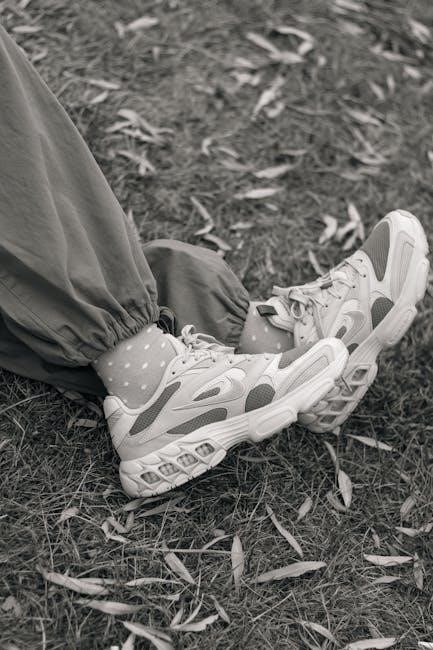
No-show socks, also known as invisible or liner socks, are designed to be hidden within shoes․ They offer a clean, barefoot aesthetic while still providing a layer of comfort and moisture-wicking protection․ Typically made from lightweight materials, they prioritize discretion and a seamless look․
Characteristics of No-Show Socks
These socks feature a very low cut, often with a silicone grip heel to prevent slipping․ They are commonly crafted from materials like cotton, nylon, or spandex blends for a snug, secure fit․ No-show socks prioritize a minimalist profile, offering minimal coverage beyond the footbed itself, ensuring invisibility within footwear․
Best Uses for No-Show Socks
No-show socks excel with loafers, ballet flats, and sneakers where you desire a sockless appearance․ They are ideal for warmer weather, preventing visible sock lines and maintaining a streamlined aesthetic․ These socks are also suitable for casual settings and activities where discreet comfort is paramount, like everyday wear․

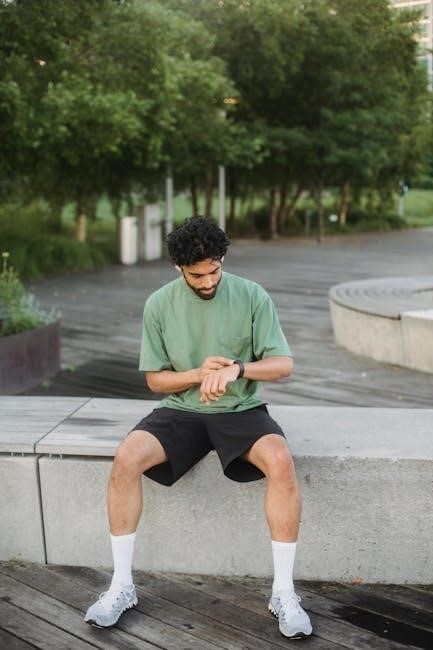
Ankle Socks: A Classic Choice
Ankle socks represent a versatile and enduring style, hitting just at or slightly above the ankle bone․ They offer a balance between coverage and a sporty look, making them a popular everyday option․ These socks are frequently paired with sneakers, casual shoes, and athletic footwear for comfort and style․
Defining Ankle Sock Height
Typically, ankle socks measure between 6 to 8 inches in height, though variations exist․ This height ensures the sock sits comfortably around the ankle, without extending significantly up the calf․ The precise placement can differ based on individual ankle size and sock design, offering a snug, secure fit for various activities․
Activities Suitable for Ankle Socks
Ankle socks excel in low-impact activities like walking, casual sports, and everyday wear․ They pair well with sneakers and athletic shoes, providing comfort and breathability․ Ideal for warmer weather, they offer sufficient coverage without overheating the feet, making them a versatile choice for numerous situations․
Quarter Socks: Bridging the Gap
Quarter socks offer a height between ankle and crew socks, providing extra ankle protection without the bulk․ They’re a practical compromise, suitable for various activities․ These socks bridge the gap, offering more coverage than ankle socks while remaining discreet within most shoe types, enhancing comfort and performance․
What are Quarter Socks?
Quarter socks typically rise approximately 4-6 inches above the ankle, offering a noticeable, yet not overwhelming, amount of coverage․ They are designed to sit just above the ankle bone, providing a snug fit and preventing rubbing․ This length makes them versatile, blending functionality with a subtle aesthetic․
Ideal for Sports and Casual Wear
Quarter socks excel in athletic activities like running, tennis, and training, offering blister protection without excessive bulk․ Their moderate height suits everyday casual outfits, pairing well with sneakers and loafers․ They provide comfort and a secure fit during various movements, making them a practical choice․
Crew Socks: Versatility and Comfort
Crew socks represent a standard length, extending mid-calf, offering a balance of coverage and flexibility․ They are incredibly versatile, suitable for everyday wear with sneakers, boots, or even casual dress shoes․ Providing ample cushioning and warmth, they’re ideal for moderate activity levels and diverse weather conditions․
The Standard Crew Sock Length
Typically, crew socks measure between 6 and 8 inches in height when laid flat, reaching mid-calf on most individuals․ This consistent length makes them a reliable choice for various footwear and outfits․ They offer a comfortable, secure fit without being overly constricting, providing a classic aesthetic․
Everyday Wear and Moderate Activity
Crew socks excel in daily life, pairing seamlessly with sneakers, casual shoes, and even some boots․ Their moderate coverage suits walking, light jogging, and general activity․ They provide cushioning and support for all-day comfort, making them a versatile staple in any sock drawer, blending practicality with style․
Mid-Calf Socks: A Step Up in Coverage
Mid-calf socks extend further up the leg than crew socks, offering increased warmth and protection․ They are ideal for activities like hiking, where shielding the lower calf is beneficial, or for those who simply prefer more coverage․ These socks provide a secure fit and noticeable comfort boost․
Distinguishing Mid-Calf Socks
Mid-calf socks are easily identified by their height, typically falling 2-4 inches above the ankle․ This differentiates them from shorter crew socks and longer knee-high options․ They offer a balanced aesthetic, providing substantial leg coverage without the dramatic flair of taller sock lengths, making them versatile․
Benefits for Specific Activities
Mid-calf socks excel during moderate activity, offering shin protection during sports like soccer or running․ Their length aids circulation and prevents chafing, proving beneficial for hiking and cycling․ They also provide a comfortable barrier within boots, enhancing overall foot health and performance during various pursuits․
Knee-High Socks: Style and Support
Knee-high socks deliver substantial coverage, blending fashion with practical support․ They’re popular in sports like volleyball and field hockey, providing shin protection and compression․ Beyond athletics, they make bold fashion statements, pairing well with skirts and dresses, or offering warmth during colder seasons․
Understanding Knee-High Sock Coverage
Knee-high socks, as the name suggests, extend to just below the knee, offering significant leg coverage․ This length provides enhanced support for muscles during activity and can contribute to improved circulation․ They often feature reinforced heels and toes for durability, making them suitable for varied uses․
Fashion, Sports, and Compression Uses
Knee-high socks are versatile, finding applications in fashion, athletics, and medical contexts․ They complement skirts and dresses, add flair to outfits, and provide warmth during colder months; Athletes utilize them for support, while compression versions aid circulation and reduce muscle fatigue during and after exercise․
Over-the-Knee Socks: Making a Statement
Over-the-knee socks boldly express personal style, extending significantly above the knee for a dramatic look․ Often paired with skirts, dresses, or shorts, they create a fashionable silhouette․ These socks aren’t solely for aesthetics; they also offer extra warmth and can be incorporated into cosplay or themed outfits․
Characteristics of Over-the-Knee Socks
Typically crafted from materials like wool, cotton, or synthetic blends, over-the-knee socks prioritize both comfort and durability․ They often feature ribbed designs for a secure fit, preventing slippage throughout the day․ Variations include cable-knit patterns, lace detailing, and reinforced heels and toes for longevity․
Fashion-Forward Applications

Over-the-knee socks are a versatile fashion statement, pairing beautifully with skirts, dresses, and shorts for a chic, layered look․ They can elevate casual outfits or add a playful touch to more formal ensembles․ Bold colors and patterns make a statement, while neutral tones offer subtle sophistication․
Compression Socks: Health and Performance
Compression socks come in varying lengths, directly influencing compression levels and targeted benefits․ They aid circulation, reduce swelling, and alleviate leg fatigue, benefiting athletes and individuals with medical conditions․ Lengths range from ankle to thigh-high, addressing specific needs and providing graduated pressure for optimal support․
Sock Length and Compression Levels
The length of a compression sock correlates with the area of compression applied․ Ankle socks target foot and lower leg issues, while knee-high options address calf muscle support and circulation․ Thigh-high compression is utilized for more extensive venous insufficiency, offering graduated pressure for maximum therapeutic effect․
Uses for Compression Socks (Medical & Athletic)
Medically, compression socks aid circulation, reduce swelling, and prevent DVT during travel or post-surgery․ Athletically, they enhance performance by improving blood flow, reducing muscle fatigue, and accelerating recovery․ Runners, nurses, and individuals with venous insufficiency commonly benefit from consistent compression sock use․
Sock Length for Different Shoe Types

Sneakers generally pair well with no-show, ankle, or quarter socks for a casual look, while boots often require crew or mid-calf socks for coverage and comfort․ Consider the boot height; taller boots necessitate longer socks to prevent chafing and maintain a polished appearance․
Socks with Sneakers
For sneakers, no-show socks offer an invisible aesthetic, while ankle and quarter socks provide a classic, sporty vibe․ Crew socks can work with high-top sneakers, but avoid overly long socks that bunch or peek out awkwardly․ Prioritize breathability and moisture-wicking materials for optimal comfort during activity․
Socks with Boots
With boots, sock length is crucial for comfort and style․ Mid-calf socks are ideal for preventing rubbing and adding warmth, especially with taller boots․ Crew socks work well with shorter boots, while knee-high socks can add a fashionable layer under riding boots․ Avoid no-show socks, as they won’t provide sufficient protection․
Sock Length and Dress Codes
Sock length significantly impacts adherence to dress codes․ Business casual generally allows crew or mid-calf socks in coordinating colors․ Formal occasions typically demand dark, over-the-calf socks to avoid leg exposure when seated․ Avoid ankle or no-show socks with suits; they appear too casual and detract from a polished appearance․
Business Casual Sock Guidelines
For business casual settings, crew and mid-calf socks are generally preferred․ Colors should complement, not clash with, trousers and shoes – navy, gray, or muted earth tones are safe choices; Subtle patterns are acceptable, but avoid overly bold or distracting designs․ Ensure socks are clean and free of holes for a professional look․
Formal Occasion Sock Choices
For formal events, over-the-calf socks are the standard, ensuring no leg is exposed when seated․ Black is the most traditional and versatile color, pairing seamlessly with dark suits․ Matching the sock color to your trousers creates a sophisticated, elongated leg line․ Quality materials like merino wool or silk elevate the overall ensemble․
Materials and Sock Length
Sock material significantly influences length preference and performance․ Thicker materials like wool often suit longer lengths for warmth, while thinner synthetics work well with no-show or ankle styles․ Breathability and moisture-wicking are crucial; merino wool excels in both․ Consider the activity – athletic socks prioritize performance fabrics regardless of length․
How Material Affects Sock Length Preference
Material weight dictates ideal sock length․ Heavier materials like wool benefit from longer lengths to prevent slippage and provide consistent warmth․ Lighter synthetics pair well with shorter socks, offering breathability․ Texture also matters; ribbed materials grip better in ankle socks, while smoother fabrics suit no-shows․
Breathability and Moisture-Wicking Considerations
Sock length impacts airflow and moisture control․ Shorter socks, like no-shows, offer less coverage, promoting ventilation during warm weather․ Longer lengths, especially with moisture-wicking materials, are crucial for high-intensity activities․ Consider the climate and activity level; synthetic blends excel at keeping feet dry and comfortable․
Finding the Right Sock Length for Your Needs
Determining ideal sock length requires balancing activity and personal preference․ Higher-impact activities benefit from more coverage and support, while casual wear allows for greater flexibility․ Prioritize comfort and consider the shoe type․ Don’t underestimate style – choose lengths that complement your overall aesthetic!
Considering Activity Level
High-intensity workouts demand performance-focused sock lengths like crew or mid-calf, offering crucial support and blister prevention․ Lower-impact activities, or daily wear, allow for ankle or no-show options․ Prioritize moisture-wicking materials for prolonged activity․ Matching sock length to exertion level maximizes comfort and performance․
Personal Style and Comfort
Ultimately, sock length is a personal choice blending aesthetics and feel․ Experiment with different lengths to discover what complements your outfits and provides optimal comfort․ Don’t be afraid to embrace trends, but prioritize a secure, non-restrictive fit․ Style and comfort should coexist harmoniously in your sock selection․
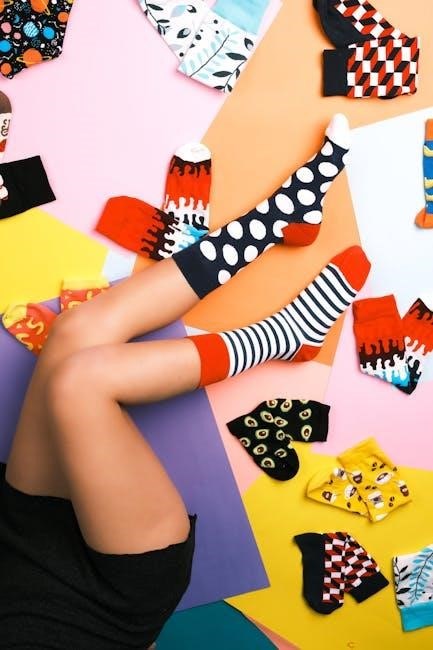
Trends in Sock Lengths (2026)
In 2026, expect a resurgence of quarter and crew lengths, offering a balance of style and practicality․ Bold patterns and vibrant colors are gaining traction, moving beyond traditional neutrals․ Sheer and textured over-the-knee socks are emerging as fashion statements, while compression sock designs are becoming more integrated into everyday wear․
Emerging Sock Length Styles
A notable trend is the rise of “slouch” socks, intentionally oversized crew or mid-calf styles worn wrinkled for a relaxed aesthetic․ Micro-compression ankle socks, blending support with discreetness, are also gaining popularity․ Experimentation with asymmetrical lengths and cut-outs is appearing, pushing boundaries beyond conventional sock designs․
Popular Color and Pattern Combinations
Bold, geometric patterns remain strong, particularly in crew and quarter lengths, offering a playful contrast to minimalist outfits․ Earth tones – olive, rust, and terracotta – are trending, complementing autumnal wardrobes․ Sheer or semi-sheer options, often in jewel tones, are gaining traction for evening wear, adding subtle sophistication․
Caring for Socks of Different Lengths
Delicate materials like merino wool require gentle, cold-water washing and air drying to prevent shrinkage and maintain shape․ Compression socks benefit from hand washing to preserve elasticity․ Turn all socks inside out before washing to minimize abrasion and fading․ Avoid harsh detergents and bleach, opting for mild, color-safe options․
Washing and Drying Recommendations

Always wash socks in a mesh laundry bag to prevent loss and protect delicate fibers․ Use a gentle cycle with cold water and a mild detergent․ Avoid high heat in the dryer, as it can damage elastic and cause shrinkage․ Air drying is preferable, especially for compression and wool socks․
Extending Sock Lifespan
Rotate your sock collection regularly to distribute wear and tear․ Repair small holes promptly to prevent them from growing․ Avoid over-washing, as it weakens fibers․ Store socks properly, paired and rolled or folded, to maintain their shape and elasticity․ Consider using sock garters!