sri krishna ashtakam in telugu pdf
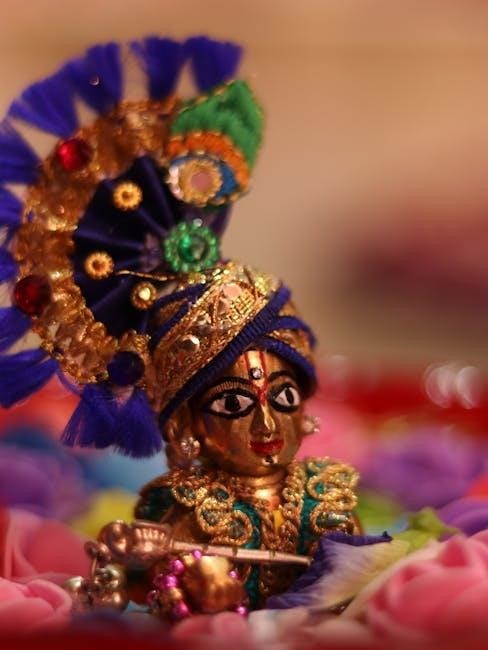
Sri Krishna Ashtakam is an 8-verse hymn dedicated to Lord Krishna‚ praising his divine qualities and deeds. Available in Telugu PDF‚ it is a cherished devotional text for spiritual seekers.

Structure and Significance
Sri Krishna Ashtakam is an 8-verse hymn‚ each describing Krishna’s divine qualities‚ deeds‚ and beauty. The verses end with “Krishnam Vande Jagadgurum‚” emphasizing Krishna’s role as the ultimate spiritual guide.
2.1 Overview of the 8 Verses
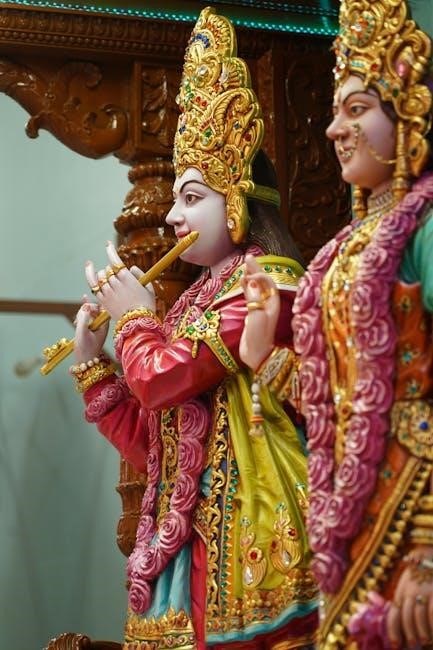
Sri Krishna Ashtakam consists of 8 verses‚ each glorifying Lord Krishna’s divine qualities‚ deeds‚ and enchanting beauty. The hymn captures his flute-playing charm‚ divine love‚ and spiritual guidance. Each verse concludes with the phrase “Krishnam Vande Jagadgurum‚” reaffirming Krishna as the ultimate spiritual teacher. The verses are rich in imagery and symbolism‚ detailing Krishna’s divine attributes and his role as a divine protector and savior. This devotional text is deeply revered in Hindu spirituality‚ offering a poetic and emotional connection to Krishna. The Telugu version of the hymn is widely cherished‚ making it accessible to devotees who seek spiritual solace and blessings through its recitation.
2.2 Cultural and Religious Significance
Sri Krishna Ashtakam holds profound cultural and religious significance in Hindu devotional practices‚ particularly in Telugu-speaking communities. It is a cherished hymn that embodies the divine essence of Lord Krishna‚ fostering spiritual connection and emotional solace. The text is often recited during rituals‚ pujas‚ and daily worship‚ serving as a means to express devotion and seek blessings. Its cultural importance lies in its ability to preserve and promote the rich spiritual heritage of Hinduism. In temples and homes‚ the Ashtakam is sung with reverence‚ creating a sense of unity among devotees. The Telugu version further enhances its accessibility‚ allowing devotees to immerse themselves in the divine praise of Krishna. This sacred hymn is not only a literary masterpiece but also a vital part of the cultural and religious fabric of the community.

Benefits of Recitation
Reciting Sri Krishna Ashtakam fosters spiritual growth‚ emotional solace‚ and mental clarity. It is believed to bring devotees closer to Lord Krishna‚ seeking his divine blessings and grace.
3.1 Spiritual Benefits
Reciting Sri Krishna Ashtakam offers profound spiritual benefits. It deepens one’s connection with Lord Krishna‚ fostering devotion and inner peace. The hymn is believed to purify the soul‚ remove past karmic obstacles‚ and grant spiritual enlightenment. By chanting the verses‚ devotees experience a heightened sense of divine presence‚ leading to self-realization and liberation. The Ashtakam also serves as a powerful tool for meditation‚ helping seekers focus on their spiritual journey. Regular recitation is said to invoke Krishna’s blessings‚ providing guidance and strength in navigating life’s challenges. This sacred text is thus a cornerstone for those seeking spiritual growth and a deeper understanding of divine love.
3.2 Emotional and Mental Benefits
Reciting Sri Krishna Ashtakam in Telugu PDF offers numerous emotional and mental benefits. It helps alleviate stress and anxiety‚ bringing calmness to the mind. The hymn’s soothing verses foster positivity‚ enhancing emotional resilience and mental clarity. Regular recitation cultivates gratitude and contentment‚ reducing negativity and fostering inner harmony. It also strengthens focus and concentration‚ benefiting overall mental well-being. Devotees often report feeling emotionally uplifted and mentally refreshed after chanting the Ashtakam. The rhythmic and devotional nature of the text creates a sense of balance‚ aiding in emotional healing and stability. By immersing oneself in its divine verses‚ one can experience profound peace and tranquility‚ making it a valuable practice for emotional and mental wellness;

Downloading the PDF
The Sri Krishna Ashtakam in Telugu PDF can be downloaded from reliable sources online. Follow the provided links to access and download the document easily.
4.1 Reliable Sources for Download
To download the Sri Krishna Ashtakam in Telugu PDF‚ rely on trusted platforms like Vaidika Vignanam or Telugu Devotionals. These sites offer authentic‚ error-free texts in multiple Indian languages. Ensure the source is reputable to maintain the sanctity of the hymn. Always verify the credibility of the website before downloading to avoid incorrect or incomplete versions. Some platforms also provide additional resources‚ such as recitation guides or translations‚ enhancing your spiritual experience. Choose sites with clear download links and user-friendly interfaces for a seamless experience. By selecting reliable sources‚ you can ensure the text’s purity and accuracy‚ making your devotional practice meaningful and effective.
4.2 Steps to Download the PDF
To download the Sri Krishna Ashtakam in Telugu PDF‚ visit a trusted website like telugudevotionalswaranjali;blogspot.com or Vaidika Vignanam. Navigate to the section dedicated to devotional texts or stotras. Search for “Sri Krishna Ashtakam” in the search bar. Select the correct link‚ ensuring it specifies the Telugu version. Click on the download button provided on the page. Some sites may require you to sign in or complete a captcha for verification. Once verified‚ the PDF will begin downloading automatically. Save the file to your device in a dedicated folder for easy access. Ensure the download is complete before opening to avoid corrupted files. Follow these steps to obtain a clear and readable version of the hymn for your spiritual practice.
Recitation Guidelines
Recite Sri Krishna Ashtakam early morning after bath‚ in a clean space‚ with focus and devotion. Chant clearly‚ maintaining rhythm and mental concentration for spiritual connection and blessings.
5.1 Best Practices for Recitation
For effective recitation of Sri Krishna Ashtakam‚ begin early in the morning after completing your daily rituals and bath. Ensure your worship space is clean and serene‚ fostering a conducive environment for devotion. Sit comfortably with a focused mind‚ avoiding distractions. Recite each verse with clarity and proper pronunciation‚ maintaining the rhythm and meter of the hymn. Offer prayers or flowers to Lord Krishna before starting‚ enhancing the spiritual experience. Chanting with devotion and concentration amplifies the benefits‚ connecting you deeply with the divine energy of Lord Krishna. Regular and consistent recitation is highly recommended for spiritual growth and inner peace.
5.2 Rituals and Tips for Effective Recitation
For an enriching experience‚ perform a quick purification ritual by sprinkling holy water in the worship area. Light incense or a lamp to create a sacred ambiance. Offer flowers or tulsi leaves to Lord Krishna before reciting. Maintain focus by closing your eyes and visualizing Krishna’s divine form. Avoid interruptions by ensuring a quiet environment. Recite the hymn with devotion‚ allowing emotions to flow naturally. Learning the correct pronunciation and meaning of each verse enhances the spiritual impact. Recitation can be accompanied by soft instrumental music to deepen concentration. Regular practice‚ ideally during Brahma Muhurta (early morning)‚ is highly beneficial. Chanting with a steadfast mind and pure heart amplifies the spiritual benefits‚ fostering inner peace and divine connection.
Historical Background and Authorship
Sri Krishna Ashtakam is a devotional hymn composed by the revered philosopher and theologian Adi Shankaracharya. This sacred text is available in Telugu PDF for devotees worldwide.
6.1 The Composer and Historical Context
The Sri Krishna Ashtakam is traditionally attributed to the revered philosopher and theologian Adi Shankaracharya‚ an 8th-century CE scholar who revitalized Hindu philosophy. Composed in Sanskrit‚ this hymn reflects the spiritual and cultural ethos of ancient India‚ emphasizing devotion to Lord Krishna. The text is structured into eight verses‚ each extolling Krishna’s divine qualities and deeds‚ concluding with the refrain “Krishnam Vande Jagadgurum” (“I bow to Krishna‚ the Guru of the universe”). Its historical context places it within the Bhakti movement‚ which celebrated personal devotion to deities. Available in Telugu PDF‚ this hymn remains a cornerstone of Krishna devotion‚ resonating with spiritual seekers and scholars alike. Its timeless appeal lies in its ability to connect devotees with Krishna’s divine essence‚ fostering a deeper sense of reverence and spiritual alignment.