Archive: February 27, 2026

stihl fs45 parts manual pdf

Stihl FS45 Parts Manual PDF: A Comprehensive Guide

Navigating the intricacies of your Stihl FS45 requires a detailed parts manual, often available as a PDF․ Accessing diagrams and part numbers simplifies maintenance and repair processes․

The Stihl FS45 is a popular, lightweight gasoline-powered string trimmer, widely used by homeowners and landscaping professionals alike․ Known for its reliability and ease of use, maintaining this tool requires understanding its components and having access to accurate information․ A crucial resource for any FS45 owner is the parts manual, often found in PDF format․

This manual provides detailed exploded view diagrams, illustrating how each part fits together, and lists corresponding part numbers․ Whether you’re performing routine maintenance, like replacing a string trimmer head, or tackling more complex repairs, such as carburetor adjustments, the FS45 parts manual is indispensable․ It ensures you order the correct replacement parts, streamlining the repair process and maximizing the lifespan of your trimmer․

Understanding the Importance of a Parts Manual

A Stihl FS45 parts manual is far more than just a list of components; it’s a vital tool for successful maintenance and repair․ Without it, identifying the correct replacement parts becomes a frustrating guessing game․ The manual’s exploded view diagrams visually demonstrate how everything assembles, preventing errors during reassembly․

Accurate part numbers are essential for ordering replacements, ensuring compatibility and avoiding costly mistakes․ Furthermore, the manual often includes torque specifications, crucial for proper tightening and preventing damage․ Ultimately, a parts manual empowers owners to perform repairs confidently, saving time and money compared to professional servicing․

Locating the Stihl FS45 Parts Manual PDF

Finding your Stihl FS45 manual PDF involves checking the official Stihl website or exploring reliable third-party databases for diagrams and parts lists․

Official Stihl Website Resources

Stihl’s official website is the primary source for authentic FS45 parts manuals in PDF format․ Navigating to the support section allows users to search for documentation using the model number – FS45․ Typically, you can find detailed exploded view diagrams, comprehensive parts lists, and even interactive resources․

Registration may be required to access certain documents, ensuring you receive the most up-to-date information․ Stihl often provides manuals for various production years, so verifying the correct version for your specific trimmer is crucial․ Downloading directly from Stihl guarantees a legitimate and accurate resource for all your parts identification and repair needs, avoiding potential inaccuracies found elsewhere․

Third-Party Online Manual Databases

Numerous online databases compile manuals for various equipment, including the Stihl FS45․ These platforms often offer a convenient alternative when direct access from the official Stihl website is limited․ However, it’s vital to exercise caution, as the accuracy and completeness of these manuals can vary significantly․

Popular sites may include owner’s manuals, repair guides, and parts lists, sometimes offering downloadable PDF versions․ Always cross-reference information with official Stihl resources when possible to ensure reliability․ Be wary of sites requesting excessive personal information or displaying suspicious advertisements before granting access to the manual․

Potential Costs Associated with Manual Access

While many resources offer the Stihl FS45 parts manual PDF free of charge, some avenues may incur costs․ Official Stihl dealers might charge a fee for a printed copy, or for accessing detailed digital versions through their service portals․ Third-party websites, while often providing free access, sometimes operate on a subscription model for comprehensive databases․

Additionally, purchasing a physical manual through online retailers like eBay or Amazon will involve the cost of the manual itself, plus shipping fees․ Beware of websites promising “free” manuals that redirect to paid services or require registration with questionable terms․

Key Components and Their Parts

The Stihl FS45 comprises essential systems: engine, cutting head, and controls․ Detailed parts lists, found in the manual, cover each component for effective repairs․

Engine Components

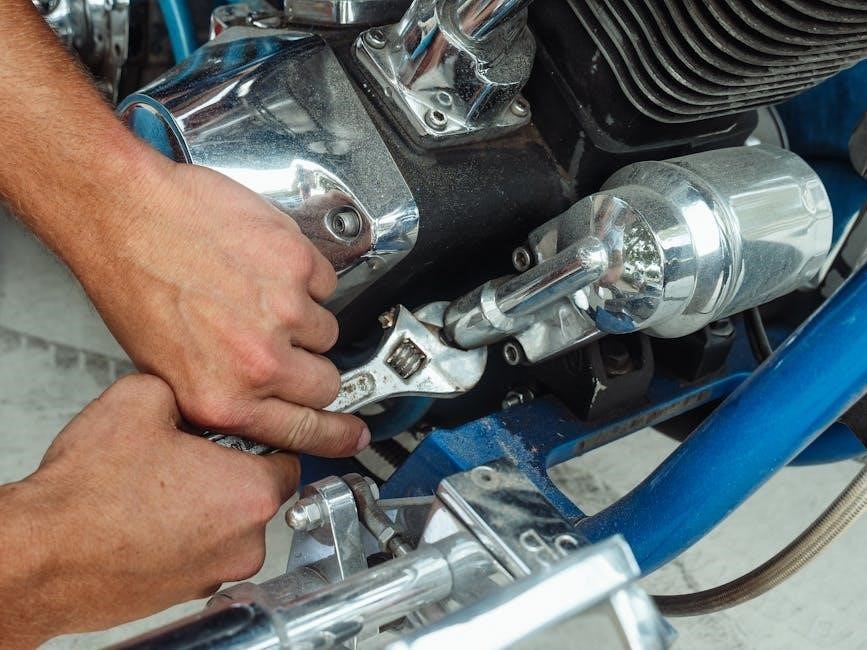
The engine is the heart of the Stihl FS45, and its components require careful attention during maintenance․ A comprehensive parts manual PDF details every aspect, from the cylinder and piston assembly to the intricacies of the carburetor and fuel system․ Understanding these parts is crucial for diagnosing issues like starting problems or fuel leaks․

Furthermore, the ignition system parts – spark plug, ignition coil – are clearly illustrated with corresponding part numbers․ Accessing exploded view diagrams within the manual allows for easy identification and proper reassembly, ensuring optimal engine performance and longevity․ Genuine Stihl parts are recommended for reliable operation․

Cylinder and Piston Assembly

The Stihl FS45’s cylinder and piston assembly are critical for engine compression and power․ A detailed parts manual PDF provides exploded views showcasing each component – cylinder, piston, connecting rod, and piston rings – with precise part numbers for easy identification․ Proper reassembly requires understanding torque specifications, also found within the manual․

Wear and tear on these parts can lead to reduced performance or engine failure․ The manual aids in diagnosing issues like piston scuffing or cylinder damage․ Using genuine Stihl replacement parts ensures compatibility and maintains the engine’s original performance characteristics, extending its lifespan․

Carburetor and Fuel System

The Stihl FS45 carburetor and fuel system, detailed in the parts manual PDF, regulate the air-fuel mixture for optimal engine operation․ Exploded diagrams illustrate components like the carburetor itself, fuel tank, fuel lines, and fuel filter, each with a unique part number․ Troubleshooting fuel-related issues, such as leaks or starting problems, becomes easier with this visual guide․

The manual highlights proper cleaning and maintenance procedures for the carburetor, including jet cleaning and diaphragm replacement․ Using the correct replacement parts, as identified in the PDF, is crucial for maintaining engine performance and preventing further damage․

Ignition System Parts

The Stihl FS45 ignition system, comprehensively covered in the parts manual PDF, is vital for starting and running the engine․ Detailed diagrams showcase components like the ignition coil, spark plug, and potentially the magneto․ Each part is assigned a specific number for accurate identification when ordering replacements․

The manual aids in diagnosing ignition-related issues, such as a no-spark condition․ Proper maintenance, including spark plug replacement and coil testing, is outlined․ Utilizing genuine Stihl parts, as referenced in the PDF, ensures reliable ignition and optimal engine performance, preventing potential malfunctions․

Cutting Head and Drive System

The Stihl FS45 parts manual PDF meticulously details the cutting head and drive system․ Exploded views illustrate various string trimmer head options, including auto-feed and bump-feed models, with corresponding part numbers; Crucially, the manual diagrams the drive shaft and gearbox assembly, essential for power transfer․

For models accepting blades, adaptor parts are clearly shown․ Troubleshooting rotation issues is simplified with diagrams pinpointing potential failure points․ The PDF assists in identifying worn or damaged components, ensuring efficient grass and weed trimming; Genuine parts, as highlighted, maintain optimal cutting performance․

String Trimmer Head Options

The Stihl FS45 parts manual PDF comprehensively showcases available string trimmer head options․ Auto-feed heads automatically advance the trimming line, while bump-feed heads require manual bumping to release more line․ Detailed diagrams illustrate each head’s internal components – spools, springs, and retaining features․

Part numbers are clearly labeled for easy identification and ordering of replacements․ The manual aids in understanding the assembly and disassembly of each head type․ Choosing the correct head ensures optimal trimming performance and line management, extending the lifespan of your FS45․

Drive Shaft and Gearbox

The Stihl FS45 parts manual PDF provides detailed breakdowns of the drive shaft and gearbox assembly․ Exploded views clearly illustrate the arrangement of components – including the drive shaft itself, gearbox housing, bearings, and seals․ Specific part numbers are assigned to each element, facilitating accurate replacement during repairs․

The manual highlights proper lubrication points and torque specifications for gearbox maintenance․ Understanding this system is crucial for diagnosing issues like power loss or unusual noises․ Diagrams assist in correctly reassembling the gearbox, ensuring smooth and efficient power transfer to the cutting head․

Blade Adaptors (if applicable)

The Stihl FS45 parts manual PDF details blade adaptors if your model is configured for blade use, rather than solely string trimming․ These adaptors connect the cutting blade to the drive shaft, requiring precise fit and secure fastening․ The manual illustrates various adaptor types and their corresponding part numbers․

Crucially, it emphasizes using only Stihl-approved blade adaptors to maintain safety and prevent damage to the gearbox․ Diagrams show correct installation procedures, including washer and nut placement, alongside specified torque values․ Proper installation ensures blade stability and minimizes vibration during operation․

Handle and Control System

The Stihl FS45 parts manual PDF provides detailed breakdowns of the handle and control system components․ This includes the handlebar assembly, throttle control, and the anti-vibration system, all vital for user comfort and operational precision․ Exploded views clearly illustrate the arrangement of grips, levers, and cables․

Part numbers are listed for each element, from throttle cables to handlebar clamps, facilitating accurate replacement․ The manual highlights the importance of a functioning anti-vibration system for reducing fatigue during extended use․ Proper adjustment of the throttle control is also covered, ensuring responsive operation․

Throttle Control and Cable

The Stihl FS45 parts manual PDF dedicates specific sections to the throttle control and its associated cable․ Detailed diagrams showcase the assembly, including the throttle trigger, lock button, and return spring, alongside the cable’s routing․ Part numbers for each component – throttle lever, cable housing, and inner cable – are clearly identified․

The manual emphasizes the importance of a smoothly functioning throttle for safe operation․ It provides guidance on cable adjustment and replacement, ensuring responsive control․ Troubleshooting tips address common issues like a sticky throttle or a frayed cable, promoting efficient repairs․

Anti-Vibration System

The Stihl FS45 parts manual PDF illustrates the anti-vibration system, crucial for operator comfort and reducing fatigue during prolonged use․ Exploded views detail the rubber dampers and mounting components that isolate engine vibrations from the handles․ Specific part numbers are assigned to each damper, mounting plate, and associated hardware․

The manual highlights the importance of maintaining the integrity of this system․ Instructions cover inspecting dampers for wear and tear, and replacing them when necessary․ Proper installation ensures optimal vibration reduction, enhancing user experience and minimizing strain․

Handlebar Assembly

The Stihl FS45 parts manual PDF provides detailed diagrams of the handlebar assembly, showcasing each component’s location and part number․ It includes illustrations of the loop handle, wrap-around handle, throttle lever, and associated mounting hardware․ Users can easily identify parts for replacement or repair, ensuring proper functionality․

The manual outlines the correct assembly procedure, emphasizing proper torque specifications for all fasteners․ It details how to adjust the handle position for optimal comfort and control․ Maintaining a secure handlebar assembly is vital for safe and efficient operation of the trimmer․

Troubleshooting Common Issues with Parts Replacement

A Stihl FS45 parts manual PDF aids in diagnosing issues; incorrect parts or improper installation can cause starting, fuel, or rotation problems․

Engine Not Starting

If your Stihl FS45 engine fails to start, a parts manual PDF becomes invaluable․ Consult the diagrams to verify the correct carburetor and ignition system parts․ Check the fuel system – tank cap, hoses, and fuel pump – for leaks or blockages, referencing the manual’s exploded views․ Ensure the spark plug is clean and properly gapped, using the manual’s specifications․ A faulty cylinder or piston assembly, identifiable through the manual, can also prevent ignition․ Proper troubleshooting, guided by the PDF, minimizes guesswork and ensures accurate parts replacement, restoring engine functionality․

Cutting Head Not Rotating

When the Stihl FS45’s cutting head doesn’t rotate, the parts manual PDF is crucial for diagnosis․ Examine the drive shaft and gearbox using the exploded view diagrams to identify potential damage or wear․ Verify the string trimmer head is correctly assembled and the chosen option is compatible, as detailed in the manual․ Inspect blade adaptors, if used, for proper installation․ A broken or worn drive component, pinpointed with part numbers from the PDF, is often the culprit․ Accurate parts replacement, guided by the manual, restores cutting performance․

Fuel Leaks and Carburetor Problems

Addressing fuel leaks or carburetor issues on your Stihl FS45 demands the precision offered by a parts manual PDF․ Utilize the exploded views to locate fuel tank components, hose connections, and the manual fuel pump․ Identify the correct replacement parts using the provided part numbers․ The manual details carburetor disassembly and cleaning procedures․ Inspect for damaged diaphragms or clogged jets․ Proper fuel system maintenance, guided by torque specifications in the PDF, prevents leaks and ensures optimal engine performance, restoring reliable operation․

Using Exploded View Diagrams

Exploded views within the Stihl FS45 parts manual PDF visually detail assembly, aiding in part identification and understanding the correct assembly order for repairs․

Identifying Part Numbers

Accurately identifying Stihl FS45 part numbers is crucial for ordering the correct replacements․ The parts manual PDF provides exploded view diagrams where each component is labeled with a unique identifier․ These numbers are typically located adjacent to the part in the diagram, allowing for precise matching when sourcing spares․

Referencing the manual ensures compatibility, preventing incorrect parts orders․ Online retailers and authorized Stihl dealers utilize these numbers for quick and accurate fulfillment․ Double-checking the part number against the manual before purchase minimizes errors and ensures a successful repair․ Genuine Stihl parts are easily identified using this system․

Understanding Assembly Order

The Stihl FS45 parts manual PDF’s exploded view diagrams aren’t just for identifying parts; they illustrate the correct assembly sequence․ Following this order is vital for proper functionality and preventing damage during reassembly․ The diagrams show how components interact and the order in which they should be installed․

Incorrect assembly can lead to malfunctions or safety hazards․ The manual often includes notes regarding specific assembly steps, like applying grease or tightening fasteners to specified torque specifications․ Carefully studying the diagrams before starting ensures a smooth and successful repair process, maximizing the trimmer’s lifespan․

Torque Specifications

The Stihl FS45 parts manual PDF provides crucial torque specifications for every fastener․ Applying the correct torque is paramount; under-tightening can cause parts to loosen and fail, while over-tightening risks stripping threads or damaging components․ These specifications are usually listed alongside the exploded view diagrams, often in Newton-meters (Nm) or inch-pounds (in-lbs)․

Using a torque wrench is highly recommended to ensure accuracy․ Adhering to these values guarantees a secure and reliable assembly, preventing premature wear and maintaining the trimmer’s performance․ Ignoring torque specs can void warranties and compromise safety, so always consult the manual․

Genuine vs․ Aftermarket Parts

Choosing between genuine Stihl parts and aftermarket alternatives impacts performance and longevity․ Genuine parts ensure compatibility, while aftermarket options may offer cost savings․

Benefits of Genuine Stihl Parts

Opting for genuine Stihl parts for your FS45 delivers unparalleled reliability and performance․ These components are meticulously engineered to meet Stihl’s exacting standards, ensuring a precise fit and optimal function within the trimmer’s system․ Using authentic parts safeguards against potential damage caused by incompatibility, extending the lifespan of your equipment․

Furthermore, genuine Stihl parts maintain the manufacturer’s warranty, providing peace of mind․ They are constructed from high-quality materials, designed to withstand the rigors of professional use․ Investing in genuine components guarantees consistent cutting power and reduces the likelihood of unexpected breakdowns, ultimately saving time and money․

Advantages of Aftermarket Alternatives

Aftermarket parts for the Stihl FS45 often present a cost-effective solution for repairs and maintenance․ These alternatives can be significantly cheaper than genuine Stihl components, appealing to budget-conscious users․ A wider availability is another benefit, as aftermarket parts are frequently stocked by numerous retailers, offering greater convenience․

However, it’s crucial to research thoroughly, as quality can vary substantially․ Some aftermarket manufacturers prioritize affordability over durability․ Selecting reputable brands can mitigate risks, providing acceptable performance․ While potentially saving money upfront, consider long-term value and potential compatibility issues․

Compatibility Considerations

Ensuring compatibility is paramount when using aftermarket parts for your Stihl FS45․ While many are designed as direct replacements, subtle variations can occur․ Always verify the part number against your FS45’s parts manual PDF to confirm a precise fit․ Incorrect parts can lead to improper function, reduced performance, or even damage to the trimmer․

Pay close attention to model variations within the FS45 range, as slight differences may exist․ Cross-referencing with the exploded view diagrams in the manual is highly recommended․ Prioritize parts specifically listed as compatible with your exact FS45 model to avoid frustrating issues;

Safety Precautions When Replacing Parts

Prioritize safety by disconnecting the spark plug and carefully handling fuel during repairs․ Utilize appropriate tools, referencing the manual’s torque specifications for secure assembly․

Disconnecting the Spark Plug

Before commencing any maintenance or parts replacement on your Stihl FS45, absolutely disconnect the spark plug․ This crucial step prevents accidental engine starting, mitigating the risk of serious injury․ Locate the spark plug, typically covered by a protective cap, and carefully remove the cap․

Using a spark plug wrench, turn the plug counterclockwise to detach it from the engine; Ensure the plug wire is pulled away from the plug itself and secured, preventing accidental contact with the engine during your work․ This simple precaution is paramount for a safe repair experience, safeguarding you from potential hazards․

Fuel Handling Safety

When dealing with fuel during Stihl FS45 parts replacement, prioritize safety․ Gasoline is highly flammable and poses significant risks․ Always work in a well-ventilated area, away from open flames, sparks, or heat sources․ Before handling fuel, ensure the engine is completely cool․

Use a fuel container specifically designed for gasoline, and avoid overfilling․ Clean up any spills immediately with absorbent materials․ Never smoke while handling fuel, and wear appropriate gloves to protect your skin․ Proper fuel handling prevents fires and ensures a safe working environment․

Proper Tool Usage

Replacing Stihl FS45 parts demands the correct tools for the job․ Utilizing inappropriate tools can damage components or cause injury․ Always refer to the parts manual for specified tool requirements, including socket sizes and screwdriver types․ Ensure tools are in good working condition, with no worn or damaged parts․

Employ torque wrenches when tightening fasteners to prevent over or under-tightening․ Wear safety glasses to protect your eyes from debris․ Avoid modifying tools or using them for unintended purposes․ Correct tool usage guarantees efficient repairs and prolongs the life of your FS45․

Where to Purchase Stihl FS45 Parts

Genuine Stihl parts are available through authorized dealers and online retailers, while used parts can be sourced from various suppliers for cost savings․

Authorized Stihl Dealers

Locating an authorized Stihl dealer provides several key advantages when sourcing parts for your FS45․ These dealerships stock genuine Stihl components, ensuring optimal performance and compatibility with your trimmer․ Knowledgeable staff can offer expert advice, assisting you in identifying the correct parts based on your model and specific needs․

Furthermore, authorized dealers often provide repair services, should you prefer professional assistance with parts replacement․ While potentially more expensive than aftermarket options or used parts, genuine Stihl parts from authorized dealers guarantee quality and adherence to the manufacturer’s specifications, preserving the longevity and reliability of your FS45․ Finding a local dealer is easily done through the Stihl website’s dealer locator tool․

Online Retailers

Numerous online retailers specialize in small engine parts, including those for the Stihl FS45․ These platforms often offer a wider selection and potentially lower prices compared to authorized dealers, but require careful vetting․ Verify the retailer’s reputation and ensure they stock genuine or high-quality aftermarket parts․

Always cross-reference part numbers with your FS45 parts manual PDF to guarantee compatibility․ Shipping costs and return policies should also be considered before making a purchase․ While convenient, online retailers may lack the expert advice available at a local Stihl dealership, so thorough research is crucial for a successful parts acquisition․

Used Parts Sources

Exploring used parts sources can be a cost-effective option for repairing a Stihl FS45, particularly for older models where new parts are scarce or expensive․ Online auction sites and small engine repair forums often feature listings from individuals selling salvaged parts․ However, exercise caution when purchasing used components․

Carefully inspect the condition of any used part before buying, and verify its compatibility with your specific FS45 model using the parts manual PDF․ Consider the potential for hidden wear or damage․ While offering savings, used parts may have a limited lifespan, so weigh the risks against the benefits․

form 8802 instructions 2023

Form 8802 Instructions 2023: A Comprehensive Guide

Form 8802 facilitates creating online surveys, quizzes, and forms, enabling real-time response analysis and collaborative editing within Google Workspace environments.

What is Form 8802?

Form 8802, Application for Extension of Time To File Certain Employee Plan Returns, is a crucial document utilized by employee plan administrators. It allows them to request an extension for filing various annual reports with the IRS, specifically those related to employee benefit plans. This form isn’t for extending the time to pay taxes, but solely for extending the time to file the required paperwork.

Essentially, Form 8802 provides a temporary reprieve from strict filing deadlines, offering plan administrators additional time to gather necessary information and ensure accurate reporting. It’s a vital tool for maintaining compliance with IRS regulations concerning employee plans, preventing potential penalties associated with late submissions. The form supports creating online surveys, quizzes, and forms, and analyzing responses in real-time.

Google Forms, a related tool, enables form creation, customization, and sharing, while also offering features for data analysis and collaboration within Google Workspace.

Who Needs to File Form 8802?

Form 8802 is primarily required by administrators and responsible parties of various employee benefit plans. This includes those overseeing retirement plans like 401(k)s, pension plans, and profit-sharing plans. It also applies to administrators of health and welfare plans, such as group health plans, dental plans, and vision plans.

Specifically, anyone responsible for filing Form 5500, an annual return/report required of employee benefit plans, may need to file Form 8802 if they anticipate difficulty meeting the standard filing deadline. This extends to plan sponsors, trustees, and other fiduciaries with filing obligations. Utilizing tools like Google Forms can aid in gathering plan information efficiently.

Essentially, if your plan requires filing Form 5500 and you need more time to prepare and submit it accurately, Form 8802 is the appropriate form to request an extension. Remember, it’s about extending the filing deadline, not the payment of any associated taxes.

Understanding Application for Extension of Time To File Certain Employee Plan Returns

Form 8802 serves as a formal application to the IRS requesting an extension of time to file specific employee plan returns, most notably Form 5500. It doesn’t extend the time to pay any taxes due, only the filing obligation. Think of it as a temporary reprieve from the standard deadlines, allowing plan administrators additional time for accurate preparation.

This application is crucial for plans facing complexities in data compilation, auditing processes, or unforeseen circumstances hindering timely filing. Utilizing digital tools, similar to Google Forms for data collection, can streamline the process. The IRS reviews these requests, and approval grants an extension, typically up to 90 days.

Successfully navigating Form 8802 requires understanding its purpose – a request, not an automatic guarantee – and adhering to the specified guidelines to avoid potential penalties. Proper documentation and a valid reason are key to a favorable outcome.

Key Dates and Deadlines for 2023

While Form 8802 itself doesn’t have a single, fixed deadline, its relevance is tied to the filing deadlines of the employee plan returns it extends – primarily Form 5500. For plans with a calendar year-end, the standard Form 5500 filing deadline is July 31st. Therefore, an extension request via Form 8802 must generally be filed before this date.

Specifically, for 2023 filings, proactively submitting Form 8802 well in advance of July 31st is advisable. The IRS doesn’t specify a “last possible date” for the extension request, but delaying increases risk. Remember, this extension only applies to the filing of the return, not the payment of any associated taxes.

Staying organized and utilizing calendar reminders is crucial. Similar to tracking responses in Google Forms, diligent date management ensures compliance and avoids potential penalties for late filing. Always verify dates with official IRS guidance.

Automatic Extensions

Generally, Form 8802 doesn’t grant automatic extensions in the same way some other IRS forms do. Unlike Google Forms’ automatic data collection, an extension requires a deliberate request and, potentially, a justification. However, certain situations can indirectly lead to an automatic extension related to the underlying Form 5500.

For instance, if a plan sponsor is experiencing a federally declared disaster, the IRS may provide automatic relief, extending various deadlines, including those for Form 5500 and, consequently, the need for a Form 8802 extension. These disaster relief announcements are crucial to monitor.

Furthermore, if the plan is part of a group submitting a consolidated Form 5500, the extension rules can become more complex. It’s vital to consult official IRS guidance or a qualified professional to determine if an automatic extension applies in these scenarios. Don’t rely on assumptions; proactive verification is key.

Reasons for Requesting an Extension

Several legitimate reasons may necessitate requesting a Form 8802 extension. Common justifications include unforeseen circumstances hindering the timely compilation of required plan information, similar to unexpected issues encountered when building a complex Google Form. These can range from difficulties in obtaining necessary data from plan administrators to delays in completing required actuarial valuations.

Another frequent reason is the need for additional time to ensure the accuracy and completeness of the Form 5500, the employee plan return that Form 8802 extends the filing deadline for. Thorough review and reconciliation of plan data are crucial for compliance.

Furthermore, if the plan sponsor is undergoing a merger, acquisition, or other significant organizational change, obtaining an extension can provide the necessary time to navigate the complexities of the transition and ensure accurate reporting. Always document the reason clearly and concisely.

How to Request an Extension

Requesting a Form 8802 extension is a straightforward process, mirroring the simplicity of creating a Google Form. The IRS generally prefers electronic submission, utilizing the Department of Labor’s EFAST2 system. Access EFAST2 through the DOL’s website and follow the guided instructions for submitting Form 8802.

You’ll need to create an account or utilize an existing one. The system will prompt you for the required plan information and the reason for the extension request. Ensure all details are accurate and consistent with your records.

While electronic filing is preferred, a paper submission is permissible, though it may experience processing delays. Mail the completed Form 8802 to the address specified in the instructions. Regardless of the method, submit your request before the original filing deadline to avoid penalties.

Filing Methods: Electronic vs. Paper

When submitting Form 8802, you have two primary options: electronic filing via the Department of Labor’s EFAST2 system, or traditional paper submission. Electronic filing is strongly encouraged by the IRS due to its speed, accuracy, and reduced processing time. EFAST2 offers a user-friendly interface, guiding you through the necessary steps and providing immediate confirmation of receipt.

Paper filing, while accepted, is considerably slower and increases the risk of processing errors. To file by mail, ensure the form is accurately completed and sent to the designated IRS address. Remember that paper submissions may experience significant delays, potentially impacting compliance.

Choosing the electronic method streamlines the process, mirroring the efficiency of Google Forms’ online accessibility and real-time data analysis capabilities. It’s the preferred route for timely and reliable submission.

Required Information for Form 8802

Completing Form 8802 necessitates precise and comprehensive information regarding the employee plan seeking an extension. This includes the plan name, Employer Identification Number (EIN), plan number, and the type of plan (e.g., pension, health). Accurate identification is crucial, akin to correctly labeling fields in a Google Form for effective data collection.

You must also specify the return the extension applies to – typically Form 5500 or Form 5500-SF. Detail the period the extension covers, clearly stating the original due date and the requested new due date. A clear justification for the extension request is paramount, outlining the reasons for the delay.

Finally, provide complete contact information for a designated individual who can address any IRS inquiries. Ensure all details are consistent and verifiable to avoid processing issues, mirroring the importance of accurate responses in online surveys;

Step-by-Step Instructions for Completing Form 8802

Begin by downloading the latest Form 8802 from the IRS website. Start with Part I, meticulously entering the plan’s identification details – name, EIN, and plan number. Accuracy here is vital, similar to ensuring correct field labeling when creating a Google Form.

Proceed to Part II, clearly stating the reason for requesting the extension. Be specific and concise. In Part III, provide complete contact information for a responsible party who can address IRS inquiries. Double-check all entries for errors.

Review the completed form thoroughly before submission. Ensure all required fields are filled and the information is consistent. Consider utilizing available IRS resources or professional tax assistance if needed. Filing electronically via IRS’s e-file system is generally recommended for faster processing, much like utilizing real-time response analysis in Google Forms.

Part I: Plan Identification

Part I of Form 8802 demands precise details about the employee benefit plan seeking an extension. You must provide the plan’s legal name as officially registered, ensuring consistency with IRS records. The Employer Identification Number (EIN) assigned to the plan is crucial; verify its accuracy against official documentation.

Next, input the specific plan number assigned by the IRS or plan administrator. This number uniquely identifies the plan within the IRS system. Include the plan type – for example, pension, health, or welfare plan – selecting the appropriate option from the provided choices.

Finally, indicate the plan year to which the extension applies. This clarifies the reporting period covered by the extension request. Accurate completion of Part I is foundational, similar to correctly labeling fields when building a Google Form for organized data collection.

Part II: Reason for Extension Request

Part II of Form 8802 requires a clear and concise explanation for needing an extension to file certain employee plan returns. Select the reason that best applies from the options provided; common reasons include delays in receiving necessary information from third parties, such as actuarial valuations or audit reports.

Alternatively, you might cite unforeseen circumstances hindering timely completion, like natural disasters or significant staffing shortages. If “other” is selected, a detailed narrative explanation is mandatory. This explanation should be specific and justify the need for additional time, mirroring the detailed responses sought in Google Forms surveys.

Be truthful and thorough; vague or insufficient explanations may lead to denial of the extension request. The IRS scrutinizes these reasons, ensuring legitimate needs are addressed. Providing a compelling rationale increases the likelihood of approval.

Part III: Contact Information

Part III of Form 8802 demands accurate contact details for the individual authorized to represent the plan administrator. This section ensures the IRS can efficiently communicate regarding the extension request and any subsequent inquiries, much like ensuring proper access control in Google Forms.

Required information includes the contact person’s name, title, phone number, email address, and mailing address. Double-check all entries for accuracy, as errors can cause delays in processing. Designating a reliable point of contact is crucial for a smooth process.

This individual should be fully knowledgeable about the employee plan and the extension request. Providing complete and correct contact information demonstrates professionalism and facilitates clear communication with the IRS, mirroring the importance of accessible support in Google Workspace.

Common Errors to Avoid

When completing Form 8802, several common errors can lead to rejection or delays, similar to issues encountered when designing forms in Google Forms. A frequent mistake is providing an incorrect Employee Identification Number (EIN) for the plan. Verify this crucial identifier against official plan documents.

Another error involves failing to clearly state the specific reason for requesting the extension in Part II. Be concise and accurate. Additionally, incomplete contact information in Part III hinders IRS communication. Ensure all fields are filled correctly;

Submitting the form without a proper signature from an authorized representative is also a common oversight. Finally, missing the deadline, even by a day, can result in penalties. Careful review before submission, akin to previewing a Google Form before publishing, is essential.

Penalties for Late Filing

Failure to file Form 8802 by the due date, or an approved extension, can incur significant penalties, mirroring the consequences of missed deadlines in other IRS filings. The penalty for late filing is $25 per day for each day the return is late, up to a maximum penalty of $15,000.

This penalty applies even if there is no tax due. If the failure is due to reasonable cause and not willful neglect, the IRS may waive the penalty. However, the burden of proof rests with the filer to demonstrate reasonable cause.

It’s crucial to remember that penalties are assessed separately for each plan year. Proactive extension requests, similar to setting reminders for Google Form response deadlines, are highly recommended to avoid these costly penalties. Accurate recordkeeping of filing dates is also vital.

Recordkeeping Requirements

Maintaining thorough records related to Form 8802 and any extension requests is paramount for demonstrating compliance during an IRS audit, much like keeping detailed data from Google Forms responses. Filers must retain a copy of Form 8802, along with all supporting documentation, for at least three years from the date of filing or two years from the date any tax related to the plan is paid, whichever is later.

This documentation includes proof of the original filing deadline, any automatic extensions applied, and the date the extension request (Form 8802) was submitted. Evidence of the reason for the extension request should also be kept.

Proper recordkeeping, similar to organizing Google Workspace files, ensures a smooth audit process and provides evidence of due diligence. Digital copies are acceptable, offering convenient access and backup, mirroring the accessibility of Google Forms data.

Relationship to Other IRS Forms (e.g., Form 5500)

Form 8802 is intrinsically linked to other IRS filings, particularly Form 5500, the annual return/report for employee benefit plans. Form 8802 grants an extension to file Form 5500 (and related forms like Form 5500-SF), it does not extend the time to pay any associated taxes. Think of it like extending a deadline to submit a Google Form report – the underlying data still needs timely attention.

If an extension is granted via Form 8802, the extended due date for Form 5500 must be clearly indicated on Form 5500 itself when it is eventually filed. Failing to accurately reflect the extended deadline can lead to penalties.

Understanding this relationship is crucial for maintaining compliance. Proper coordination, similar to linking Google Forms responses to a central spreadsheet, ensures all reporting obligations are met accurately and on time.

Resources and Where to Find Help

Navigating Form 8802 and related IRS regulations can be complex. Fortunately, numerous resources are available to assist filers. The official IRS website (irs.gov) is the primary source, offering the form itself, detailed instructions, and frequently asked questions – akin to a comprehensive Google Forms help center.

IRS publications, specifically those related to employee benefit plans, provide further guidance. Tax professionals, such as Certified Public Accountants (CPAs) and enrolled agents, offer expert assistance, similar to consultants specializing in Google Workspace form creation.

The IRS’s Taxpayer Assistance Centers provide in-person support, while the IRS telephone helpline offers assistance over the phone. Online forums and communities dedicated to tax compliance can also be valuable for sharing information and best practices. Remember to verify information from unofficial sources with the IRS directly.

IRS Contact Information

For direct assistance regarding Form 8802 and related inquiries, the IRS offers several contact methods. The main IRS helpline is available at 1-800-829-1040, operating Monday through Friday, 8:00 AM to 5:00 PM local time. Be prepared for potential wait times, especially during peak filing seasons – similar to high-volume periods for Google Form responses.

Taxpayers can also utilize the IRS’s online contact form through the IRS website (irs.gov). For specific questions about employee benefit plans, the Employee Plans division can be reached directly. Tax professionals can access dedicated support lines for their clients.

Additionally, the Taxpayer Assistance Centers (TACs) nationwide provide in-person assistance by appointment. Locate the nearest TAC via the IRS website. Remember to have your Form 8802 and relevant plan details readily available when contacting the IRS, ensuring efficient resolution of your query.

Frequently Asked Questions (FAQs) about Form 8802

Q: What happens if I miss the extended deadline? Filing after the extended deadline, even with an approved Form 8802, may incur penalties. Similar to missing a Google Form submission deadline, late filing isn’t excused.

Q: Can I amend my Form 8802 request? Amendments are generally not permitted. If your circumstances change significantly, consult with a tax professional. Like revising a published Google Form, changes are difficult post-submission.

Q: Is an extension to file also an extension to pay? No, an extension to file does not extend the time to pay any taxes due. Payment obligations remain unchanged.

Q: What if my plan is terminating? Specific rules apply to terminating plans; consult the IRS guidelines.

Q: Where can I find more detailed guidance? Refer to the official IRS instructions for Form 8802, Publication 590-B, and related notices.

Understanding the Impact of Extensions on Compliance

Securing a Form 8802 extension doesn’t absolve plan sponsors of their ongoing compliance responsibilities. It merely provides additional time to prepare and submit required returns, much like extending a Google Form’s response collection period doesn’t negate the need to analyze the data.

Maintaining accurate records is crucial throughout the extension period. Proper documentation demonstrates good faith efforts toward compliance. Timely filing, even with an extension, minimizes potential penalties and scrutiny.

Extensions should not be viewed as a routine practice but rather a necessary accommodation for unforeseen circumstances. Proactive planning and diligent recordkeeping are essential for avoiding the need for frequent extensions.

Remember, extensions are granted at the IRS’s discretion, and consistent reliance on them may raise compliance concerns.

Changes to Form 8802 in 2023

While specific, significant alterations to Form 8802 for the 2023 tax year haven’t been widely publicized, it’s crucial to remain vigilant for updates from the IRS. Similar to how Google Forms continuously receives feature enhancements, the IRS periodically refines its forms.

Plan sponsors should always consult the latest version of the form and accompanying instructions available on the IRS website. Minor revisions to formatting, clarifying language, or updated contact information are common occurrences.

Staying informed about these changes ensures accurate completion and avoids potential processing delays. Regularly checking the IRS website and subscribing to relevant updates are recommended practices.

Furthermore, any changes impacting the electronic filing process or accepted methods should be carefully reviewed. Proactive awareness of updates streamlines the filing process and maintains compliance.

sock length guide

Sock Length Guide: A Comprehensive Overview (Updated November 2, 2026)

Navigating the world of socks requires understanding length variations – from virtually invisible no-shows to statement-making over-the-knee styles, impacting both function and fashion․

Sock length is a surprisingly crucial element of both style and practicality․ Choosing the right height impacts comfort, performance, and overall aesthetic․ From barely-there no-show socks designed for a hidden look, to supportive knee-highs and bold over-the-knee options, the spectrum is vast․

Understanding these differences, and when to utilize each length, is key to a well-coordinated and comfortable wardrobe․ This guide will explore each type in detail․

No-Show Socks: The Invisible Option

No-show socks, also known as invisible or liner socks, are designed to be hidden within shoes․ They offer a clean, barefoot aesthetic while still providing a layer of comfort and moisture-wicking protection․ Typically made from lightweight materials, they prioritize discretion and a seamless look․

Characteristics of No-Show Socks

These socks feature a very low cut, often with a silicone grip heel to prevent slipping․ They are commonly crafted from materials like cotton, nylon, or spandex blends for a snug, secure fit․ No-show socks prioritize a minimalist profile, offering minimal coverage beyond the footbed itself, ensuring invisibility within footwear․

Best Uses for No-Show Socks

No-show socks excel with loafers, ballet flats, and sneakers where you desire a sockless appearance․ They are ideal for warmer weather, preventing visible sock lines and maintaining a streamlined aesthetic․ These socks are also suitable for casual settings and activities where discreet comfort is paramount, like everyday wear․

Ankle Socks: A Classic Choice

Ankle socks represent a versatile and enduring style, hitting just at or slightly above the ankle bone․ They offer a balance between coverage and a sporty look, making them a popular everyday option․ These socks are frequently paired with sneakers, casual shoes, and athletic footwear for comfort and style․

Defining Ankle Sock Height

Typically, ankle socks measure between 6 to 8 inches in height, though variations exist․ This height ensures the sock sits comfortably around the ankle, without extending significantly up the calf․ The precise placement can differ based on individual ankle size and sock design, offering a snug, secure fit for various activities․

Activities Suitable for Ankle Socks

Ankle socks excel in low-impact activities like walking, casual sports, and everyday wear․ They pair well with sneakers and athletic shoes, providing comfort and breathability․ Ideal for warmer weather, they offer sufficient coverage without overheating the feet, making them a versatile choice for numerous situations․

Quarter Socks: Bridging the Gap

Quarter socks offer a height between ankle and crew socks, providing extra ankle protection without the bulk․ They’re a practical compromise, suitable for various activities․ These socks bridge the gap, offering more coverage than ankle socks while remaining discreet within most shoe types, enhancing comfort and performance․

What are Quarter Socks?

Quarter socks typically rise approximately 4-6 inches above the ankle, offering a noticeable, yet not overwhelming, amount of coverage․ They are designed to sit just above the ankle bone, providing a snug fit and preventing rubbing․ This length makes them versatile, blending functionality with a subtle aesthetic․

Ideal for Sports and Casual Wear

Quarter socks excel in athletic activities like running, tennis, and training, offering blister protection without excessive bulk․ Their moderate height suits everyday casual outfits, pairing well with sneakers and loafers․ They provide comfort and a secure fit during various movements, making them a practical choice․

Crew Socks: Versatility and Comfort

Crew socks represent a standard length, extending mid-calf, offering a balance of coverage and flexibility․ They are incredibly versatile, suitable for everyday wear with sneakers, boots, or even casual dress shoes․ Providing ample cushioning and warmth, they’re ideal for moderate activity levels and diverse weather conditions․

The Standard Crew Sock Length

Typically, crew socks measure between 6 and 8 inches in height when laid flat, reaching mid-calf on most individuals․ This consistent length makes them a reliable choice for various footwear and outfits․ They offer a comfortable, secure fit without being overly constricting, providing a classic aesthetic․

Everyday Wear and Moderate Activity

Crew socks excel in daily life, pairing seamlessly with sneakers, casual shoes, and even some boots․ Their moderate coverage suits walking, light jogging, and general activity․ They provide cushioning and support for all-day comfort, making them a versatile staple in any sock drawer, blending practicality with style․

Mid-Calf Socks: A Step Up in Coverage

Mid-calf socks extend further up the leg than crew socks, offering increased warmth and protection․ They are ideal for activities like hiking, where shielding the lower calf is beneficial, or for those who simply prefer more coverage․ These socks provide a secure fit and noticeable comfort boost․

Distinguishing Mid-Calf Socks

Mid-calf socks are easily identified by their height, typically falling 2-4 inches above the ankle․ This differentiates them from shorter crew socks and longer knee-high options․ They offer a balanced aesthetic, providing substantial leg coverage without the dramatic flair of taller sock lengths, making them versatile․

Benefits for Specific Activities

Mid-calf socks excel during moderate activity, offering shin protection during sports like soccer or running․ Their length aids circulation and prevents chafing, proving beneficial for hiking and cycling․ They also provide a comfortable barrier within boots, enhancing overall foot health and performance during various pursuits․

Knee-High Socks: Style and Support

Knee-high socks deliver substantial coverage, blending fashion with practical support․ They’re popular in sports like volleyball and field hockey, providing shin protection and compression․ Beyond athletics, they make bold fashion statements, pairing well with skirts and dresses, or offering warmth during colder seasons․

Understanding Knee-High Sock Coverage

Knee-high socks, as the name suggests, extend to just below the knee, offering significant leg coverage․ This length provides enhanced support for muscles during activity and can contribute to improved circulation․ They often feature reinforced heels and toes for durability, making them suitable for varied uses․

Fashion, Sports, and Compression Uses

Knee-high socks are versatile, finding applications in fashion, athletics, and medical contexts․ They complement skirts and dresses, add flair to outfits, and provide warmth during colder months; Athletes utilize them for support, while compression versions aid circulation and reduce muscle fatigue during and after exercise․

Over-the-Knee Socks: Making a Statement

Over-the-knee socks boldly express personal style, extending significantly above the knee for a dramatic look․ Often paired with skirts, dresses, or shorts, they create a fashionable silhouette․ These socks aren’t solely for aesthetics; they also offer extra warmth and can be incorporated into cosplay or themed outfits․

Characteristics of Over-the-Knee Socks

Typically crafted from materials like wool, cotton, or synthetic blends, over-the-knee socks prioritize both comfort and durability․ They often feature ribbed designs for a secure fit, preventing slippage throughout the day․ Variations include cable-knit patterns, lace detailing, and reinforced heels and toes for longevity․

Fashion-Forward Applications

Over-the-knee socks are a versatile fashion statement, pairing beautifully with skirts, dresses, and shorts for a chic, layered look․ They can elevate casual outfits or add a playful touch to more formal ensembles․ Bold colors and patterns make a statement, while neutral tones offer subtle sophistication․

Compression Socks: Health and Performance

Compression socks come in varying lengths, directly influencing compression levels and targeted benefits․ They aid circulation, reduce swelling, and alleviate leg fatigue, benefiting athletes and individuals with medical conditions․ Lengths range from ankle to thigh-high, addressing specific needs and providing graduated pressure for optimal support․

Sock Length and Compression Levels

The length of a compression sock correlates with the area of compression applied․ Ankle socks target foot and lower leg issues, while knee-high options address calf muscle support and circulation․ Thigh-high compression is utilized for more extensive venous insufficiency, offering graduated pressure for maximum therapeutic effect․

Uses for Compression Socks (Medical & Athletic)

Medically, compression socks aid circulation, reduce swelling, and prevent DVT during travel or post-surgery․ Athletically, they enhance performance by improving blood flow, reducing muscle fatigue, and accelerating recovery․ Runners, nurses, and individuals with venous insufficiency commonly benefit from consistent compression sock use․

Sock Length for Different Shoe Types

Sneakers generally pair well with no-show, ankle, or quarter socks for a casual look, while boots often require crew or mid-calf socks for coverage and comfort․ Consider the boot height; taller boots necessitate longer socks to prevent chafing and maintain a polished appearance․

Socks with Sneakers

For sneakers, no-show socks offer an invisible aesthetic, while ankle and quarter socks provide a classic, sporty vibe․ Crew socks can work with high-top sneakers, but avoid overly long socks that bunch or peek out awkwardly․ Prioritize breathability and moisture-wicking materials for optimal comfort during activity․

Socks with Boots

With boots, sock length is crucial for comfort and style․ Mid-calf socks are ideal for preventing rubbing and adding warmth, especially with taller boots․ Crew socks work well with shorter boots, while knee-high socks can add a fashionable layer under riding boots․ Avoid no-show socks, as they won’t provide sufficient protection․

Sock Length and Dress Codes

Sock length significantly impacts adherence to dress codes․ Business casual generally allows crew or mid-calf socks in coordinating colors․ Formal occasions typically demand dark, over-the-calf socks to avoid leg exposure when seated․ Avoid ankle or no-show socks with suits; they appear too casual and detract from a polished appearance․

Business Casual Sock Guidelines

For business casual settings, crew and mid-calf socks are generally preferred․ Colors should complement, not clash with, trousers and shoes – navy, gray, or muted earth tones are safe choices; Subtle patterns are acceptable, but avoid overly bold or distracting designs․ Ensure socks are clean and free of holes for a professional look․

Formal Occasion Sock Choices

For formal events, over-the-calf socks are the standard, ensuring no leg is exposed when seated․ Black is the most traditional and versatile color, pairing seamlessly with dark suits․ Matching the sock color to your trousers creates a sophisticated, elongated leg line․ Quality materials like merino wool or silk elevate the overall ensemble․

Materials and Sock Length

Sock material significantly influences length preference and performance․ Thicker materials like wool often suit longer lengths for warmth, while thinner synthetics work well with no-show or ankle styles․ Breathability and moisture-wicking are crucial; merino wool excels in both․ Consider the activity – athletic socks prioritize performance fabrics regardless of length․

How Material Affects Sock Length Preference

Material weight dictates ideal sock length․ Heavier materials like wool benefit from longer lengths to prevent slippage and provide consistent warmth․ Lighter synthetics pair well with shorter socks, offering breathability․ Texture also matters; ribbed materials grip better in ankle socks, while smoother fabrics suit no-shows․

Breathability and Moisture-Wicking Considerations

Sock length impacts airflow and moisture control․ Shorter socks, like no-shows, offer less coverage, promoting ventilation during warm weather․ Longer lengths, especially with moisture-wicking materials, are crucial for high-intensity activities․ Consider the climate and activity level; synthetic blends excel at keeping feet dry and comfortable․

Finding the Right Sock Length for Your Needs

Determining ideal sock length requires balancing activity and personal preference․ Higher-impact activities benefit from more coverage and support, while casual wear allows for greater flexibility․ Prioritize comfort and consider the shoe type․ Don’t underestimate style – choose lengths that complement your overall aesthetic!

Considering Activity Level

High-intensity workouts demand performance-focused sock lengths like crew or mid-calf, offering crucial support and blister prevention․ Lower-impact activities, or daily wear, allow for ankle or no-show options․ Prioritize moisture-wicking materials for prolonged activity․ Matching sock length to exertion level maximizes comfort and performance․

Personal Style and Comfort

Ultimately, sock length is a personal choice blending aesthetics and feel․ Experiment with different lengths to discover what complements your outfits and provides optimal comfort․ Don’t be afraid to embrace trends, but prioritize a secure, non-restrictive fit․ Style and comfort should coexist harmoniously in your sock selection․

Trends in Sock Lengths (2026)

In 2026, expect a resurgence of quarter and crew lengths, offering a balance of style and practicality․ Bold patterns and vibrant colors are gaining traction, moving beyond traditional neutrals․ Sheer and textured over-the-knee socks are emerging as fashion statements, while compression sock designs are becoming more integrated into everyday wear․

Emerging Sock Length Styles

A notable trend is the rise of “slouch” socks, intentionally oversized crew or mid-calf styles worn wrinkled for a relaxed aesthetic․ Micro-compression ankle socks, blending support with discreetness, are also gaining popularity․ Experimentation with asymmetrical lengths and cut-outs is appearing, pushing boundaries beyond conventional sock designs․

Popular Color and Pattern Combinations

Bold, geometric patterns remain strong, particularly in crew and quarter lengths, offering a playful contrast to minimalist outfits․ Earth tones – olive, rust, and terracotta – are trending, complementing autumnal wardrobes․ Sheer or semi-sheer options, often in jewel tones, are gaining traction for evening wear, adding subtle sophistication․

Caring for Socks of Different Lengths

Delicate materials like merino wool require gentle, cold-water washing and air drying to prevent shrinkage and maintain shape․ Compression socks benefit from hand washing to preserve elasticity․ Turn all socks inside out before washing to minimize abrasion and fading․ Avoid harsh detergents and bleach, opting for mild, color-safe options․

Washing and Drying Recommendations

Always wash socks in a mesh laundry bag to prevent loss and protect delicate fibers․ Use a gentle cycle with cold water and a mild detergent․ Avoid high heat in the dryer, as it can damage elastic and cause shrinkage․ Air drying is preferable, especially for compression and wool socks․

Extending Sock Lifespan

Rotate your sock collection regularly to distribute wear and tear․ Repair small holes promptly to prevent them from growing․ Avoid over-washing, as it weakens fibers․ Store socks properly, paired and rolled or folded, to maintain their shape and elasticity․ Consider using sock garters!

atem mini pro iso manual

ATEM Mini Pro ISO: A Comprehensive Manual & Guide (Updated 02/04/2026)

This guide details the ATEM Mini Pro ISO’s features, setup, and operation, including ISO recording, streaming, and control—beneficial for podcasters.

The ATEM Mini Pro ISO represents a powerful, yet compact, live production switcher designed for streamers, podcasters, and content creators. It’s a significant step up from standard webcams and basic switchers, offering professional-grade features in a portable form factor. This manual will serve as your comprehensive guide to unlocking the full potential of this versatile device.

Unlike simpler models, the “ISO” designation indicates the ability to record each input as an independent stream – crucial for post-production editing and creating multiple content pieces. Reddit discussions highlight its excellent value, often recommending the Extreme version for expanded connectivity. Understanding these capabilities is key to maximizing your workflow. We’ll cover everything from initial setup to advanced features, ensuring a smooth and efficient production experience.

What is the ATEM Mini Pro ISO and Who is it For?

The ATEM Mini Pro ISO is an all-in-one live video production switcher with recording capabilities, designed for users needing professional quality without a complex setup. It allows simultaneous recording of all inputs as individual ISO files, streamlining post-production. This makes it ideal for podcasters wanting to separate audio tracks, or content creators needing flexible editing options.

Specifically, it caters to streamers on platforms like YouTube, Facebook, and Twitch, as well as those utilizing RTMP protocols for custom streaming solutions. Reddit users suggest it’s a “best bang-for-buck” option, though the Extreme version is often recommended for greater input/output flexibility. Ultimately, it’s for anyone seeking a robust, portable, and feature-rich live production tool.

Key Features & Specifications

The ATEM Mini Pro ISO boasts a compact design with four HDMI inputs and a USB-C connection for recording and streaming. It supports up to 1080p60 video resolution and includes a built-in media pool for graphics and titles. A crucial feature is the ability to record up to five independent ISOs – all inputs plus the program output.

Audio capabilities include dedicated microphone inputs that can be split into four separate channels for isolated recording. While the Pro ISO offers two HDMI or SDI outputs, Reddit discussions highlight the Extreme model’s advantage with more output options. Network control via Ethernet enables remote operation and configuration through ATEM Software Control.

Unboxing and Initial Setup

Upon unboxing your ATEM Mini Pro ISO, you’ll find the switcher itself, a power adapter, and a USB-C cable. Begin by connecting the power adapter and verifying the unit powers on. Next, connect the USB-C cable to your computer for initial software recognition and potential driver installation.

Download and install the ATEM Software Control from Blackmagic Design’s website. This software is essential for configuration and control. Ensure your computer meets the minimum system requirements. A stable network connection is recommended for firmware updates and remote operation. Initial setup involves configuring video standards and audio settings within the software.

Connecting Inputs & Outputs

The ATEM Mini Pro ISO offers versatile connectivity options. You can connect cameras and other video sources via HDMI or SDI inputs. Utilize the HDMI output for program feed monitoring or connection to a display. The USB-C port facilitates both video output and direct streaming to platforms like YouTube and Facebook.

For audio, connect microphones using the dedicated XLR inputs, benefiting from channel separation for ISO recording. Consider using a USB capture card with the HDMI output if you need to feed the video into a laptop for additional processing or monitoring. Remember the Extreme ISO model provides more output options.

HDMI vs. SDI Connections: Which to Choose?

Selecting between HDMI and SDI depends on your setup and distance requirements. HDMI is suitable for shorter runs, typically within home studios or smaller venues, and is compatible with most consumer cameras. SDI, however, excels in professional environments, offering greater cable lengths and robust signal transmission, minimizing dropouts.

The ATEM Mini Extreme ISO provides more output ports, including both HDMI and SDI, offering greater flexibility. If you anticipate needing longer cable runs or integrating with professional broadcast equipment, SDI is the preferred choice. For simpler setups, HDMI provides a convenient and cost-effective solution.

Utilizing the USB-C Connections for Recording & Streaming

The ATEM Mini Pro ISO’s USB-C port facilitates direct recording and streaming to computers. It functions as a webcam, simplifying integration with software like OBS Studio, Zoom, or Skype. This eliminates the need for capture cards for basic streaming setups.

For higher quality recordings, consider using the USB-C port to connect to a computer for direct capture, bypassing compression. Alternatively, utilize the port for streaming directly to platforms like YouTube, Facebook, or Twitch. Remember, the Extreme ISO model offers dual USB-C connections for simultaneous recording and streaming capabilities.

Software Control & Configuration

Blackmagic Design’s ATEM Software Control panel provides comprehensive control over the Mini Pro ISO. This software allows for remote operation, switching between sources, adjusting audio levels, and configuring recording settings. Network control enables operation from a separate computer connected to the same network, offering flexibility during live productions.

The software mirrors the physical controls of the switcher, but expands functionality with features like macro creation and advanced color correction. Utilizing a dedicated computer for control frees up the switcher for recording and streaming tasks, streamlining your workflow.

ATEM Software Control Panel Overview

The ATEM Software Control panel is logically organized into sections for easy navigation. The ‘Switcher’ tab manages program and preview rows, allowing for cuts, mixes, and transitions. ‘Audio’ provides individual channel control, including gain, EQ, and compression. ‘Media’ handles still store and clip playback, while ‘Color’ offers basic color correction tools.

‘Recording’ configures ISO recording parameters and manages storage. ‘Setup’ adjusts global settings like video standards and network configurations. The panel’s intuitive design facilitates quick adjustments during live broadcasts, maximizing efficiency and creative control.

Network Control & Remote Operation

The ATEM Mini Pro ISO enables remote operation via Ethernet connection. Connecting the ATEM to the same network as a laptop allows control through the ATEM Software Control panel, even without a direct USB connection. This is particularly useful for setups where the switcher is physically distant from the operator.

Network control facilitates adjustments to all switcher settings, including video sources, audio levels, and transitions. Utilizing network control eliminates the need for physical access to the device, streamlining workflows and enabling collaborative broadcasting scenarios.

Recording Capabilities: ISO Recording Explained

The ATEM Mini Pro ISO’s standout feature is its ISO recording capability. This allows simultaneous recording of all input sources as individual files to a USB drive. Essentially, each camera feed, plus the program and preview outputs, are recorded independently.

This provides immense flexibility in post-production, enabling editing with multiple camera angles. ISO recordings are crucial for creating polished content, correcting errors, or repurposing footage. The ability to split the two microphone inputs into four separate channels further enhances audio ISO recording possibilities.

Multi-Camera Recording with ISOs

Leveraging the ATEM Mini Pro ISO’s ISO recording truly shines in multi-camera setups. With multiple cameras connected, each source is recorded independently, offering unparalleled creative control during editing. This eliminates the limitations of traditional recording methods where only the program output is saved.

Imagine a podcast with two camera angles and two distinct microphones; the ISOs capture each feed separately. This allows for dynamic switching between cameras and precise audio adjustments in post-production. Consider upgrading to the Extreme ISO model for increased input and output options, maximizing multi-camera potential.

Managing and Exporting ISO Recordings

After recording, accessing and exporting your ISO files is straightforward. The ATEM Mini Pro ISO stores ISO recordings on a connected USB drive. These files are typically in a format compatible with common video editing software like DaVinci Resolve, Adobe Premiere Pro, or Final Cut Pro.

Organization is key; clearly label your USB drives and recordings. If you encounter issues, consider utilizing a USB capture card to transfer video to a laptop for editing and control via the ATEM’s network interface. Remember, the ISOs represent individual source feeds, allowing for flexible post-production workflows.

Audio Control & Mixing

The ATEM Mini Pro ISO provides robust audio control, crucial for professional-sounding productions. It features dedicated microphone inputs that can be split into four separate channels, effectively creating ISO recordings of each microphone source. This allows for independent audio post-production and mixing.

Utilize the software control panel to adjust levels, apply equalization, and add compression to each audio channel. Careful monitoring and level adjustment are essential to prevent clipping and ensure a clean, balanced sound. Proper audio mixing significantly enhances the overall quality of your live streams and recordings.

Dedicated Microphone Inputs & Channel Separation

The ATEM Mini Pro ISO boasts two dedicated XLR microphone inputs, a significant advantage for podcasting and multi-presenter setups. A key feature is the ability to split these two inputs into four separate, isolated channels within the mixer. This channel separation is vital for ISO recording, allowing you to capture each microphone source independently.

This functionality provides unparalleled flexibility in post-production. You can adjust levels, apply effects, and refine the audio of each speaker individually, resulting in a polished and professional sound. Effectively, you gain an ISO recording of each of the four mics.

Audio Monitoring & Level Adjustment

Precise audio control is crucial for a professional broadcast, and the ATEM Mini Pro ISO delivers. The built-in audio mixer allows for individual level adjustment for each input, including the dedicated microphone channels. Visual audio meters provide real-time feedback, ensuring optimal signal levels and preventing clipping or distortion.

Monitoring options are versatile. You can utilize the built-in headphone jack for direct monitoring, or connect external speakers via the HDMI output. Careful level adjustment, combined with monitoring, guarantees clear and consistent audio throughout your live stream or recording;

Live Streaming Setup & Configuration

The ATEM Mini Pro ISO simplifies live streaming to popular platforms. Direct integration with YouTube, Facebook, and Twitch is available, streamlining the setup process. Simply select your desired platform within the ATEM Software Control panel and enter your stream key.

For greater flexibility, the ATEM Mini Pro ISO supports RTMP protocols, enabling streaming to custom servers or less common platforms. Consider utilizing a wired Ethernet connection for a stable and reliable stream. Alternatively, a USB capture card can route the HDMI output to a laptop for streaming control.

Direct Streaming Platforms (YouTube, Facebook, Twitch)

The ATEM Mini Pro ISO offers seamless direct streaming to major platforms. Within the ATEM Software Control, select your preferred service – YouTube, Facebook, or Twitch – from the streaming destination options. Input your unique stream key, obtained from the platform’s settings, into the designated field.

Ensure your internet connection is stable and sufficient for the desired streaming quality. The ATEM Mini Pro ISO automatically handles encoding and bitrate adjustments. Regularly monitor the stream status within the software to confirm a successful connection and broadcast.

Using RTMP Protocols for Custom Streaming

For streaming to platforms not directly supported, the ATEM Mini Pro ISO utilizes RTMP (Real-Time Messaging Protocol). Access the custom streaming settings within the ATEM Software Control panel. Manually input the RTMP server URL and stream key provided by your chosen platform.

Verify the server address and key accuracy to avoid connection issues. Adjust bitrate and resolution settings to match the platform’s recommendations. RTMP offers flexibility but requires more technical configuration than direct platform integration. Test the connection thoroughly before live broadcasts.

Troubleshooting Common Issues

Encountering problems? Begin by checking all cable connections—ensure they are secure; For audio issues, verify input levels and channel assignments within the audio mixer. If video signal is lost, confirm source power and HDMI/SDI cable integrity.

Consider upgrading to the Extreme ISO for additional ports if experiencing limitations. Utilize the ATEM Software Control for remote diagnostics. A USB capture card can bypass multiview monitor issues. Network connectivity is crucial for remote operation; confirm a stable connection.

Resolving Audio Problems

Audio glitches are common; start by verifying microphone connections and ensuring proper gain staging. The ATEM Mini Pro ISO splits two mic inputs into four separate channels, enabling ISO recording of individual mics. Check the audio mixer within the software control panel for correct channel assignments and levels.

Confirm phantom power is enabled if using condenser microphones. Monitor audio levels closely to avoid clipping or excessive noise. If issues persist, test with different cables and microphones to isolate the problem. A stable network connection is vital for reliable audio transmission.

Addressing Video Signal Loss

Video signal loss can stem from several sources; begin by inspecting all HDMI or SDI cable connections, ensuring they are securely fastened. Consider cable quality – higher-grade cables minimize signal degradation. If using long cable runs, an amplifier might be necessary to boost the signal.

Verify the input source is powered on and outputting a compatible video format. The ATEM Mini Pro ISO supports various resolutions and frame rates; confirm compatibility. As a workaround, utilize a USB capture card connected to a laptop for video input, alongside network control via Ethernet.

ATEM Mini Pro ISO vs. ATEM Mini Extreme ISO: A Comparison

The ATEM Mini Pro ISO is a robust entry point, but the Extreme ISO offers significant advantages for expanding setups. Notably, the Extreme ISO boasts eight inputs versus the Pro ISO’s four, providing greater flexibility. Crucially, it features two HDMI and four SDI outputs, alongside dual USB-C connections—enhancing connectivity options.

For podcasting or multi-camera productions, the Extreme ISO’s expanded I/O is invaluable. Upgrading provides more outputs for monitoring and recording, plus the ability to connect more sources. Consider the Extreme ISO if future growth or complex workflows are anticipated.

Benefits of Upgrading to the Extreme ISO Model

Transitioning to the ATEM Mini Extreme ISO unlocks substantial workflow enhancements. The increased input count—eight versus four—accommodates larger productions and more camera sources. Dual USB-C ports enable simultaneous recording and streaming without compromise, a critical feature for live content creation.

Furthermore, the expanded output options—two HDMI and four SDI—facilitate versatile monitoring and distribution. For those utilizing a laptop for control, bypassing the multiview monitor with a USB capture card is possible. Ultimately, the Extreme ISO provides scalability and professional-grade connectivity.

Advanced Features & Workflows

The ATEM Mini Pro ISO’s power extends beyond basic switching. Utilizing macros allows for complex, automated sequences—ideal for repetitive actions or precise timing during broadcasts. These pre-programmed sequences streamline production, reducing errors and freeing up the operator.

Furthermore, explore advanced audio routing and mixing capabilities for a polished sound. The ability to split the two microphone inputs into four separate channels is particularly useful for podcasting, enabling individual ISO recordings of each mic source. Regular firmware updates ensure continued functionality and access to new features.

Utilizing Macros for Automated Switching

Macros within the ATEM Mini Pro ISO are pre-programmed sequences of actions, automating complex operations with a single button press. These can include transitions, media player control, audio adjustments, and even triggering external devices. Creating macros involves recording a series of commands within the ATEM Software Control panel.

For example, a macro could instantly switch between multiple camera angles, apply a specific video effect, and adjust audio levels—all simultaneously. This is incredibly useful for live events, ensuring consistent and professional results. Experiment with different combinations to streamline your workflow and enhance production value.

Firmware Updates & Support

Blackmagic Design regularly releases firmware updates for the ATEM Mini Pro ISO, improving performance, adding new features, and addressing potential bugs. Staying current with these updates is crucial for optimal operation and access to the latest enhancements. Updates are typically downloaded from the Blackmagic Design website and installed via the ATEM Setup Utility.

Comprehensive support resources are available online, including a detailed user manual, FAQs, and a dedicated support forum. The Blackmagic Design community is also a valuable source of information and troubleshooting assistance. For more complex issues, direct support can be obtained through Blackmagic Design’s support channels.

PDF

the alaska roadside angler’s guide .pdf

The Alaska Roadside Anglers Guide, available as a PDF, is a vital resource. It details numerous fishing spots accessible directly from Alaska’s highways, offering comprehensive angling information.

What is the Alaska Roadside Anglers Guide?

The Alaska Roadside Anglers Guide is a comprehensive PDF document designed to assist anglers in accessing and enjoying Alaska’s abundant fishing opportunities. This invaluable resource details locations reachable directly from roadways like the Glenn Highway, Tok Cut-Off, and Taylor Highway. It provides crucial information on various species, including Halibut and Sheefish.

The guide, often available online, simplifies trip planning by outlining access points and relevant regulations. It’s a key tool for both novice and experienced anglers seeking convenient roadside fishing experiences throughout Alaska.

Importance of the Guide for Anglers

The Alaska Roadside Anglers Guide, readily available as a PDF, is essential for successful and responsible fishing in Alaska. It streamlines planning by pinpointing accessible spots along major highways, saving time and effort. Understanding current fishing regulations, bait restrictions, and catch-and-release practices (like for Sheefish) is crucial, and the guide provides this information.

This resource ensures anglers remain compliant with Alaska Department of Fish and Game rules, promoting conservation and sustainable fishing for all.

Key Fishing Areas in Alaska

The Alaska Roadside Anglers Guide PDF highlights prime locations like Nome, the Yukon River drainage, and along the Dalton Highway for diverse fishing opportunities.

Northwestern Alaska ‒ Nome Area

The Alaska Roadside Anglers Guide PDF specifically details Nome’s unique road system, providing access to rivers teeming with various fish species. This area offers exceptional angling opportunities, making it a premier destination for roadside anglers. The guide outlines access points and potential catches within Nome’s surrounding waterways. It’s a crucial resource for planning a successful fishing trip in this remote region of Alaska, ensuring anglers are well-prepared for the unique conditions and abundant fish populations found there.

Yukon River Drainage Access

The Alaska Roadside Anglers Guide PDF highlights access to the Yukon River Drainage, a vast network offering diverse fishing experiences. It details locations along the Dalton Highway, specifically within five miles, excluding the Ray River. Anglers utilizing this guide will find valuable information regarding species availability and optimal fishing spots. Always consult the current State of Alaska Fishing Regulations guide alongside the PDF for up-to-date bait, hook, and gear restrictions within this expansive drainage system.

Dalton Highway Fishing Opportunities

The Alaska Roadside Anglers Guide PDF details significant fishing opportunities along the Dalton Highway, a remote yet rewarding location. It specifies access for angling within five miles of the highway, with the exception of the Ray River area. The guide emphasizes the importance of referencing the current State of Alaska Fishing Regulations for precise details on permitted bait, hook types, and gear restrictions applicable to this unique fishing environment. Careful planning using both resources is crucial.

Understanding Alaska Fishing Regulations

The Alaska Roadside Anglers Guide PDF stresses consulting the annual State of Alaska Fishing Regulations for current rules regarding bait, hooks, and gear restrictions.

Annual Fishing Regulations Guide

The Alaska Roadside Anglers Guide consistently emphasizes the absolute necessity of reviewing the annually updated State of Alaska Fishing Regulations. This PDF guide serves as a starting point, but regulations change frequently.

Anglers must consult the current year’s guide for precise details on species-specific limits, open seasons, gear restrictions, and any emergency closures. Ignoring these regulations can result in substantial fines or other penalties. Always prioritize compliance for a responsible and enjoyable fishing experience.

Bait, Hook, and Gear Restrictions

The Alaska Roadside Anglers Guide highlights that Alaska imposes specific restrictions on bait, hook types, and overall fishing gear. These regulations vary significantly by location and target species. The current State of Alaska Fishing Regulations guide (available as a PDF) details these nuances.

Certain areas may prohibit the use of natural bait, while others may restrict hook sizes or require specific gear types. Always verify current rules before fishing to ensure full compliance and avoid potential penalties.

Catch and Release Practices ‒ Sheefish Example

The Alaska Roadside Anglers Guide emphasizes catch and release, particularly for species like Sheefish. A dedicated PDF resource details best practices for minimizing harm to these fish. Proper handling is crucial – wet hands, careful unhooking, and minimal air exposure are vital.

Sheefish are slow-growing, making responsible angling essential for population sustainability. The guide stresses the importance of quick, gentle releases to ensure the fish’s survival and continued reproduction.

Popular Fish Species for Roadside Anglers

The Alaska Roadside Anglers Guide, in PDF format, highlights Halibut, Sheefish, Salmon, and Trout as prime catches for roadside anglers throughout Alaska.

Halibut Fishing – Trip Details & Regulations

The Alaska Roadside Anglers Guide, accessible as a PDF, provides crucial details for Halibut fishing. It covers trip durations, prime locations along the coast, and essential regulations anglers must follow. Understanding size limits, bag limits, and seasonal closures is paramount.

The guide emphasizes adherence to Alaska Department of Fish and Game rules, ensuring sustainable Halibut populations. It also details necessary permits and licensing requirements before embarking on a Halibut fishing adventure, promoting responsible angling practices.

Sheefish – Catch & Release Focus

The Alaska Roadside Anglers Guide, in PDF format, strongly advocates for Catch and Release practices when targeting Sheefish. This unique species, found in Northwestern Alaska, requires careful handling to ensure survival post-release. The guide details proper techniques, emphasizing minimizing stress on the fish.

It highlights the importance of using barbless hooks and avoiding prolonged air exposure. Conservation of Sheefish populations is a key message, promoting responsible angling and sustainable fisheries management within the region, as detailed in supplemental PDF resources.

Other Common Species (Salmon, Trout, etc.)

The Alaska Roadside Anglers Guide PDF details opportunities beyond Halibut and Sheefish. Numerous rivers accessible from roadways teem with various Salmon species – King, Red, Silver, Pink, and Chum – offering diverse angling experiences. Trout, including Rainbow and Dolly Varden, are also prevalent.

The guide provides basic identification and regulation information for these species. It emphasizes checking current Alaska Department of Fish and Game regulations for specific limits and restrictions, ensuring responsible and legal angling practices throughout the state.

Essential Gear for Alaska Roadside Fishing

The Alaska Roadside Anglers Guide PDF recommends appropriate rod and reel selections, essential tackle, and crucial safety equipment for successful and secure Alaska angling.

Rod and Reel Recommendations

The Alaska Roadside Anglers Guide PDF doesn’t explicitly detail specific rod and reel brands, but suggests matching gear to targeted species. For halibut, a sturdy conventional reel paired with a heavy-power rod is crucial. When pursuing sheefish or salmon, a medium-heavy spinning or casting setup offers versatility.

Consider rod length – 6 to 7.5 feet is generally effective. Line capacity should accommodate substantial runs, especially when battling larger fish. Durable construction is paramount, given Alaska’s rugged conditions. Prioritize quality to enhance your angling experience and ensure reliable performance throughout your trip.

Tackle and Lure Selection

The Alaska Roadside Anglers Guide PDF emphasizes adapting tackle to the fish and location. For halibut, heavy jigs, and large bait presentations are effective. Sheefish respond well to spoons and spinners, mimicking their natural prey. Salmon fishing requires a diverse array of lures – spoons, spinners, and flies – depending on the river and species.

Bring a variety of weights and hooks to adjust to changing conditions. Consider using durable tackle, as Alaska’s environment can be harsh. Always check regulations regarding hook types and bait restrictions before fishing.

Safety Equipment Checklist

The Alaska Roadside Anglers Guide PDF stresses prioritizing safety. Essential items include bear spray, a first-aid kit, waterproof clothing, and sturdy boots. Carry a communication device – a satellite phone or personal locator beacon – as cell service is unreliable in many areas.

Pack a headlamp or flashlight, a map and compass (and know how to use them!), and sufficient food and water. Be aware of changing weather conditions and inform someone of your fishing plans before heading out.

Road Access and Fishing Spot Locations

The Alaska Roadside Anglers Guide PDF highlights spots along the Glenn Highway, Tok Cut-Off, and Taylor Highway, providing detailed access information and maps for anglers.

Glenn Highway/Tok Cut-Off Spots

The Alaska Roadside Anglers Guide PDF details numerous accessible fishing locations along the Glenn Highway and Tok Cut-Off. These areas provide convenient access for anglers seeking diverse species. The guide specifies locations, often within five miles of the road, offering opportunities for both novice and experienced fishers. It emphasizes checking the current State of Alaska Fishing Regulations guide for up-to-date information regarding bait, hook, and gear restrictions. These spots are easily reachable, making them ideal for roadside angling adventures, and are clearly mapped within the guide itself.

Taylor Highway Fishing Access

The Alaska Roadside Anglers Guide PDF highlights fishing opportunities along the Taylor Highway, a more remote but rewarding location. Access points are detailed, allowing anglers to explore various river systems. The guide stresses the importance of consulting the annual Alaska Fishing Regulations for current rules. It’s crucial to be aware of specific restrictions, particularly concerning bait and gear. The PDF provides mapping resources to pinpoint prime spots, ensuring a successful and compliant angling experience along this less-traveled Alaskan route.

Mapping Resources for Roadside Fishing

The Alaska Roadside Anglers Guide PDF emphasizes utilizing maps for successful fishing. It references maps included within the book itself, detailing spots along highways like the Glenn and Taylor. Anglers are encouraged to supplement this with additional resources. Digital mapping tools and Alaska Department of Fish and Game maps are recommended. Precise location data, combined with the guide’s information, maximizes angling efficiency and ensures access to prime fishing locations throughout the state.

Planning Your Alaska Fishing Trip

The Alaska Roadside Anglers Guide PDF aids trip planning by detailing optimal fishing seasons and nearby accommodations, ensuring a well-prepared angling adventure.

Best Time of Year to Fish

The Alaska Roadside Anglers Guide PDF doesn’t explicitly detail peak times universally, as it varies greatly by region and species. However, generally, summer – June through August – offers the warmest weather and most accessible fishing opportunities along roadways.

Salmon runs dictate prime times for specific rivers, while halibut fishing is often best during these warmer months too. Checking the annual Alaska State fishing regulations, referenced within the guide, is crucial for precise dates and species-specific openings. Early and late seasons can offer fewer crowds, but potentially harsher conditions.

Accommodation Options Near Fishing Spots

The Alaska Roadside Anglers Guide PDF doesn’t list specific lodging, but highlights areas along Glenn Highway, Tok Cut-Off, and Taylor Highway with fishing access. Expect options ranging from established hotels and motels in towns like Tok and Glennallen, to more rustic cabins and campgrounds closer to remote spots.

Denali National Park offers park lodges and nearby hotels. Booking in advance, especially during peak season, is highly recommended. Resources like the Routard guide to Alaska can assist in finding detailed accommodation listings near these fishing locations.

Transportation Considerations

The Alaska Roadside Anglers Guide PDF focuses on roadside access, implying a personal vehicle is ideal. However, Alaska’s distances are vast; ensure your vehicle is well-maintained. Rental cars are available at major airports. Consider a 4×4 for accessing more remote spots mentioned in supplemental guides like Routard.

Public transportation is limited outside major cities. Planning for fuel stops is crucial, as services can be sparse along highways like the Dalton and Taylor. Be prepared for varying road conditions.

Alaska Travel Information

The Alaska Roadside Anglers Guide PDF advises checking entry formalities – passport/visa requirements – and health precautions before your trip to ensure smooth travels.

Entry Formalities (Passport/Visa)

The Alaska Roadside Anglers Guide PDF highlights the importance of verifying entry requirements before your angling adventure. For international travelers, a valid passport is generally essential for entering the United States. Depending on your country of origin, a visa may also be necessary. It’s crucial to consult the U.S. Department of State website or your nearest U.S. embassy or consulate to determine specific requirements based on your citizenship. Ensure your passport is valid for at least six months beyond your intended stay to avoid potential issues at the border.

Vaccinations and Health Precautions

The Alaska Roadside Anglers Guide PDF doesn’t directly address health, but responsible travel requires preparation. Consult your doctor regarding recommended vaccinations and health precautions before your trip. While Alaska generally has a high standard of healthcare, remote fishing locations may have limited access. Pack a comprehensive first-aid kit, including insect repellent, sunscreen, and any personal medications. Be aware of potential wildlife encounters and practice food safety when preparing your catch.

Tourist Information Resources

While the Alaska Roadside Anglers Guide PDF focuses on fishing, broader travel planning requires additional resources. Le Routard offers Alaska photos and trip planning ideas. The official Alaska tourism website provides comprehensive information on attractions, accommodations, and transportation. Local visitor centers along highways like the Glenn and Taylor offer maps and advice. Online fishing forums and communities can provide up-to-date conditions and angler reports, complementing the guide’s static information.

Denali National Park Fishing Considerations

The Alaska Roadside Anglers Guide provides limited Denali coverage; park-specific regulations apply. Accessing fishing locations requires careful planning and adherence to National Park Service rules.

Accessing Fishing Locations within Denali

The Alaska Roadside Anglers Guide offers minimal detail regarding Denali’s interior fishing spots, emphasizing road-accessible areas. Reaching prime fishing within Denali National Park often necessitates utilizing the park’s bus system, requiring reservations and adherence to schedules. Hiking to remote locations is possible, but demands physical fitness and backcountry preparedness.
Remember to consult the park’s website for updated access information, trail conditions, and potential closures. Prioritize Leave No Trace principles to preserve this pristine environment for future anglers.

Park-Specific Regulations

The Alaska Roadside Anglers Guide directs anglers to consult Denali National Park’s specific regulations, distinct from statewide rules. These regulations govern permitted fishing methods, catch limits, and species-specific restrictions within the park boundaries. Bait restrictions may apply, and certain areas could be closed to protect spawning fish. Obtaining a park fishing permit is often required, alongside a valid Alaska fishing license. Always verify current regulations before casting a line to ensure compliance and responsible angling.

Alaska Culture and Cuisine

The Alaska Roadside Anglers Guide encourages respecting local traditions and sampling regional cuisine. Discover Alaska’s gastronomic specialties and unique cultural experiences alongside your fishing adventures.

Local Traditions and Etiquette

The Alaska Roadside Anglers Guide implicitly promotes respectful interaction with Alaskan communities. Understanding local customs enhances your experience; Alaskans value self-reliance and respect for the environment. Be mindful of wildlife and practice Leave No Trace principles while fishing. Showing genuine interest in Native Alaskan cultures is appreciated, but avoid intrusive behavior; Respect private property and obtain permission before crossing land. A friendly attitude and willingness to learn will foster positive interactions during your angling trip.

Gastronomic Specialties to Try

While The Alaska Roadside Anglers Guide focuses on fishing, exploring Alaskan cuisine complements your trip! Savor fresh salmon, prepared in diverse styles – smoked, baked, or grilled. Reindeer sausage and king crab legs are iconic delicacies. Don’t miss Akutaq (Eskimo ice cream), a traditional dessert. Local breweries offer unique craft beers. Enjoy halibut, often caught during trips detailed in the PDF guide. Embrace the flavors of the Last Frontier for a complete Alaskan experience.

Resources for Further Information

Explore The Routard Guide to Alaska and online fishing forums. The Alaska Department of Fish and Game website provides the PDF guide and regulations.

The Routard Guide to Alaska

Le Routard (The Routard) offers a comprehensive overview of Alaska, including travel planning, cultural insights, and practical information. While not solely focused on angling, it provides valuable context for your trip. Discover Alaska through stunning photos and plan your adventure with their detailed guides.

It’s a useful companion alongside the Alaska Roadside Anglers Guide PDF, offering broader travel advice and helping you integrate fishing into a larger Alaska experience. Explore itineraries, accommodation options, and local cuisine suggestions to enhance your journey.

Online Fishing Forums and Communities

Supplementing the Alaska Roadside Anglers Guide PDF, online forums provide real-time insights and recent reports from fellow anglers. These communities are invaluable for current conditions, hot spots, and tackle recommendations. Share experiences, ask questions, and learn from others who’ve fished Alaska’s roadside locations.

Engage with experienced Alaska fishers to gain local knowledge beyond the guide’s scope. Discover hidden gems, understand seasonal variations, and refine your techniques for a successful angling adventure.

Alaska Department of Fish and Game Website

The Alaska Department of Fish and Game (ADF&G) website is the definitive source for the most up-to-date fishing regulations, complementing the information in the Alaska Roadside Anglers Guide PDF. Always verify current rules regarding bait, hook types, and catch limits before your trip.

ADF&G also provides detailed species information, fishing forecasts, and emergency closures. Accessing this resource ensures compliance and responsible angling practices throughout Alaska’s diverse waterways.