Archive: January 27, 2026

trader joe’s pizza dough cooking instructions

Trader Joe’s Pizza Dough: A Comprehensive Cooking Guide

Unlocking delicious homemade pizza is easy with Trader Joe’s dough! This guide provides detailed instructions, from initial handling and resting techniques to optimal baking methods.

Understanding Trader Joe’s Pizza Dough

Trader Joe’s pizza dough is a convenient and affordable option for creating a delightful homemade pizza experience. It’s pre-made, refrigerated dough, typically found in a simple package, ready for your culinary creativity. Many appreciate its ease of use, bypassing the time-consuming process of making dough from scratch. However, understanding its characteristics is key to success.

The dough isn’t overly seasoned, providing a blank canvas for your favorite toppings. It’s important to note that it benefits significantly from proper handling and resting. Unlike some pre-made doughs, Trader Joe’s version requires a bit of coaxing to achieve a perfectly stretched and crispy crust. Initial shaping into a ball and allowing it to rest are crucial steps, as highlighted by many users.

Where to Find It in the Store

Locating Trader Joe’s pizza dough within the store is generally quite straightforward, though its exact placement can vary slightly depending on the store layout. Typically, you’ll find it in the refrigerated section, specifically within the fresh pasta and dough area. Look near the pre-made pasta, cheeses, and other refrigerated Italian-style foods.

It’s often stocked alongside other refrigerated doughs, such as cookie dough or crescent roll dough. However, it’s not always in the same aisle as frozen pizzas. Be prepared to check multiple refrigerated sections if you don’t spot it immediately. Stock levels can fluctuate, especially on weekends, so it’s wise to visit during off-peak hours for the best chance of finding it readily available.

The Dough’s Ingredients and Composition

Trader Joe’s pizza dough boasts a relatively simple ingredient list, contributing to its appealing taste and texture. The primary components include wheat flour, water, yeast, olive oil, and salt. Notably, it doesn’t contain any artificial flavors, preservatives, or high fructose corn syrup, aligning with Trader Joe’s commitment to cleaner ingredient lists.

The dough’s composition results in a slightly chewy, yet tender crust when baked correctly. The presence of olive oil contributes to its flavor and helps achieve a desirable texture. While the exact flour type isn’t specified, it appears to be a standard bread flour, providing sufficient gluten development for a good rise and structure. This straightforward composition makes it a versatile base for various pizza creations.

Preparing the Dough for Cooking

Proper preparation is key! Gently form the dough into a ball, rest it for at least 30 minutes, and utilize olive oil for easier handling.

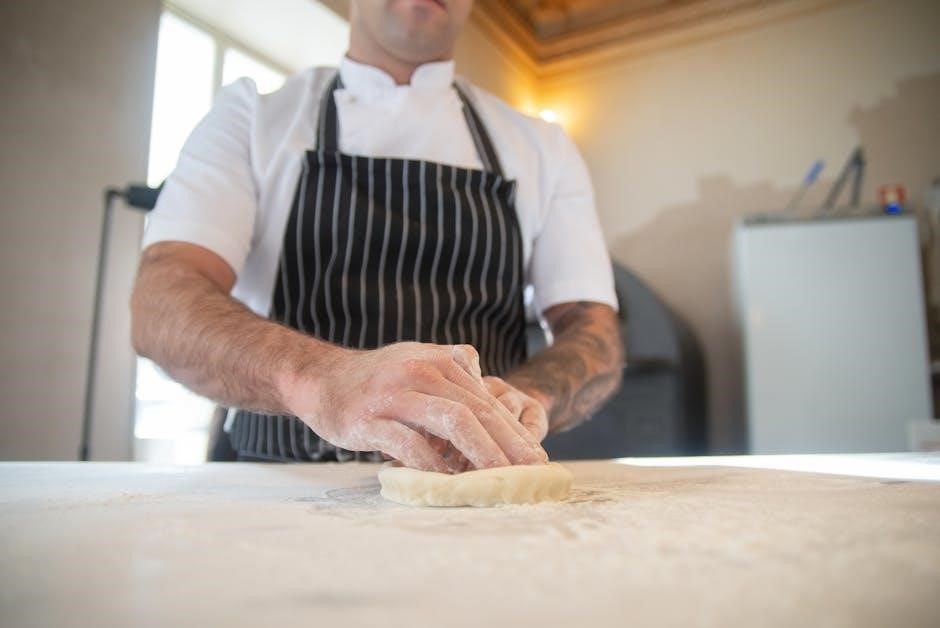
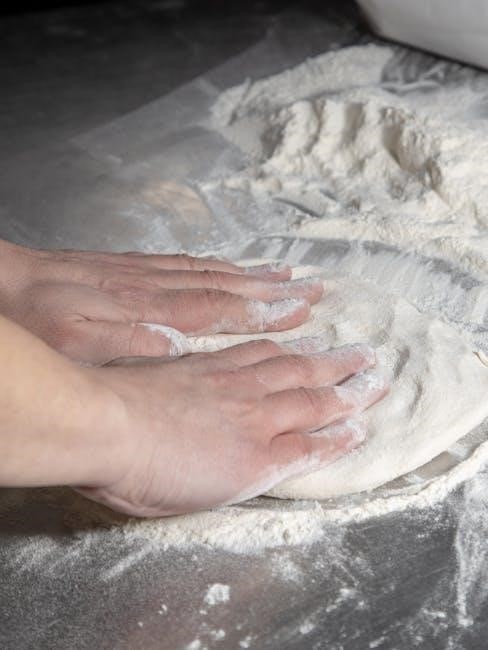
Initial Dough Handling: Forming a Ball

Beginning with the Trader Joe’s pizza dough, the first crucial step is removing it from its packaging. Many sources recommend immediately forming the dough into a smooth, tight ball. This process isn’t about aggressive kneading; instead, gently coax the dough together, tucking the edges underneath to create surface tension.

This initial shaping helps develop gluten structure, leading to a more pliable and easier-to-work-with crust. Avoid excessive flour during this stage, as it can dry out the dough. A lightly oiled surface can be beneficial. Forming a ball allows for even resting and expansion, ultimately contributing to a better texture and overall pizza experience. Don’t overwork it!

Resting the Dough: Timing and Techniques

Allowing the Trader Joe’s pizza dough to rest is paramount for achieving a tender, flavorful crust. A minimum 30-minute rest at room temperature is generally recommended, though some bakers suggest an overnight rest in the refrigerator for enhanced flavor development. During this time, gluten relaxes, making the dough easier to stretch and preventing it from snapping back.

Cover the dough ball loosely with plastic wrap or a damp towel to prevent drying. Resting on a lightly oiled surface, rather than a floured one, is often advised to maintain moisture. Patience is key; a well-rested dough yields a superior pizza!

Using Olive Oil for Easier Handling

Trader Joe’s pizza dough can sometimes be a bit sticky, making it challenging to work with. A simple solution is to utilize olive oil! Instead of heavily flouring your work surface, lightly coat it with olive oil. This creates a non-stick barrier, preventing the dough from adhering and allowing for smoother stretching and shaping.

Additionally, lightly oiling your hands can further aid in handling. The olive oil not only improves manageability but also contributes to a richer flavor and a beautifully golden-brown crust. Don’t overdo it – a light coating is all you need for success!

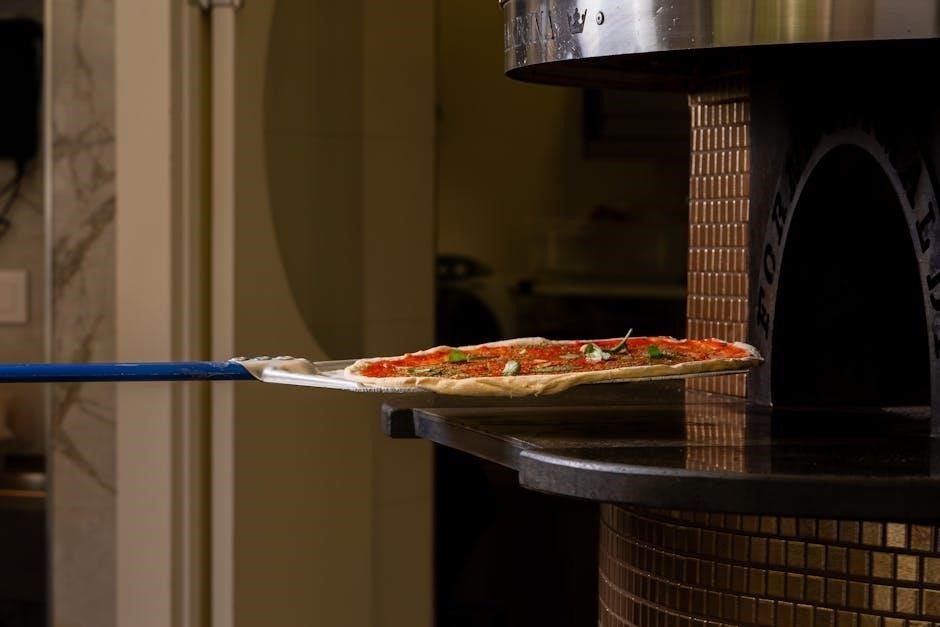
Cooking Methods: Oven Baking

Oven baking delivers classic pizza results! Preheat your oven, prepare your baking surface, and follow time guidelines for a perfectly cooked, golden-brown Trader Joe’s pizza.

Optimal Oven Temperature

Achieving the ideal oven temperature is crucial for a fantastic Trader Joe’s pizza. Most sources recommend a high heat, typically between 425°F (218°C) and 450°F (232°C). This elevated temperature mimics the conditions of a traditional pizza oven, promoting a crispy crust and well-melted toppings.

Preheating your oven thoroughly is essential – allow at least 30 minutes for it to reach the desired temperature. A hotter oven ensures a quicker bake, preventing the dough from becoming soggy. Some bakers even suggest using the oven’s broiler for the last minute or two to achieve extra browning and bubbling on the cheese. Experiment to find what works best with your oven!

Remember that oven temperatures can vary, so monitoring your pizza closely during baking is always a good idea.

Baking Time Guidelines

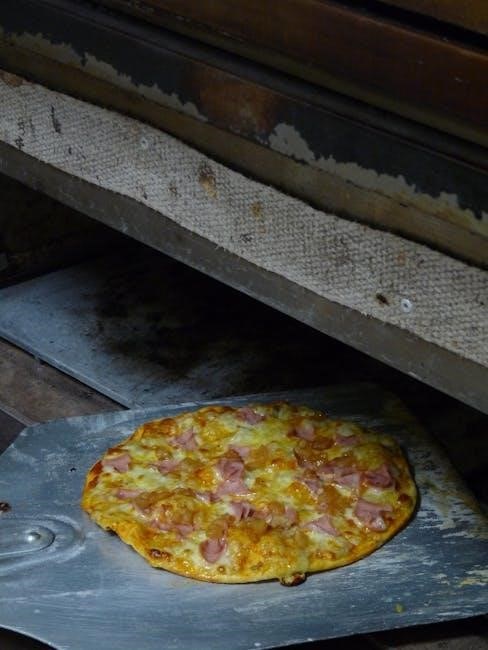
Determining the correct baking time for Trader Joe’s pizza dough depends on your oven temperature and desired crust thickness. Generally, a baking time of 12-15 minutes at 425°F (218°C) to 450°F (232°C) is a good starting point.

Keep a close watch on the pizza during the last few minutes of baking. The crust should be golden brown and slightly crisp, and the cheese should be melted and bubbly. Rotating the pizza halfway through baking can help ensure even cooking.

If you prefer a thinner crust, reduce the baking time slightly. For a thicker, chewier crust, you may need to add a few extra minutes. Always check for doneness before removing the pizza from the oven!

Using a Pizza Stone or Baking Sheet

For a truly crispy crust, a pizza stone is highly recommended! Preheat the stone in the oven during preheating, ensuring it’s thoroughly heated before placing the pizza on it. Carefully slide the prepared pizza onto the hot stone using a pizza peel dusted with cornmeal.

If you don’t have a pizza stone, a baking sheet will work just fine. Lightly grease the baking sheet with olive oil or line it with parchment paper to prevent sticking. Transfer the stretched dough to the prepared baking sheet before adding toppings.

Baking directly on the stone yields a superior crust, but a baking sheet provides convenience and ease of handling.

Cooking Methods: Alternative Techniques

Beyond oven baking, Trader Joe’s dough excels on the grill or in a skillet! These methods offer unique textures and flavors for a quick, delicious meal.

Grilling the Pizza Dough

Grilling Trader Joe’s pizza dough imparts a smoky flavor and delightfully charred texture. Begin by preheating your grill to medium-high heat. Lightly oil the grill grates to prevent sticking. Gently stretch or roll the dough to your desired thickness and carefully place it directly onto the hot grill.

Grill for approximately 2-3 minutes per side, watching closely to avoid burning. The dough should develop grill marks and become slightly puffed. Remove from the grill and quickly add your desired toppings. Return the pizza to the grill, close the lid, and cook for another 2-5 minutes, or until the cheese is melted and bubbly and the toppings are heated through. This method creates a wonderfully crispy crust with a unique, summery taste!

Skillet/Pan-Frying the Dough

For a quick and easy pizza experience, skillet or pan-frying Trader Joe’s dough delivers a wonderfully crispy base. Heat a tablespoon of olive oil in a large skillet over medium heat. Gently stretch or roll the dough to fit the skillet’s diameter. Carefully place the dough in the hot oil and cook for 3-4 minutes per side, until golden brown and slightly puffed.

Remove the partially cooked crust from the skillet and flip it over. Add your favorite sauce and toppings to the cooked side. Cover the skillet and continue cooking for another 5-7 minutes, or until the cheese is melted and the toppings are heated through. This method creates a delightfully crunchy crust, perfect for a weeknight meal!

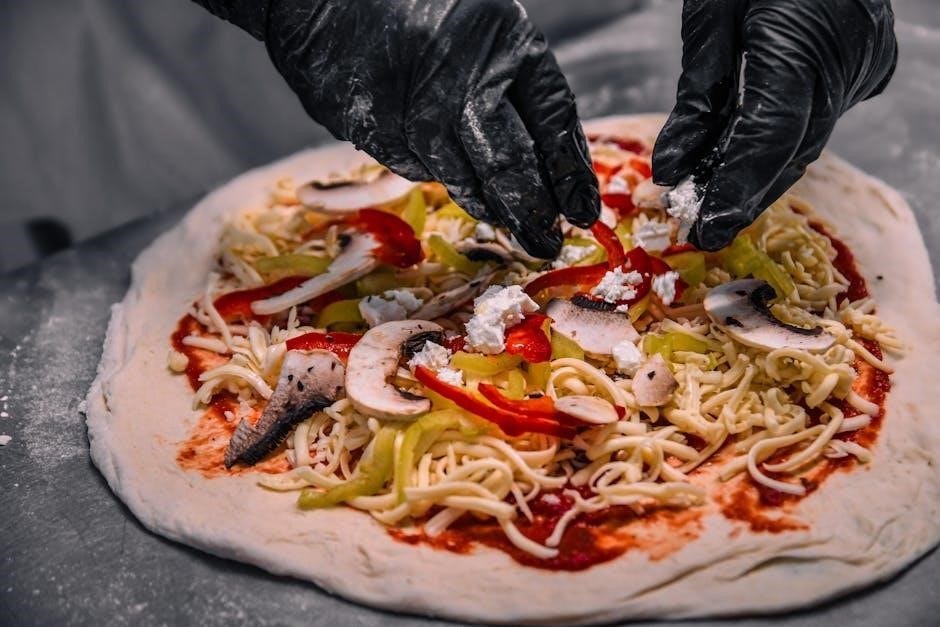
Topping Suggestions and Considerations

Elevate your pizza! Use sauce sparingly to avoid sogginess, and don’t overload toppings. Trader Joe’s offers fantastic pairings for a flavorful experience.

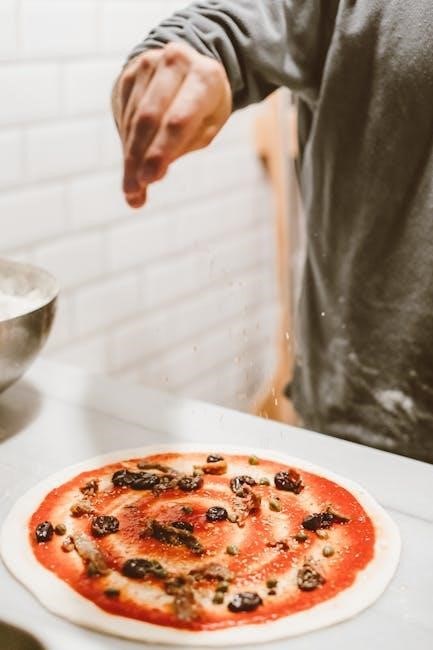
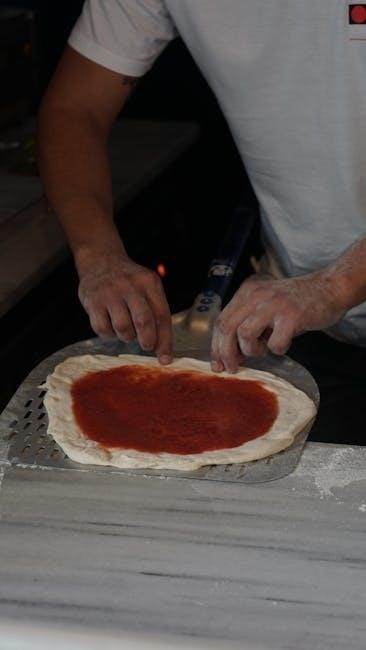
Sauce Quantity: Avoiding a Soggy Crust

Achieving a perfectly crisp crust with Trader Joe’s pizza dough hinges on mindful sauce application. A common pitfall is using too much sauce, leading to a soggy, unstable base. Remember, less is often more! Begin with a thin, even layer, spreading it deliberately but sparingly across the dough.

Consider the sauce’s moisture content; some varieties are wetter than others. A good starting point is approximately ¼ to ⅓ cup for a standard-sized Trader Joe’s dough ball. Avoid extending the sauce all the way to the edges, leaving about a half-inch border for the crust to develop properly. This creates a natural barrier, preventing the sauce from seeping into the outer edges during baking and compromising their crispness.

Experiment to find your ideal sauce-to-dough ratio, but always prioritize a lighter touch to ensure a delightful, structurally sound pizza.

Topping Weight: Preventing Overload

Maintaining structural integrity is crucial when topping your Trader Joe’s pizza. Overloading the dough with too many ingredients can result in a floppy, difficult-to-handle pizza, and potentially a burnt or undercooked crust. Distribute toppings evenly, avoiding large, concentrated piles.

Heavier toppings, like copious amounts of cheese or dense vegetables, should be used more sparingly. Consider pre-cooking vegetables with high water content to reduce moisture release during baking. A balanced approach is key – aim for a harmonious blend of flavors and textures without overwhelming the dough’s capacity.

Remember, the dough is relatively thin, so restraint is vital. Prioritize quality over quantity, selecting complementary toppings that enhance, rather than hinder, the pizza’s overall structure and bake.

Popular Trader Joe’s Topping Pairings

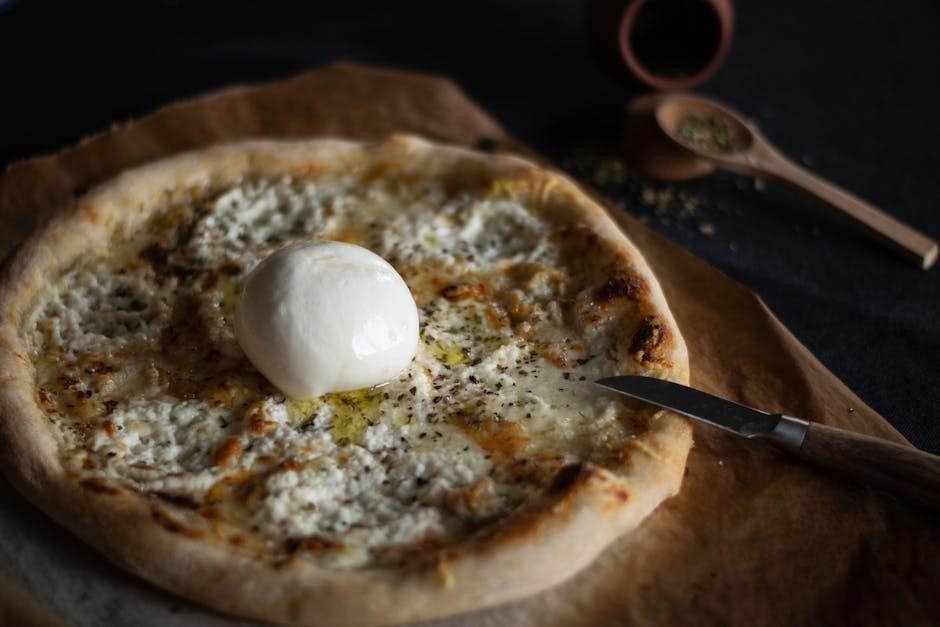
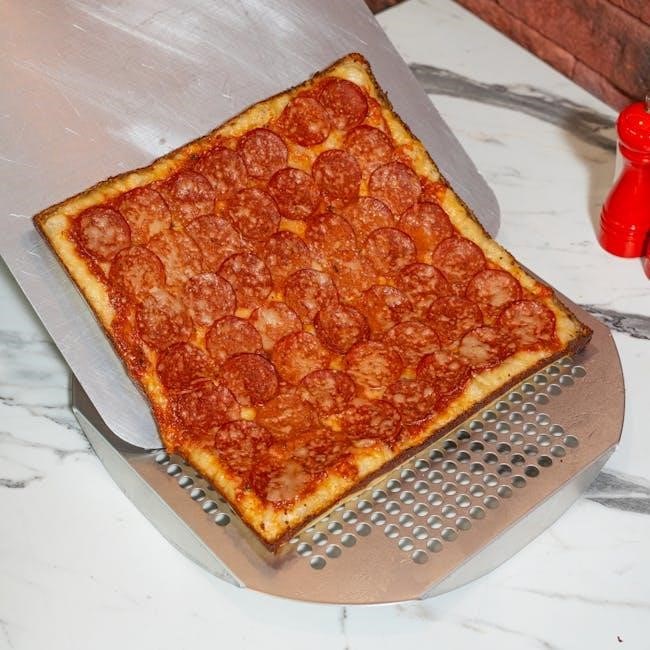
Trader Joe’s offers a fantastic array of ingredients perfect for pizza night! A classic combination is the store’s marinara sauce paired with fresh mozzarella, basil, and pepperoni. For a more adventurous palate, try the Calabrian chili pasta sauce with spicy Italian sausage and roasted red peppers.

The unexpected pairing of fig jam, prosciutto, and goat cheese creates a sweet and savory delight. Don’t overlook the pre-shredded cheeses – the three-cheese blend is a versatile option. Utilize the store’s unique pesto varieties for a vibrant, flavorful base.

Experiment with seasonal produce like butternut squash or Brussels sprouts for a unique twist. Remember to complement the dough’s flavor with thoughtfully chosen ingredients!

Troubleshooting Common Issues

Sticky dough can be solved with flour; tough crusts need less handling. Uneven baking? Rotate the pizza during cooking for consistent results!

Dealing with Sticky Dough

Trader Joe’s pizza dough can sometimes be surprisingly sticky, making it challenging to work with. Don’t panic! The key is to avoid over-flouring, which can alter the dough’s texture. Instead, lightly oil your work surface with olive oil – this creates a non-stick barrier without drying out the dough.

As you handle the dough, keep your hands lightly oiled as well. If it still sticks, sprinkle a very small amount of flour onto your hands and the dough, incorporating it gently. Resist the urge to add a lot of flour at once, as this can make the crust tough. Patience and a gentle touch are crucial. Remember, a slightly sticky dough often yields a chewier, more flavorful crust!

Preventing a Tough Crust

A tough pizza crust is a common frustration, but easily avoidable with Trader Joe’s dough. Overworking the dough is the primary culprit; handle it gently and avoid excessive kneading. Allow sufficient resting time – at least 30 minutes, or even overnight in the refrigerator – to allow the gluten to relax.

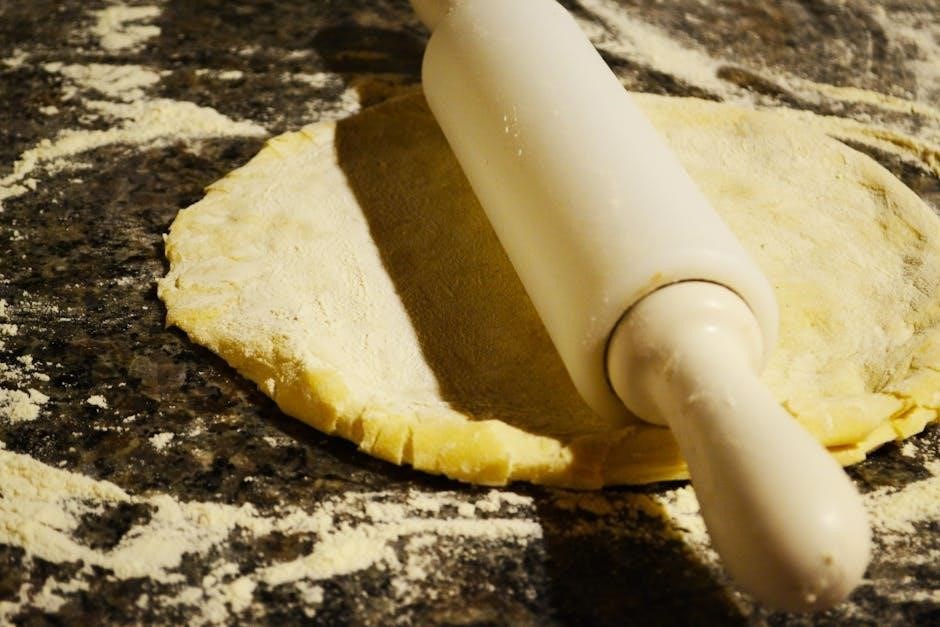
Using olive oil during handling also helps maintain tenderness. When stretching the dough, avoid using a rolling pin, as this compresses the air bubbles. Instead, gently stretch it with your hands. Finally, avoid overloading the pizza with toppings, as excessive weight can also contribute to a dense, tough crust. A lighter touch yields a delightfully airy result!

Addressing Uneven Baking

Uneven baking can occur when using Trader Joe’s pizza dough, often due to inconsistent oven temperatures. Utilizing a pizza stone preheated in the oven for at least 30 minutes helps distribute heat more evenly. If you don’t have a stone, a preheated baking sheet works, but may require slightly longer baking times.

Rotating the pizza halfway through baking ensures all sides receive equal exposure to the heat. Also, ensure your oven rack is positioned in the center. If one area consistently browns faster, try shielding it with foil. Monitoring closely and adjusting baking time accordingly will result in a perfectly golden, evenly baked pizza every time!

Advanced Techniques

Elevate your pizza game with cold fermentation for deeper flavor! Experiment with stretching techniques and create thin or thick crusts to personalize your experience.

Cold Fermentation for Enhanced Flavor

Unlock a more complex and nuanced flavor profile in your Trader Joe’s pizza dough through cold fermentation. This technique involves a prolonged, slow rise in the refrigerator. After forming your dough into a ball, place it in a lightly oiled container, cover tightly, and refrigerate for 24 to 72 hours.

The extended cold rest allows enzymes to break down starches and proteins, developing richer, more savory flavors. Don’t worry about the dough rising significantly; the goal is flavor development, not substantial volume increase. When ready to bake, remove the dough from the refrigerator about 30-60 minutes before stretching to allow it to warm up slightly, making it more pliable. This method truly transforms the Trader Joe’s dough!

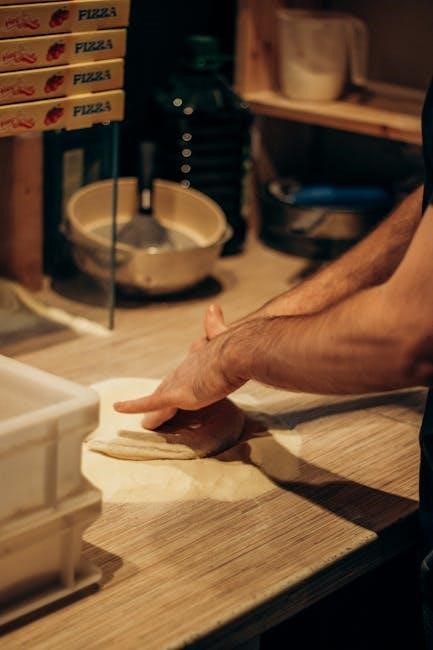
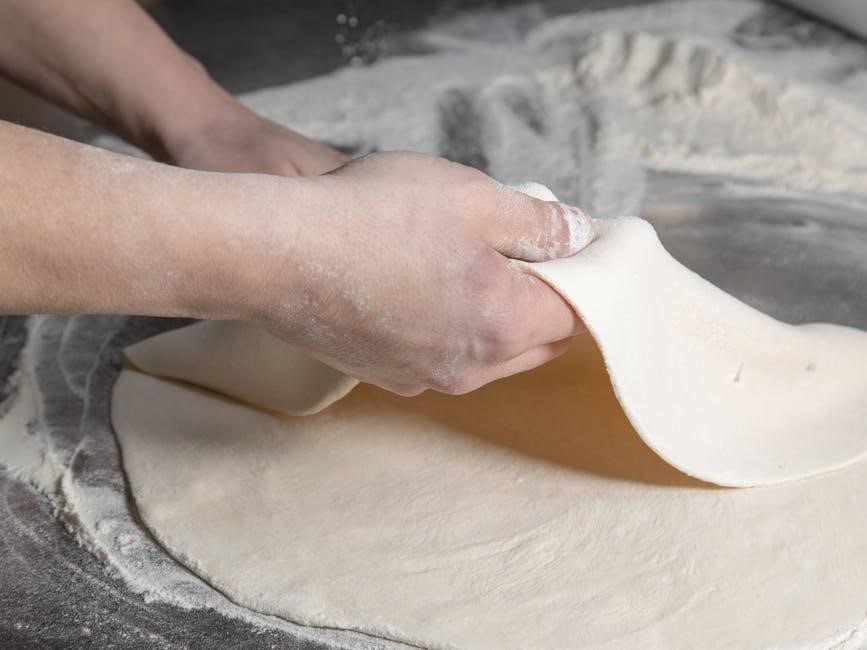
Stretching the Dough: Tips and Tricks

Achieving the perfect pizza base starts with proper dough stretching. Gently coax the dough outwards, using your fingertips to press and stretch from the center. Avoid using a rolling pin, as it compresses the dough, resulting in a tougher crust. Lift the dough and gently stretch it over the backs of your hands, rotating as you go.

If the dough resists stretching, let it rest for another 5-10 minutes to allow the gluten to relax. Dust your work surface lightly with flour or, even better, semolina flour to prevent sticking. Aim for a roughly 12-14 inch circle, leaving a slightly thicker edge for the crust. Practice makes perfect – don’t be discouraged if your first attempt isn’t flawless!

Creating Different Crust Styles (Thin, Thick)

Trader Joe’s dough is versatile, allowing for varied crust styles. For a thin, crispy crust, stretch the dough more extensively, aiming for a larger diameter – around 14-16 inches. Use minimal sauce and toppings to prevent sogginess. A higher oven temperature (450-475°F) also promotes crispness.

To create a thicker, chewier crust, stretch the dough to a smaller size (10-12 inches) and leave it slightly thicker at the edges. Don’t overwork the dough during stretching. A slightly lower oven temperature (425-450°F) and a longer baking time will ensure the center cooks through without burning the crust. Experiment to find your preferred style!

Storage and Preservation

Leftover dough can be refrigerated for a day or two, or frozen for longer storage. Thaw frozen dough slowly in the refrigerator for best results.

Refrigerating Leftover Dough

If you find yourself with leftover Trader Joe’s pizza dough after a satisfying pizza night, proper refrigeration is key to maintaining its quality. Immediately after use, place the dough in an airtight container or a resealable plastic bag. Ensure the container is lightly coated with olive oil to prevent sticking and drying.

Refrigerated dough will generally remain usable for up to two days, though its texture may slightly change. Before using refrigerated dough, allow it to come to room temperature for approximately 30-60 minutes. This will make it more pliable and easier to stretch. Don’t be alarmed if it needs a little extra flour during stretching, as the chilling process can affect its elasticity. Properly refrigerated dough offers a convenient option for a quick weeknight pizza!

Freezing Trader Joe’s Pizza Dough

For longer-term storage, freezing Trader Joe’s pizza dough is an excellent option. Divide the dough into portions corresponding to the size of pizzas you typically make. This allows for convenient thawing of only what you need. Wrap each portion tightly in plastic wrap, ensuring no air pockets remain.

Follow this by placing the wrapped dough inside a freezer-safe bag or container. Properly frozen, the dough can last for up to two months without significant quality loss. When ready to use, transfer the frozen dough to the refrigerator and allow it to thaw slowly overnight. This gradual thawing process yields the best results for texture and ease of handling.

Thawing Frozen Dough Properly

Proper thawing is crucial for achieving the best texture with frozen Trader Joe’s pizza dough. The recommended method is a slow, overnight thaw in the refrigerator. This allows the dough to regain its elasticity gradually, preventing a gummy or tough final product. Remove the frozen dough from the freezer and place it in a lightly oiled bowl, covered with plastic wrap.

Alternatively, for quicker thawing, you can place the dough in a sealed bag and submerge it in cold water, changing the water every 30 minutes. However, refrigerator thawing is preferred. Once thawed, allow the dough to come to room temperature for about 30 minutes before shaping and baking.

trial of the crusader guide

Welcome to the comprehensive Trial of the Crusader guide for Wrath of the Lich King Classic! This resource details accessing, strategies, and rewards within the raid.

Overview of the Raid

Trial of the Crusader (ToC) is a ten-player raid instance located in Icecrown Citadel, serving as a bridge between the normal progression raids and Icecrown Citadel itself. It presents a unique challenge with two distinct phases, each featuring three boss encounters and culminating in a final, powerful adversary.

The raid is designed to test raid coordination and individual player skill, demanding precise execution of mechanics and optimized strategies. Successfully navigating ToC unlocks access to valuable loot and progresses the story towards the ultimate confrontation with the Lich King. Heroic difficulty significantly increases the challenge, offering superior rewards for those who can overcome it. Prepare for intense battles and strategic gameplay!

Accessing the Trial of the Crusader

To access the Trial of the Crusader, players must first complete the “Trial of the Crusader” questline, initiated by Argent Confessor Palatini located in the Icecrown Citadel. This quest requires completing several prerequisite tasks within Icecrown, ensuring players are adequately prepared for the challenges ahead.

Once the questline is finished, a portal will appear in Dalaran, specifically in the Violet Citadel, allowing direct access to the raid instance. The raid is designed for a ten-player group, and entering requires a raid group to be formed. Remember to set the difficulty appropriately – Normal or Heroic – based on your group’s skill and gear level. Prepare for a challenging experience!

Raid Requirements & Preparation

Successful completion of the Trial of the Crusader demands a well-geared and coordinated raid group. A minimum item level of 200 is generally recommended for Normal mode, increasing to 219+ for Heroic difficulty. Essential raid compositions include dedicated tanks, healers, and damage dealers, balanced for optimal performance.

Bring necessary consumables like potions, flasks, and food to enhance your stats. Understanding boss mechanics is crucial; familiarize yourselves with each encounter beforehand. Raid leaders should assign roles and responsibilities clearly. Communication is key – utilize voice chat for real-time coordination. Prepare for challenging encounters requiring precise execution and teamwork!

Boss Strategies ⎻ Phase 1

Phase one features encounters with the Northrend Beasts and the formidable Lord Jaraxxus, demanding strategic positioning and swift adaptation to evolving mechanics.

Northrend Beasts Encounter

The Northrend Beasts encounter tests raid coordination against multiple creatures. Successful completion relies heavily on understanding each beast’s unique abilities and prioritizing targets effectively. Proper positioning is crucial to minimize raid damage from sweeping attacks and avoid being overwhelmed by the sheer number of adds.

Tanks must maintain firm control, utilizing cooldowns strategically to mitigate incoming damage. Healers should focus on burst healing during periods of high damage output from the beasts. DPS players need to quickly eliminate adds while maintaining consistent damage on the primary targets. Mastering these elements is key to overcoming this challenging phase of the Trial of the Crusader.

Positioning and Mechanics

Optimal positioning during the Northrend Beasts encounter is paramount. The raid should spread out to minimize the impact of area-of-effect abilities. Tanks should position themselves to effectively peel adds away from the ranged DPS and healers. Ranged DPS should maintain maximum distance while still being able to contribute consistent damage.

Key mechanics involve managing the adds spawned by the beasts, prioritizing those that inflict the most significant damage or apply debilitating debuffs. Understanding the timing of these spawns and coordinating interrupts is vital. Proper movement and awareness of ground effects are also essential for survival throughout the encounter.

Role-Specific Advice (Tank, Healer, DPS)

Tanks must maintain threat on both beasts and be prepared to taunt swap frequently. Healers should focus on burst healing during periods of heavy damage from add abilities and prioritize keeping the tanks alive. Anticipate incoming damage and utilize cooldowns effectively.

DPS players should prioritize adds based on raid leader instructions, focusing on those posing the greatest immediate threat; Maintain consistent damage output while avoiding standing in harmful ground effects. Coordinate cooldown usage with the raid to maximize burst damage windows and accelerate the encounter’s progression.

Lord Jaraxxus Encounter

Lord Jaraxxus presents a two-phase battle demanding precise execution. Phase one focuses on consistent damage while managing his Shadow Bolt Volley and Nether Grip abilities. Tanks must be prepared for frequent swaps due to the grip.

Phase two initiates when Jaraxxus reaches 50% health, summoning Infernal spawns. Effective Infernal management is crucial; DPS must quickly eliminate them to prevent raid-wide damage. Healers need to be prepared for increased damage output during this phase, utilizing cooldowns strategically to maintain raid health and ensure victory.

Phase 1 Strategy

During the initial phase against Lord Jaraxxus, prioritize sustained damage output while carefully monitoring his abilities. Tanks should maintain a firm grip on threat and prepare for frequent swaps due to Nether Grip. Raid members must spread to minimize Shadow Bolt Volley damage.

DPS should focus fire on Jaraxxus, avoiding unnecessary movement during key phases. Healers should anticipate incoming damage and utilize healing cooldowns proactively. Maintaining mana efficiency is vital for the prolonged encounter. Consistent communication regarding Nether Grip targets is essential for a smooth and successful phase one.

Phase 2 Strategy ⎻ Infernal Spawn Management

Phase two introduces the critical challenge of managing Infernal spawns. Quickly assign dedicated groups to kite and control these adds, ensuring they don’t overwhelm the raid. Prioritize interrupting their Incinerate casts to mitigate raid-wide damage. Tanks should be prepared to taunt and reposition the Infernal as needed.

DPS should focus fire on the Infernal, utilizing all available cooldowns to accelerate their demise. Healers must be prepared for increased damage output from both Jaraxxus and the adds. Effective communication and coordination are paramount for successful Infernal management and progression through this demanding phase.

Boss Strategies ⎻ Phase 2

Phase two encounters demand heightened coordination and adaptability, presenting unique mechanics and increased difficulty compared to the initial phases of each boss.

Kologarn Encounter

Kologarn presents a challenging fight centered around managing adds – the Stone Guardians. These guardians must be dealt with swiftly, as they empower Kologarn and complicate the encounter. Focus fire on the guardians as they spawn, prioritizing those buffing Kologarn’s abilities.

Successfully handling Kologarn requires careful attention to his abilities, including his slams and the Void Zone mechanic. Proper positioning is crucial to avoid unnecessary damage and maintain raid cohesion. Assign dedicated players to interrupt key casts and manage the Stone Guardians effectively. Mastering these elements is key to victory!

Dealing with the Stone Guardians

Stone Guardians are pivotal to the Kologarn encounter, directly impacting his damage output. These adds spawn periodically and grant Kologarn specific buffs – increasing his damage or healing received. Prioritize quickly eliminating them to mitigate these effects. Assigning dedicated DPS to focus solely on the Guardians is highly recommended.

Interrupting their empowering casts is crucial, preventing Kologarn from becoming overwhelmingly powerful. Coordinate stuns and slows to maintain control. Ignoring the Guardians will quickly lead to a raid wipe. Efficiently managing these adds is the cornerstone of a successful Kologarn strategy.

Managing Kologarn’s Abilities

Kologarn utilizes several impactful abilities requiring careful management. His Stone Grip requires quick reaction from the tank, utilizing defensive cooldowns to survive the immense damage. Seismic Slam deals raid-wide damage, demanding healers to be prepared for spikes.

Furthermore, Kologarn’s Living Stone ability creates adds that must be addressed promptly. Proper positioning is vital to minimize the impact of his area-of-effect attacks. Coordinated cooldown usage and consistent damage output are essential for overcoming Kologarn’s challenges, ensuring raid survival and a swift victory.

Festergut Encounter

Festergut presents a unique challenge centered around the Infected Wounds mechanic. This debuff stacks with each hit from Festergut’s abilities, significantly increasing damage taken. Healers must prioritize dispelling this debuff, or risk raid members being quickly overwhelmed.

Optimizing DPS is crucial to accelerate the encounter and minimize the duration of the stacking debuff. Strategic cooldown usage and focused target prioritization are key. Maintaining consistent healing output and effective dispel rotations are paramount for success against Festergut’s relentless assault.

Infected Wounds Mechanic

Infected Wounds is central to the Festergut encounter, stacking with each hit from his abilities and dramatically increasing damage taken by affected players. This debuff requires immediate attention from healers, who must prioritize dispelling it to prevent rapid raid member deaths.

Ignoring the stacking debuff leads to exponential damage increases, quickly overwhelming healing capabilities. Effective dispel coordination and swift reaction times are vital. Understanding the timing of Festergut’s attacks and proactively preparing dispels will significantly improve the raid’s survivability and overall success.

Optimizing DPS and Healing

Maximizing both DPS and healing is crucial during the Festergut encounter due to the rapid stacking of Infected Wounds. DPS should focus on consistent damage output, prioritizing burst windows when the boss is vulnerable, while being mindful of movement to avoid unnecessary debuff stacks.

Healers must anticipate incoming damage and proactively manage dispels, alongside maintaining raid-wide healing. Efficient mana management is also key for sustained healing throughout the fight. Coordinated cooldown usage between healers and DPS can significantly improve the raid’s ability to overcome the encounter’s challenges.

Rotface Encounter

The Rotface encounter demands strict coordination to manage the constant spawning of oozes. Tanks must effectively kite and control Rotface, preventing him from reaching the raid while dealing with the adds. Prioritize quickly eliminating the green oozes, as they empower Rotface.

Positioning is vital; spread out to minimize cleave damage and facilitate efficient oze targeting. DPS should focus fire on oozes as they spawn, and healers must prepare for raid-wide damage spikes. Successful completion relies on swift reactions, precise execution, and a well-defined strategy for oze control.

Managing Ooze Spawns

Ooze spawn management is critical during the Rotface encounter. Green oozes empower Rotface, increasing his damage, while black oozes explode, dealing significant raid damage. Prioritize eliminating green oozes immediately upon spawning to mitigate Rotface’s threat. Assign dedicated DPS to oze control, ensuring swift takedowns.

Healers must anticipate the damage from exploding black oozes and prepare appropriate cooldowns. Proper positioning helps minimize the impact of these explosions. Effective communication is key to coordinating oze targeting and ensuring a smooth, controlled encounter, preventing wipes due to overwhelming oze pressure.

Tanking and Positioning Strategies

Rotface requires careful tanking and positioning. The main tank should maintain threat and position Rotface away from the raid, allowing ample space for oze spawns and movement. A second tank is essential for quickly grabbing and repositioning black oozes before they reach the group.

Tanks must communicate effectively regarding cooldown usage and swap timings. Raid members should maintain a spread formation to minimize the impact of oze explosions. Proper positioning prevents chain reactions and ensures healers can efficiently manage incoming damage. Consistent awareness and adaptation are vital for a successful encounter.

Rewards and Achievements

Trial of the Crusader offers valuable loot, tribute chest rewards based on attempts, and numerous achievements for dedicated raiders to unlock.

Loot from the Trial of the Crusader

The Trial of the Crusader raid is renowned for its desirable loot, offering a significant upgrade to character gear. Players can anticipate receiving powerful items, including tier pieces, weapons, and accessories, essential for progressing further into Wrath of the Lich King content. Specific drops vary per boss, encouraging multiple raid attempts to maximize acquisition opportunities.

Notable items include pieces from the Tier 8 sets, providing substantial stat boosts and set bonuses. Weapons like the Val’kyr’s Blade and The Shadowmourne precursor are highly sought after. Beyond gear, players can also obtain valuable gems, enchanting materials, and recipes. The quality of loot significantly increases when the raid is completed on Heroic difficulty, making it a worthwhile challenge for dedicated guilds and players.

Tribute Chest Rewards & Attempts

The Trial of the Crusader features a unique Tribute Chest mechanic, rewarding raiding guilds based on their performance. The chest’s contents are directly influenced by the number of unsuccessful attempts before a full raid clear; Fewer wipes translate to superior rewards, incentivizing strategic gameplay and efficient execution.

Rewards within the Tribute Chest include additional gear, valuable tokens for purchasing specific items, and potentially rare mounts or cosmetic items. Guilds striving for the best possible rewards should prioritize preparation, communication, and adaptability during encounters. Each attempt adds to the chest’s potential, but also diminishes the quality of the final rewards, creating a compelling risk-reward dynamic.

Available Achievements

Trial of the Crusader offers a diverse range of achievements, challenging guilds and players to demonstrate mastery of the raid’s encounters and mechanics. These achievements span from completing the raid on Heroic difficulty to overcoming specific challenges within each boss fight, rewarding dedication and skill.

Notable achievements include defeating each boss without a single raid member dying, completing the raid within a specific time limit, and mastering complex encounter mechanics. Earning these achievements unlocks unique rewards, such as titles, mounts, and cosmetic items, showcasing a guild’s accomplishments to the wider World of Warcraft community. They provide long-term goals and encourage repeated engagement with the raid content.

par-baked pizza cooking instructions

Understanding Par-Baked Pizza Crusts

Par-baked crusts offer convenience, being partially cooked for a quicker finish! They represent a smart solution for busy cooks desiring a fresh,
homemade pizza experience without extensive preparation․

What is Par-Baking?

Par-baking, also known as pre-baking, is a culinary technique where a pizza crust is initially baked for a reduced period․ This partial cooking process doesn’t fully set the crust; instead, it aims to firm it up enough to handle toppings without becoming soggy․ The crust is typically baked at a moderate temperature, around 350-400°F (175-200°C), for approximately 8-15 minutes, depending on its thickness and the desired level of pre-cooking․

Essentially, par-baking creates a stable base for your pizza․ It prevents the dreaded soggy bottom that can occur when a raw crust is loaded with wet ingredients․ This method is particularly useful for thicker crusts, like deep-dish, where a fully cooked base is crucial for structural integrity․ The final baking stage, after toppings are added, completes the cooking process, resulting in a perfectly crisp and golden-brown crust․

Benefits of Using Par-Baked Crusts

Par-baked crusts deliver significant advantages for both home cooks and professional pizza makers․ Primarily, they drastically reduce cooking time, making weeknight pizza nights far more achievable․ They eliminate the need for extensive dough preparation and proofing, offering a convenient shortcut without sacrificing quality․

Furthermore, par-baking ensures a consistently crisp crust, even with heavier toppings․ This is because the initial bake sets the structure, preventing sogginess․ They also offer flexibility – you can prepare the crusts in advance and store them, ready for a quick pizza whenever the craving strikes․ Utilizing a preheated baking steel or stone alongside a par-baked crust, at temperatures around 500°F, can yield Neapolitan-style results in just minutes, achieving a beautifully charred and crispy exterior․

Preparing for Cooking

Before baking, ensure your par-baked crust is at room temperature for optimal results․ Gather your desired toppings and preheat your oven thoroughly for even cooking!

Checking Crust Condition

Prior to proceeding, a thorough inspection of the par-baked crust is crucial for achieving the best possible outcome; Gently assess the crust’s texture; it should be firm enough to handle without tearing, yet still possess some flexibility․ Look for any signs of mold or discoloration, discarding the crust if present․

If the crust feels excessively dry, a light brushing of olive oil can help restore some moisture and promote a more even bake․ Conversely, if it appears damp or sticky, a brief period (5-10 minutes) on a wire rack can allow excess moisture to evaporate․ Pay attention to the edges – they should be consistently colored and free from any burnt or underbaked spots․ A well-maintained crust is the foundation of a delicious pizza, so taking the time to evaluate its condition is a worthwhile investment!

Essential Equipment

For successful par-baked pizza creation, certain tools are invaluable․ A reliable oven thermometer is paramount, ensuring accurate temperature readings – crucial for achieving a perfectly crisp crust․ A pizza stone or baking steel is highly recommended; these retain heat exceptionally well, mimicking a professional pizza oven’s environment․

If neither is available, a sturdy baking sheet will suffice, though results may vary․ A pizza peel (wooden or metal) facilitates easy transfer of the pizza to and from the hot stone/steel․ Olive oil spray or a pastry brush is useful for lightly coating the baking surface․ Finally, oven mitts are essential for safe handling of hot equipment; Having these items readily available streamlines the process and elevates your pizza-making experience!

Oven Temperature & Baking Time

Optimal temperatures range from 356°F to 900°F, with baking times varying from 8 to 35 minutes, depending on crust style and desired crispness․

Optimal Oven Temperature (General)

For generally achieving a perfectly cooked par-baked pizza, a temperature range of 450°F to 500°F (232°C to 260°C) is widely recommended․ This provides sufficient heat to fully bake the crust, melt the cheese, and cook the toppings without burning the base․ However, remember that oven variations exist, so monitoring is crucial․

Starting with a preheated oven is essential for optimal results․ Allow ample time for the oven to reach the desired temperature, ensuring even heat distribution․ A hotter oven, approaching 500°F, will yield a crispier crust in a shorter timeframe, mirroring Neapolitan styles․ Conversely, a lower temperature, around 450°F, is suitable for thicker crusts or those preferring a softer base․

Consistent temperature throughout the baking process is key․ Avoid opening the oven door frequently, as this can cause temperature fluctuations and impact the final outcome․ Utilizing an oven thermometer can help verify the internal temperature and ensure accuracy․

Optimal Oven Temperature (Neapolitan Style)

To truly emulate a Neapolitan-style pizza with a par-baked crust, achieving extremely high temperatures is paramount․ Ideally, aim for an oven temperature between 800°F and 900°F (427°C to 482°C)․ This intense heat rapidly cooks the pizza, creating a characteristic charred, blistered crust while maintaining a soft, airy interior․

However, reaching these temperatures typically requires a specialized pizza oven․ For conventional home ovens, maximizing the temperature to its highest setting – often around 500°F to 550°F – is the best achievable approximation․ Utilizing a baking steel or pizza stone is crucial to retain and distribute heat effectively․

Baking time at these high temperatures is incredibly short, usually between 90 seconds and 2 minutes․ Constant vigilance is necessary to prevent burning․ The goal is a quickly cooked crust with slight charring, a hallmark of authentic Neapolitan pizza․

Baking Time for Thin Crust

When utilizing a par-baked thin crust, baking time will be relatively short, typically ranging from 8 to 15 minutes․ This timeframe is heavily influenced by your oven’s temperature and the specific thickness of the crust․ Consistent monitoring is key to achieving a perfectly golden-brown and crispy result․

If your oven reaches 500°F (260°C), expect the shorter end of the range – around 8-10 minutes․ Lower temperatures, closer to 400°F (204°C), will necessitate closer to 12-15 minutes․ Remember to rotate the pizza halfway through the baking process to ensure even cooking and prevent burning on one side․

Visually inspect the crust; it should be uniformly golden brown and firm to the touch․ The cheese should be fully melted and bubbly․ Adjust baking time accordingly based on these visual cues for optimal results․

Baking Time for Deep Dish

Deep-dish pizzas, utilizing par-baked crusts, require a significantly longer baking time compared to thinner varieties․ Expect a total cooking duration of approximately 35-40 minutes, following an initial par-bake of around 8 minutes for the crust itself; This extended time allows the substantial dough to fully cook through and develop a desirable texture․

Lower oven temperatures, typically around 356°F (180°C), are recommended for deep-dish pizzas․ Higher heat risks burning the crust before the interior and toppings are adequately heated․ Utilizing a ventilated oven is also beneficial for even heat distribution․

Monitor closely; the crust should be golden brown and the cheese fully melted and bubbly․ A slight jiggle in the center indicates it may need a few more minutes․ Patience is crucial for a perfectly cooked deep-dish masterpiece!

Cooking Methods

Various methods exist for cooking par-baked pizza, including utilizing a pizza stone, baking steel, or directly placing the crust on the oven rack for optimal results!

Using a Pizza Stone

A pizza stone is a fantastic tool for achieving a crispy crust! Preheat the stone along with your oven – ideally to 500°F (260°C) or higher, depending on your recipe and desired style․ Placing the stone on a wire rack during preheating helps ensure even heat distribution․

Carefully transfer the par-baked crust directly onto the hot stone․ Baking times will vary, generally ranging from 8 to 15 minutes, but closely monitor for golden-brown perfection․ Remember to rotate the pizza halfway through cooking to promote even browning, especially if your oven has hot spots․

The stone’s porous nature draws moisture away from the crust, resulting in a delightfully crisp texture․ Be cautious when handling the hot stone; oven mitts are essential! A pizza peel dusted with cornmeal or flour will aid in safely transferring the pizza to and from the stone․

Using a Baking Steel

A baking steel offers superior heat retention compared to a stone, leading to an even crispier crust! Preheat your oven with the steel inside, aiming for 500°F (260°C) or even higher – some enthusiasts reach 900°F (482°C) for Neapolitan-style results․ Coating the steel with a light layer of olive oil prevents sticking and aids in browning․

Carefully place the par-baked crust onto the preheated steel․ Baking times are typically shorter with a steel, often around 11/2 to 2 minutes at very high temperatures, or 8-15 minutes at more moderate settings․ Monitor closely to prevent burning․

The steel’s density creates intense bottom heat, resulting in a beautifully charred and crispy base․ Use a pizza peel for safe transfer, and remember oven mitts are crucial when handling the extremely hot steel!

Directly on Oven Rack

Baking directly on the oven rack is a viable option, though requires caution and a well-preheated oven! Ensure your oven rack is clean and positioned in the middle section for even heat distribution․ Preheat the oven to the appropriate temperature – generally between 356°F (180°C) and 500°F (260°C), depending on crust thickness and desired crispness․

Carefully place the par-baked crust directly onto the hot rack․ This method maximizes airflow around the crust, promoting all-around crisping․ However, it also increases the risk of the crust becoming too browned or even burning, so vigilant monitoring is essential․

Baking times will vary, typically ranging from 8 to 15 minutes․ Consider rotating the pizza halfway through to ensure even cooking․ A baking sheet placed on a lower rack can catch any potential drips․

Toppings & Finishing

Adding toppings after the par-baked crust is cooked ensures a perfectly melted cheese and flavorful pizza! Fresh herbs and a drizzle of olive oil elevate the taste․

When to Add Toppings

Timing is crucial when applying toppings to a par-baked pizza crust․ Unlike starting with raw dough, the partially cooked base requires a different approach to prevent undesirable results․ It’s generally recommended to add your toppings immediately after removing the par-baked crust from the oven․

This allows the cheese to melt beautifully and the toppings to cook through without burning the crust, which can happen if you add them before the initial bake․ The crust has already established some structure, so it can support heavier toppings without becoming soggy․

Consider this: the par-baking process has already addressed much of the structural integrity of the crust․ Therefore, the final bake is primarily focused on melting cheese and heating toppings․ Applying toppings before this final bake risks undercooked ingredients or a compromised crust texture․

Don’t delay! Add your sauce, cheese, and desired toppings promptly for optimal results․

Cheese Selection & Quantity

Cheese choice significantly impacts your par-baked pizza’s final outcome․ Mozzarella remains a classic, offering excellent melt and stretch, but don’t limit yourself! Provolone adds a slightly sharper flavor, while a sprinkle of Parmesan provides a salty, umami boost․ Consider a blend for complexity․

Regarding quantity, moderation is key․ Overloading with cheese can lead to a greasy pizza and potentially prevent the crust from fully crisping․ A good starting point is approximately 6-8 ounces of shredded cheese for a 12-inch pizza․

However, adjust based on your preference and the type of cheese․ Denser cheeses like provolone require less quantity than lighter, airier mozzarella․ Distribute the cheese evenly across the sauce, leaving a small border for a beautifully browned crust;

Remember, the par-baked crust is already partially set, so the cheese needs to melt and bubble without overwhelming the base․

Finishing Touches (Oils, Herbs)

Elevate your par-baked pizza with thoughtful finishing touches! A drizzle of high-quality extra virgin olive oil post-bake adds richness and aroma․ Infused oils, like garlic or chili, introduce another layer of flavor․ Apply sparingly to avoid a soggy crust․

Fresh herbs are game-changers․ Basil, oregano, or parsley, sprinkled on immediately after removing the pizza from the oven, provide vibrant color and fragrance․ Avoid adding herbs before baking, as they can burn and become bitter․

A pinch of red pepper flakes offers a subtle heat, while a grating of Parmesan or Pecorino Romano adds a salty, savory note․ Consider a balsamic glaze for a touch of sweetness and tang․

These final flourishes transform a simple pizza into a culinary delight, showcasing your personal touch and enhancing the overall experience․

Troubleshooting

Common issues include burning or sogginess․ Adjust oven temperature and baking time accordingly․ Uneven cooking often requires rotating the pizza during the baking process․

Crust Burning Before Cheese Melts

If the crust is browning too quickly while the cheese remains unmelted, your oven temperature is likely too high․ Lowering the heat is the primary solution; consider reducing it by 25-50 degrees Fahrenheit․ A lower temperature allows the cheese to melt gradually without scorching the crust․

Additionally, ensure the pizza isn’t positioned too close to the heating element․ Moving it to a lower rack can help distribute heat more evenly․ Covering the crust’s edges with foil during the final few minutes of baking can shield them from excessive heat․

Remember, par-baked crusts are already partially cooked, making them more susceptible to burning․ Monitoring closely and adjusting baking time – potentially reducing it by a few minutes – is crucial for achieving a perfectly melted cheese topping and a golden-brown, not burnt, crust․

Crust Remaining Soggy

A soggy crust indicates insufficient heat or moisture buildup during baking․ Ensure your oven is fully preheated to the recommended temperature – typically between 450°F and 500°F (232°C ― 260°C) – before placing the pizza inside․ Utilizing a pizza stone or baking steel is highly recommended, as these materials retain and distribute heat effectively, promoting a crispier base․

If using a baking sheet, avoid overcrowding it with toppings, as this can trap steam․ Lightly oiling the baking surface can also help prevent sticking and encourage crisping․ For particularly stubborn sogginess, briefly increase the oven temperature during the last few minutes of baking, carefully monitoring to prevent burning․

Finally, ensure ingredients with high water content, like fresh mozzarella, are adequately drained before adding them to the pizza․

Uneven Cooking

Uneven cooking often stems from inconsistent oven heat distribution or improper placement of the pizza within the oven․ Rotating the pizza halfway through the baking process is crucial to ensure all areas receive equal exposure to heat․ Avoid opening the oven door frequently, as this causes temperature fluctuations that hinder even cooking․

If your oven has hot spots, experiment with different rack positions to find one that promotes more uniform baking․ A pizza stone or baking steel helps mitigate hot spots by providing a consistently heated surface․ Ensure the par-baked crust is placed directly on the heated surface, not on a baking sheet on top of it․

Finally, verify your oven’s temperature accuracy with an oven thermometer․

dixell universal controller manual

Dixell Universal Controller Manual: A Comprehensive Plan

This manual provides a detailed guide to programming Dixell temperature controllers, as demonstrated in resources like YouTube tutorials focusing on digital thermostat setup.

It covers setpoint temperature control, essential for precise temperature management, and offers insights into various controller series.

Dixell universal controllers represent a leading solution in temperature management, widely adopted across refrigeration, heating, and air conditioning applications. These programmable instruments offer precise control and monitoring capabilities, ensuring optimal performance and energy efficiency. Understanding their functionality is crucial for professionals and end-users alike.

The controllers are renowned for their versatility, accommodating a broad range of sensors and actuators. Resources like YouTube tutorials (e.g., Dixell Temperature Controller Program Digital Thermostat) demonstrate the practical application of these controllers, specifically focusing on digital thermostat programming and setpoint temperature adjustments. These controllers aren’t limited to simple on/off control; they support advanced features like defrost cycles, alarm systems, and fan control, all configurable through a user-friendly interface.

Dixell’s commitment to innovation has resulted in a diverse series of controllers, each tailored to specific needs. From basic models to sophisticated units with communication protocols (like Modbus), Dixell provides a solution for virtually any temperature control challenge. Proper installation, configuration, and maintenance are key to maximizing the lifespan and performance of these controllers, and this manual aims to provide comprehensive guidance on all aspects.

Understanding the Dixell Controller Series

Dixell offers a comprehensive range of controller series, each designed to address specific application requirements. The X series, for example, is popular for its versatility and ease of programming, often featured in introductory tutorials like those found on platforms such as YouTube. The XR series builds upon this foundation, adding enhanced features and communication capabilities.

More advanced series, such as the GENIUS series, provide sophisticated control algorithms and extensive parameterization options. These controllers are ideal for complex systems requiring precise temperature management and data logging. Understanding the distinctions between these series is crucial for selecting the appropriate controller for a given application. Key considerations include the number of outputs, sensor compatibility, and communication protocol support.

Each series boasts unique features, from simple on/off control to proportional-integral-derivative (PID) control for optimized performance. Dixell’s documentation and online resources (including video guides demonstrating programming techniques) provide detailed specifications for each model, enabling informed decision-making. Choosing the right series ensures optimal efficiency, reliability, and long-term cost savings.

Key Features and Benefits

Dixell universal controllers offer a wealth of features designed to optimize temperature management across diverse applications. Precise temperature control is paramount, achieved through advanced algorithms and accurate sensor integration. User-friendly programming interfaces, often demonstrated in online tutorials, simplify setup and customization. Defrost cycle management is a core benefit, preventing ice buildup and maintaining efficiency.

Alarm systems provide critical alerts for temperature deviations or equipment malfunctions, ensuring timely intervention. Fan control settings allow for optimized airflow and energy savings. Digital input/output configuration enables seamless integration with external devices and systems. Data logging capabilities facilitate performance monitoring and analysis, aiding in preventative maintenance.

Remote access and control options (depending on the model) enhance convenience and flexibility. These controllers contribute to reduced energy consumption, improved product quality, and increased operational reliability. The versatility of Dixell controllers makes them suitable for refrigeration, heating, and various industrial processes, offering a significant return on investment.

Controller Display and Interface Overview

Dixell universal controllers typically feature a clear, multi-line display providing real-time temperature readings, setpoints, and operational status. The interface generally consists of tactile buttons – often labeled for functions like “Set,” “Menu,” “Up,” and “Down” – enabling intuitive navigation. LED indicators signal active functions such as defrost, alarm, or fan operation.

Display elements commonly include current temperature, desired setpoint, and icons representing active features. The menu structure is hierarchical, allowing access to various parameters and settings. Some models incorporate a backlight for improved visibility in low-light conditions. The display’s responsiveness and clarity are crucial for efficient operation and troubleshooting.

Understanding the display’s symbols and codes is essential for interpreting controller behavior. The interface is designed for ease of use, even for operators with limited technical expertise. Online resources, including video tutorials, often demonstrate navigating the interface and interpreting displayed information, enhancing user understanding.

Basic Navigation and Menu Structure

Dixell controllers employ a hierarchical menu structure accessed via dedicated buttons, typically “Menu” and “Set.” Pressing “Menu” cycles through main menu options, while “Set” confirms selections and enters submenus. The “Up” and “Down” arrows adjust parameter values within menus. Navigation is generally straightforward, though specific steps vary by model.

Common menu sections include setpoint adjustment, defrost settings, alarm configuration, and parameter programming. Within each section, further submenus allow fine-tuning of specific functions. The controller’s display guides users through the menu options, indicating current selections and available parameters.

Understanding the menu logic is crucial for effective controller operation. Online tutorials and manuals often provide step-by-step instructions for navigating the menu structure. Familiarizing yourself with the menu layout streamlines parameter adjustments and troubleshooting. Remember to save changes after making adjustments to ensure they are implemented.

Parameter Programming: General Principles

Parameter programming in Dixell controllers involves adjusting numerical values to customize operation. Accessing parameters requires navigating the menu structure using the “Menu,” “Set,” “Up,” and “Down” buttons. Each parameter has a specific code and range of acceptable values, detailed in the controller’s manual.

Modifying parameters allows tailoring the controller to specific application requirements. Key considerations include temperature setpoints, defrost cycles, alarm thresholds, and fan control settings. Changes should be made cautiously, documenting original values for easy reversion if needed;

Understanding parameter interdependencies is vital; altering one parameter can affect others. Online resources and tutorials demonstrate programming techniques for common applications. Always save changes after adjusting parameters to ensure they are applied. Incorrect parameter settings can lead to suboptimal performance or system malfunctions, so careful attention is essential.

Setting the Temperature Setpoint

Setting the temperature setpoint is a fundamental operation on a Dixell universal controller. Typically, this is achieved by entering the “Set” mode via the controller’s interface, often initiated by pressing the “Set” button. The display will then show the current setpoint temperature, allowing adjustment using the “Up” and “Down” arrow buttons.

The setpoint represents the desired temperature the controller will maintain. It’s crucial to set this accurately based on the application’s requirements – whether it’s refrigeration, heating, or a specific process. Some controllers allow for multiple setpoints, enabling different temperatures for different times or conditions.

Online tutorials demonstrate this process visually, showing the button presses and display changes. After adjusting the setpoint, confirm and save the new value by pressing “Set” again. Verify the setpoint is correctly displayed after saving. Incorrect setpoints can lead to inefficient operation or product spoilage.

Configuring Defrost Cycles

Defrost cycles are essential for refrigeration systems utilizing Dixell controllers, preventing ice buildup on the evaporator coil. Configuration involves setting parameters like defrost frequency, duration, and termination temperature. Accessing these settings typically requires navigating the controller’s menu using the “Set” and arrow buttons.

Defrost frequency determines how often the defrost cycle initiates – options include time-based (e.g., every 24 hours) or demand-based (triggered by frost accumulation). Defrost duration specifies how long the defrost heater operates, while the termination temperature indicates when the cycle ends.

Proper configuration is vital for energy efficiency and system performance. Too frequent defrosts waste energy, while infrequent ones lead to ice buildup and reduced cooling capacity. Online resources often illustrate the menu structure and parameter options. Carefully review the application’s requirements and adjust the parameters accordingly. Always save changes after configuration.

Alarm System Configuration

Dixell controllers feature robust alarm systems to alert users to critical system conditions. Configuration involves defining alarm thresholds and selecting appropriate response actions. Common alarm types include high/low temperature alarms, door open alarms, and sensor failure alarms. Accessing alarm settings is usually done through the controller’s menu, often under a dedicated “Alarm” or “Safety” section.

Each alarm can be individually configured with specific parameters. Alarm thresholds define the temperature or condition that triggers the alarm. Hysteresis prevents rapid alarm cycling. Response actions include audible alarms, relay activation (for remote signaling), and display messages.

Proper alarm configuration is crucial for preventing damage and ensuring product safety. Carefully consider the application’s requirements and set appropriate thresholds. Test the alarm system regularly to verify its functionality. Refer to the manual for detailed information on available alarm options and configuration procedures.

Fan Control Settings

Dixell controllers offer versatile fan control options to optimize airflow and temperature distribution. Configuration allows users to define fan operation based on various parameters, including temperature, defrost cycles, and time. Common fan control modes include continuous operation, periodic operation, and alarm-activated operation.

Fan settings typically include fan speed control, minimum on/off times, and hysteresis settings. Fan speed can often be adjusted to balance airflow with noise levels and energy consumption. Minimum on/off times prevent frequent fan cycling, extending fan life. Hysteresis ensures stable fan operation.

Proper fan control configuration is essential for maintaining consistent temperatures and preventing condensation. Consider the application’s specific requirements and adjust fan settings accordingly. Monitor fan performance to ensure optimal operation. Consult the manual for detailed information on available fan control options and configuration procedures.

Digital Input Configuration

Dixell universal controllers feature digital inputs that enhance functionality and allow for integration with external devices. These inputs can be configured to respond to various signals, such as door switches, level sensors, or remote control systems. Proper configuration is crucial for tailoring the controller to specific application needs.

Digital inputs can be assigned different functions through the controller’s parameter settings. Common functions include alarm activation, defrost initiation, fan control override, and setpoint adjustment. The controller’s manual provides a comprehensive list of available input functions and their corresponding parameters.

When configuring digital inputs, it’s important to consider the input signal type (e.g., normally open or normally closed) and the desired response. Incorrect configuration can lead to unexpected behavior or system malfunctions. Testing the input configuration after setup is recommended to ensure proper operation. Refer to the wiring diagrams for correct connection details.

Digital Output Configuration

Dixell universal controllers utilize digital outputs to control external devices based on programmed parameters and system status. These outputs can activate relays, solenoids, or other components, enabling automated control of refrigeration, heating, or ventilation systems. Careful configuration of these outputs is essential for optimal system performance.

Digital outputs are assigned functions like compressor activation, defrost heater control, fan operation, and alarm signaling. The controller’s parameter menu allows for customization of output behavior, including on/off delays, hysteresis settings, and alarm priorities. Understanding these parameters is key to achieving precise control.

When configuring digital outputs, consider the load requirements of the connected devices and ensure the controller’s output capacity is sufficient. Incorrect configuration or overloading can damage the controller or connected equipment. Always verify wiring connections and test the output functionality after setup. Consult the manual for specific output ratings and limitations.

Advanced Parameter Settings

Dixell universal controllers offer a range of advanced parameter settings designed for experienced users and specialized applications. These settings allow fine-tuning of controller behavior beyond basic temperature control, optimizing performance and efficiency. Accessing these parameters typically requires entering a specific configuration mode.

Advanced settings include parameters for cascade control, proportional-integral-derivative (PID) tuning, and adaptive defrost algorithms. Cascade control enables the use of multiple temperature sensors and controllers for more precise temperature regulation. PID tuning optimizes the controller’s response to temperature changes, minimizing overshoot and oscillation. Adaptive defrost adjusts defrost cycles based on actual frost buildup, reducing energy consumption.

Modifying advanced parameters requires a thorough understanding of control theory and the specific application. Incorrect settings can lead to unstable system operation or reduced efficiency. Always document any changes made to advanced parameters and proceed with caution. Refer to the Dixell manual for detailed explanations and recommended settings.

Understanding Error Codes and Troubleshooting

Dixell universal controllers utilize error codes to signal malfunctions or abnormal operating conditions. These codes are displayed on the controller’s interface, providing valuable diagnostic information. Understanding these codes is crucial for efficient troubleshooting and minimizing downtime. The manual provides a comprehensive list of error codes and their corresponding meanings.

Common error codes indicate sensor failures (e.g., broken wire, short circuit), relay issues, or temperature range violations. For example, an error code related to a temperature sensor suggests a problem with the sensor itself or its wiring. Relay errors may indicate a faulty relay or a problem with the connected load. Troubleshooting typically involves checking wiring connections, testing sensors, and verifying relay operation.

If an error code persists after attempting basic troubleshooting steps, consult the Dixell manual or contact a qualified technician. Attempting repairs without proper knowledge can damage the controller or connected equipment. Always prioritize safety when troubleshooting electrical systems.

Wiring Diagrams and Electrical Connections

Proper wiring is essential for the correct operation and safety of a Dixell universal controller. The manual provides detailed wiring diagrams illustrating the connections for various configurations, including compressors, fans, defrost heaters, and alarms. These diagrams clearly show the terminal assignments and recommended wire gauges.

Electrical connections typically involve connecting the controller to a power supply, temperature sensors, and controlled devices. Ensure the power supply voltage matches the controller’s requirements. Temperature sensors are usually connected to dedicated terminals, and their wiring should be shielded to minimize interference. Relays control the power to compressors, fans, and heaters, and their connections must be secure.

Always disconnect power before making any wiring changes. Follow the wiring diagrams precisely and double-check all connections before restoring power. Incorrect wiring can damage the controller or connected equipment. If unsure about any aspect of the wiring, consult a qualified electrician.

Communication Protocols (e.g., Modbus)

Dixell universal controllers often support various communication protocols, enabling integration with Building Management Systems (BMS) and remote monitoring setups. Modbus is a commonly implemented protocol, allowing data exchange between the controller and a central system. This facilitates remote temperature monitoring, control adjustments, and data logging.

The manual details the Modbus communication settings, including baud rate, parity, and address configuration. Proper configuration is crucial for establishing reliable communication. Other protocols, such as BACnet or Ethernet, may be supported depending on the specific controller model. These protocols offer enhanced connectivity and data transfer capabilities.

Utilizing these communication protocols allows for centralized management of multiple controllers, streamlining operations and improving efficiency. Data logging features, accessible through these protocols, provide valuable insights into temperature trends and system performance. Consult the manual for specific instructions on configuring and utilizing the supported communication protocols.

Data Logging and Monitoring Capabilities

Dixell universal controllers frequently incorporate robust data logging and monitoring features, crucial for performance analysis and troubleshooting. These capabilities allow for the recording of temperature readings, setpoints, and alarm events over time. Logged data can be invaluable for identifying trends, optimizing system efficiency, and diagnosing potential issues.

The manual details how to access and interpret the logged data, often through dedicated software or via communication protocols like Modbus. Data can be downloaded for analysis using spreadsheet programs or specialized data visualization tools. Real-time monitoring features provide current temperature readings and system status at a glance.

Advanced models may offer graphical displays of historical data directly on the controller’s interface. This allows for quick identification of temperature fluctuations and deviations from setpoints. Proper utilization of these features enhances preventative maintenance and ensures optimal system performance. Refer to the manual for specific instructions on data logging configuration and access.

Remote Access and Control Options

Dixell universal controllers increasingly offer remote access and control functionalities, enhancing operational convenience and efficiency. These options typically leverage communication protocols like Modbus, enabling integration with Building Management Systems (BMS) or dedicated remote monitoring platforms. Remote access allows users to monitor temperature readings, adjust setpoints, and acknowledge alarms from a centralized location.

The manual details the necessary configuration steps for establishing remote connectivity, including network settings and communication parameters. Some models support web-based interfaces, providing access through standard web browsers. Mobile applications may also be available, offering convenient control from smartphones or tablets.

Secure remote access is paramount, and the manual outlines best practices for protecting against unauthorized access. Features like password protection and encryption are often implemented. Proper configuration ensures reliable remote operation and facilitates proactive system management. Consult the manual for specific instructions and compatibility information.

Maintenance and Calibration Procedures

Regular maintenance is crucial for ensuring the long-term accuracy and reliability of your Dixell universal controller. The manual emphasizes periodic inspection of wiring connections, verifying secure terminations and checking for any signs of damage or corrosion. Cleaning the controller’s display and enclosure with a soft, dry cloth is also recommended.

Calibration procedures are outlined to maintain temperature sensor accuracy. The manual details how to compare the controller’s readings with a calibrated reference thermometer and adjust parameters accordingly. It’s important to follow these steps carefully, as improper calibration can lead to inaccurate temperature control.

Preventative maintenance schedules are suggested based on the operating environment and application. The manual also addresses troubleshooting common issues and provides guidance on replacing faulty components. Remember to always disconnect power before performing any maintenance or calibration procedures. Refer to the manual for specific model instructions and safety precautions.

Safety Precautions and Guidelines

Prioritizing safety is paramount when installing, operating, and maintaining a Dixell universal controller. The manual strongly advises disconnecting all power sources before performing any wiring or maintenance procedures to prevent electrical shock. Qualified personnel should handle all electrical connections, adhering to local and national electrical codes.

Caution is urged against operating the controller in excessively humid or corrosive environments, as this can damage internal components and create safety hazards. The manual highlights the importance of using appropriately rated fuses and ensuring proper grounding to protect against short circuits.

Never attempt to disassemble or modify the controller beyond the procedures outlined in the manual, as this could compromise its safety features and void the warranty. Regularly inspect wiring for damage and replace any worn or frayed cables. Always follow the manufacturer’s recommendations for temperature limits and operating conditions. Adhering to these guidelines ensures safe and reliable operation.