Archive: October 27, 2024

ryobi weed trimmer manual

Welcome to the Ryobi Weed Trimmer Manual‚ your essential guide for safe and effective operation. This comprehensive manual covers assembly‚ operation‚ maintenance‚ and troubleshooting‚ ensuring optimal performance. Designed by Ryobi‚ a brand trusted for quality and innovation‚ this guide helps you maximize your trimmer’s potential with clear instructions and expert tips. Read carefully to get the most out of your tool.

1.1 Purpose of the Manual

This manual serves as a detailed guide for Ryobi weed trimmer users‚ ensuring safe and efficient operation. It provides essential information on assembly‚ maintenance‚ and troubleshooting. Designed for both new and experienced users‚ the manual helps you understand your trimmer’s features‚ optimize performance‚ and address common issues effectively. Always refer to this guide before use.

1.2 Key Sections of the Manual

The manual is divided into essential sections‚ including safety guidelines‚ assembly instructions‚ operating tips‚ and maintenance advice. It also covers troubleshooting‚ compatible accessories‚ and environmental considerations. Each section provides detailed information to ensure safe‚ efficient‚ and effective use of your Ryobi weed trimmer‚ helping you get the best results from your tool.

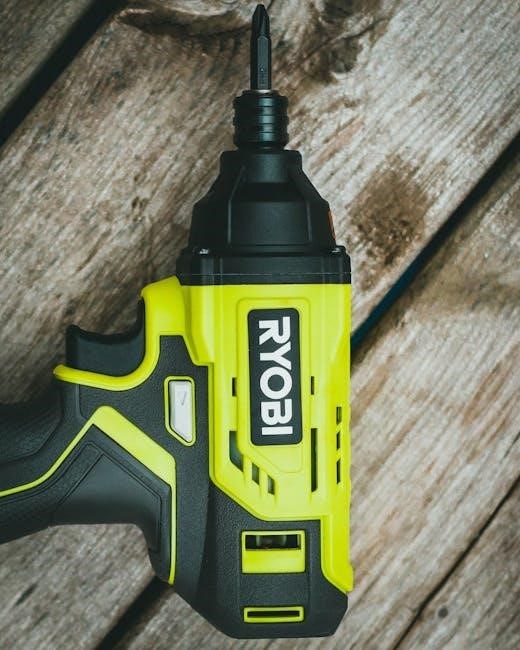
Product Specifications

This section details the RYOBI Weed Trimmer’s technical specifications‚ including its battery-powered operation‚ cordless design‚ and compatible accessories like SpeedSpool for efficient trimming.

2.1 Overview of the Ryobi Weed Trimmer Models

Ryobi offers a range of weed trimmer models‚ including cordless and gas-powered options‚ designed for versatility and efficiency. Models like the OLT1832 and RBC52FSB feature adjustable handles and interchangeable attachments‚ catering to various yard sizes and tasks. With options for 30cc engines or 18V battery power‚ Ryobi trimmers provide reliable performance for residential and heavy-duty use‚ ensuring adaptability to user needs.

2.2 Battery and Power Specifications

Ryobi weed trimmers feature advanced battery technology‚ with options like 18V and 40V lithium-ion systems for cordless convenience. Batteries are compatible across Ryobi’s One+ platform‚ offering extended runtime and reliable power. The trimmers support 0.065″ or 0.08″ cutting lines‚ ensuring efficient performance. Eco-friendly battery power reduces emissions‚ while high-torque motors handle tough tasks effortlessly‚ making these tools versatile for various yard needs.

2.3 Compatible Accessories and Attachments

Ryobi weed trimmers offer a range of compatible accessories‚ including the innovative SpeedSpool and Click-Link systems. These allow quick line replacement and easy attachment swaps. Additional attachments like cultivator and sweeper heads expand functionality. Batteries are part of Ryobi’s One+ platform‚ ensuring compatibility across tools. Optional accessories enhance versatility‚ making the trimmer adaptable for various yard care tasks efficiently.

Safety Precautions

Ryobi weed trimmers offer a range of compatible accessories‚ including the innovative SpeedSpool and Click-Link systems. These allow quick line replacement and easy attachment swaps. Additional attachments like cultivator and sweeper heads expand functionality. Batteries are part of Ryobi’s One+ platform‚ ensuring compatibility across tools. Optional accessories enhance versatility‚ making the trimmer adaptable for various yard care tasks efficiently.

3.1 General Safety Guidelines

Always read the manual before use. Ensure proper assembly and wear protective gear‚ including gloves and eyewear. Keep bystanders at a safe distance and avoid trimming near water or in wet conditions. Prevent accidental start-ups and maintain a firm grip. Regularly inspect the tool for damage. Follow all safety precautions to minimize risks and ensure safe operation.

3.2 Protective Gear and Precautions

Always wear protective gear‚ including gloves‚ safety glasses‚ and long pants‚ to minimize injury risks. Keep loose clothing tied back and avoid jewelry that could catch. Ensure bystanders‚ pets‚ and children stay at a safe distance. Be cautious of debris and avoid trimming near windows or fragile surfaces. Proper precautions ensure safe and effective trimming.

3.3 Handling Electric Shock Risks

Prevent electric shock by avoiding water exposure. Never use the trimmer in wet conditions or near water sources. Inspect cords for damage before use and avoid overreaching. If the trimmer gets wet‚ unplug it immediately. Do not touch electrical components with wet hands. Always follow safety guidelines to minimize shock risks and ensure safe operation.

Assembly and Initial Setup

Begin by unpacking and inventorying all components. Follow the step-by-step assembly instructions carefully. Ensure all parts are securely attached. Perform initial safety checks to confirm proper function before first use.

4.1 Unpacking and Inventory

Start by carefully opening the packaging and removing all components. Inspect each part for damage. Typically included are the trimmer unit‚ string spool‚ handle‚ and operator’s manual. Organize all items to avoid misplacement. Cross-reference the manual’s parts list to ensure everything is accounted for. Note any missing or damaged components immediately.

4.2 Step-by-Step Assembly Instructions

Attach the handle to the trimmer base and secure it with the provided screws. Next‚ wind the cutting string into the spool according to the manual’s guidelines. Insert the spool into the trimmer head and ensure it clicks into place. Finally‚ perform a quick test to ensure all parts are properly aligned and functioning smoothly.

4.3 Initial Safety Checks

Before first use‚ inspect the trimmer for damage or loose parts. Ensure the cutting string and spool are properly installed. Wear protective gear‚ including gloves and safety glasses. Check the area for debris or obstacles. Verify that all safety guards are in place and functioning correctly. Always refer to the manual for specific safety checks.

Operating Instructions

Start by ensuring the trimmer is fully assembled and safety-checked. Hold it firmly‚ keeping the cutting head parallel to the ground. Use the correct line diameter for your model.

Engage the trigger gently‚ sweeping in steady‚ even strokes. Avoid over-revving to maintain control. Adjust your technique for different weed thicknesses and terrain conditions for optimal results.

5.1 Starting the Trimmer

Insert the battery into the trimmer‚ ensuring it clicks securely. Perform a quick safety check for loose parts. Grip the handle firmly‚ squeeze the trigger to start the motor. For gas models‚ prime the engine and pull the starter cord gently until it roars to life. Always handle the trimmer away from your body to prevent accidental contact.

5.2 Cutting Techniques and Best Practices

Use a consistent cutting motion‚ keeping the trimmer head parallel to the ground for even results. Maintain a steady pace‚ avoiding overly aggressive strokes that could damage the line or nearby plants. For thick weeds‚ work in small sections‚ gradually lowering the cutting head to prevent overload. Always keep the trimmer away from your body and ensure a clear path for debris.

5.3 Handling Thick or Tough Weeds

For tackling thick or tough weeds‚ use a higher diameter line (0.08-inch or above) for increased cutting power. Work in small sections‚ making multiple passes to avoid overloading the trimmer. Keep the cutting head at a consistent height and angle to maximize efficiency. Avoid applying too much pressure‚ which can damage the tool or reduce performance.

Maintenance and Troubleshooting

This section covers essential maintenance tasks and troubleshooting tips to ensure your Ryobi weed trimmer operates efficiently. Learn how to address common issues‚ replace parts‚ and extend its lifespan.

6.1 Regular Maintenance Tasks

Regular maintenance ensures your Ryobi weed trimmer performs optimally. Check the cutting line‚ clean debris from the trimmer head‚ and lubricate moving parts. Inspect the battery and charger for damage. Replace worn or damaged components promptly to prevent performance issues. Follow the recommended maintenance schedule in the manual to extend the tool’s lifespan and reliability.

6.2 Common Issues and Solutions

Common issues with Ryobi weed trimmers include line feeding problems‚ engineDifficulty starting‚ and reduced cutting performance. For line issues‚ clean the spool and ensure proper installation. For engine problems‚ check fuel levels and air filters. If the trimmer underperforms‚ sharpen the cutting blade or replace the line. Refer to the manual for detailed troubleshooting steps to resolve these issues effectively.

6.3 Lubrication and Parts Replacement

Regular lubrication of moving parts ensures optimal performance and extends the trimmer’s lifespan. Refer to the manual for specific lubrication points‚ such as the cutting head and gears. For parts replacement‚ use genuine Ryobi components to maintain warranty validity. Consult the parts diagram in the manual for accurate identification and installation of replacement parts safely and correctly.

Parts and Accessories

Explore a wide range of genuine Ryobi parts and accessories designed for optimal performance. From SpeedSpool to Click-Link‚ these components ensure compatibility and ease of use‚ enhancing your trimming experience effectively.

7.1 Overview of Available Parts

Ryobi offers a variety of genuine parts to maintain and enhance your weed trimmer. These include SpeedSpool‚ Click-Link attachments‚ replacement lines‚ cutting heads‚ and more. Compatible with most Ryobi models‚ these parts ensure reliable performance and durability. Explore the range to find the perfect components for your specific needs‚ keeping your trimmer in top condition for years to come.

7.2 Where to Find Parts and Accessories

Ryobi parts and accessories are readily available through the official Ryobi website‚ authorized dealers‚ and home improvement stores. Use the online parts catalog to find specific components for your model. For assistance‚ contact Ryobi customer service or visit a local authorized service center to ensure genuine and compatible parts for your weed trimmer.

7.3 How to Use SpeedSpool and Click-Link

The SpeedSpool system allows quick and easy line replacement without tools. Simply thread the line through the spool and twist to secure. The Click-Link feature enables fast attachment changes‚ such as switching between trimming and edging‚ by locking securely into place. Both innovations enhance efficiency and versatility for your trimming tasks.

Warranty and Customer Support

Ryobi products are backed by a comprehensive warranty covering manufacturing defects. For assistance‚ contact customer service at 1-800-345-8746 (US) or 1-800-265-6778 (Canada). Changes subject to notice.

8.1 Warranty Coverage and Conditions

Ryobi weed trimmers are covered by a limited warranty for manufacturing defects. The warranty applies to products purchased in the US or Canada. Registration is required for warranty validation. Coverage excludes damage from misuse or improper maintenance. For details‚ refer to the warranty section in your manual or visit the Ryobi website.

8.2 Registering Your Product

Registering your Ryobi weed trimmer is essential to activate warranty benefits and receive product updates. Visit the Ryobi website or call customer service at 1-800-345-8746 (US) or 1-800-265-6778 (Canada). Provide your product details and purchase information to complete the process. Registration ensures personalized support and enhances your ownership experience with Ryobi.

8.3 Contacting Ryobi Customer Service

Contact Ryobi customer service at 1-800-345-8746 (US) or 1-800-265-6778 (Canada) for expert support. Visit their official website for detailed troubleshooting guides‚ repair requests‚ and general inquiries. The dedicated team is available to address any concerns‚ ensuring your Ryobi weed trimmer operates at peak performance and resolving issues promptly.

Environmental Considerations

Ryobi weed trimmers are designed with eco-friendly features to minimize environmental impact. Proper disposal of old parts and responsible battery recycling are encouraged to support sustainability efforts.

9.1 Eco-Friendly Features

Ryobi weed trimmers are designed with eco-friendly features‚ including battery-powered operation for reduced emissions and energy efficiency. Many models use recyclable materials and promote sustainable gardening practices‚ aligning with environmentally responsible standards. This makes them a greener choice for yard maintenance while maintaining high performance and reliability.

9.2 Proper Disposal of Old Parts

Properly dispose of old Ryobi weed trimmer parts by recycling or following local waste guidelines. Batteries and electronic components should be handled separately to prevent environmental harm. Check local regulations for hazardous waste disposal options. Ensure all materials are recycled responsibly to minimize ecological impact and promote sustainability.

User Reviews and Feedback

Users praise Ryobi weed trimmers for their ease of use and reliability. Many highlight excellent battery life and value for money. Some note minor issues with assembly.

10.1 Common User Experiences

Users widely praise Ryobi weed trimmers for their ease of use‚ reliability‚ and battery life. Many highlight the convenience of cordless operation and the value for money. However‚ some users mention minor issues with assembly and spool replacement. Overall‚ the trimmers are well-received for their performance on thick weeds and versatility in yard maintenance tasks.

10.2 Pros and Cons of Ryobi Weed Trimmers

Ryobi weed trimmers are known for their ease of use‚ reliable performance‚ and long battery life. They offer excellent value for money. However‚ some users find the assembly process and spool replacement a bit challenging. Despite these minor drawbacks‚ the trimmers remain a popular choice for efficient yard maintenance.

Comparison with Other Models

Ryobi weed trimmers excel in offering affordable innovation‚ with features like cordless convenience and robust performance. They stand out for their durable design and user-friendly interface‚ making them a top choice for homeowners seeking reliable yard tools.

11.1 How Ryobi Stands Out

Ryobi weed trimmers are distinguished by their high performance‚ affordable prices‚ and innovative features. They offer cordless convenience‚ long-lasting battery life‚ and durable construction. The SpeedSpool system simplifies line replacement‚ while Click-Link attachments enhance versatility. Ryobi’s commitment to quality and user-friendly designs makes them a top choice for both homeowners and professionals seeking reliable yard care solutions.

11.2 Unique Features of Ryobi Weed Trimmers

Ryobi weed trimmers boast cordless convenience‚ powered by high-capacity batteries for extended runtime. The SpeedSpool system allows quick and easy line replacement without tools. Additionally‚ the Click-Link attachment capability enables compatibility with various yard care tools‚ enhancing versatility. Adjustable handles and ergonomic designs ensure comfort‚ while eco-friendly features reduce environmental impact‚ making Ryobi trimmers a standout choice for efficient yard maintenance.

The Ryobi weed trimmer manual provides a comprehensive guide for optimal tool usage. With its ease of use and robust features‚ it ensures efficient yard maintenance. Highly recommended for homeowners seeking reliable performance and durability in their outdoor power tools.

12.1 Summary of Key Points

The Ryobi weed trimmer manual provides essential guidance for safe and effective use‚ covering assembly‚ operation‚ and maintenance. It emphasizes safety precautions‚ proper handling‚ and regular upkeep to ensure longevity. With detailed instructions and troubleshooting tips‚ this manual empowers users to maximize their trimmer’s performance while minimizing potential issues. A valuable resource for both beginners and experienced users alike.

12.2 Final Recommendations

Always follow the manual’s guidelines for safe operation and maintenance. Regularly inspect and maintain your trimmer to ensure optimal performance. Use genuine Ryobi parts for repairs to maintain warranty validity. Prioritize safety by wearing protective gear and adhering to precautions. For eco-friendly use‚ explore energy-efficient models and proper disposal methods. Refer to the manual for troubleshooting and enjoy efficient trimming results.

a manual for professional organizers pdf

A comprehensive guide for aspiring professional organizers, offering insights into starting and growing an organizing business, with practical advice on turning a passion for order into a fulfilling career․

1․1 What is Professional Organizing?

Professional organizing is a service that helps individuals and businesses create systems for managing time, space, and resources․ It involves assessing needs, designing solutions, and implementing strategies to enhance productivity and efficiency․ Organizers work with clients to declutter, categorize, and optimize physical and digital spaces, ensuring everything has a purpose and a place, enabling them to achieve their goals effectively․

1․2 The Importance of Professional Organizing in Today’s Fast-Paced World

Professional organizing is crucial in today’s fast-paced world, addressing clutter and digital overload․ It enhances focus, productivity, and reduces stress by creating efficient systems․ Organizing helps individuals and businesses streamline tasks, save time, and achieve a better work-life balance, making it essential for overcoming modern challenges and fostering success․

Getting Started as a Professional Organizer

Launching a career in professional organizing requires essential skills, tools, and a clear roadmap․ This section guides you through the foundational steps to establish a thriving organizing business․

2․1 Essential Skills and Qualities Needed

Professional organizers must possess strong organizational, time management, and communication skills․ Empathy, problem-solving, and attention to detail are crucial․ They should be self-motivated, reliable, and able to work independently․ Confidentiality and trustworthiness are essential when handling clients’ personal spaces․ A passion for creating order and improving efficiency is key to success in this fulfilling career․

2․2 Setting Up Your Organizing Business

Starting an organizing business requires market research, a clear business plan, and legal setup․ Choose a business structure, register your company, and obtain necessary licenses․ Secure insurance to protect your business․ Develop a strong brand identity, create a professional website, and establish a marketing strategy․ Invest in essential tools and supplies to deliver high-quality services and build a loyal client base;

2․3 Initial Supplies and Tools for Professional Organizers

Essential tools include a label maker, pens, pencils, highlighters, sticky notes, scissors, and a hole punch․ Invest in sturdy bins, baskets, and dividers for organizing spaces․ A reliable timer and planner help manage time effectively․ These supplies enable professionals to streamline tasks, ensuring efficiency and client satisfaction while maintaining a professional and organized workspace․

The Professional Organizer Task System

A structured approach to organizing tasks efficiently, focusing on clear steps and proven methods to enhance productivity and maintain order in both physical and digital spaces․

3․1 The 3-Step Process: Organize, Prioritize, Focus

The 3-step process is a cornerstone of professional organizing, enabling individuals to streamline tasks and enhance productivity․ First, organize by categorizing and structuring items or tasks․ Next, prioritize to identify what’s most important․ Finally, focus on executing tasks with clarity and purpose․ This method ensures efficiency, reduces overwhelm, and fosters a sense of control in both personal and professional environments․

3․2 The SPASM Acronym for Effective Organizing

The SPASM acronym provides a structured approach to organizing, helping professionals create systems that maximize efficiency․ It stands for Sort, Purge, Assign a home, and Set limits․ This method ensures spaces remain organized and functional, making it easier to maintain order over time while reducing clutter and improving productivity․

Tools and Supplies for Professional Organizers

Essential tools for professional organizers include label makers, storage bins, and office supplies․ These items help create functional spaces, enhancing productivity and maintaining order effectively․

4․1 Must-Have Organizing Products

Label makers, storage bins, baskets, dividers, and shelving are essential tools for professional organizers․ These products help create functional spaces by sorting, purging, and assigning homes for items․ Choosing the right size and functionality ensures effectiveness․ The SPASM acronym—Sort, Purge, Assign a home, and Set limits—guides the use of containers and dividers to maintain order and maximize efficiency in any organizing project․

4․2 The Role of Labeling and Storage Solutions

Labeling and storage solutions are crucial for maintaining organization and accessibility․ Label makers help categorize items, while storage bins, dividers, and shelving provide structure․ These tools enable the assignment of homes for belongings, ensuring everything has a designated place․ Proper labeling enhances clarity, while storage solutions maximize space efficiency, making it easier to sustain an organized environment over time;

Marketing Your Organizing Services

Building a strong online presence and crafting effective strategies are key to attracting clients․ Develop a professional website, leverage social media, and network locally to promote your services successfully․

5․1 Building a Strong Online Presence

Establishing a credible online presence is crucial for professional organizers․ Create a professional website showcasing services, portfolio, and testimonials․ Use SEO strategies to improve visibility and engage with clients through social media platforms․ Regularly share organizing tips, before-and-after photos, and client success stories to build trust and attract potential customers․ Consistency and quality content will help maintain a strong digital footprint;

5․2 Effective Strategies for Client Acquisition

Acquiring clients requires a strategic approach․ Networking with local businesses, partnering with complementary services, and offering free consultations can attract potential clients․ Leverage referrals and testimonials to build credibility․ Use targeted marketing campaigns and workshops to showcase expertise․ Consistent follow-up and personalized communication are key to converting prospects into loyal clients and growing your organizing business effectively․

Client Management and Communication

Effective client management involves understanding needs, maintaining clear communication, and building trust․ Professional relationships thrive on active listening, empathy, and tailored solutions, ensuring satisfaction and long-term partnerships․

6․1 Understanding Client Needs and Expectations

Understanding client needs is crucial for effective organizing․ Active listening and empathy help identify their challenges, such as lack of systems or skills․ Tailored solutions address their unique struggles, ensuring satisfaction and long-term success․

6․2 Maintaining Professional Relationships

Maintaining professional relationships requires trust, clear communication, and ethical conduct․ Organizers must respect client confidentiality, set clear boundaries, and ensure mutual respect․ Honesty, reliability, and empathy foster strong connections, while consistent professionalism builds long-term trust and client satisfaction․

Advanced Organizing Techniques

Advanced techniques involve digital organization, time management, and specialized strategies for different spaces, ensuring efficiency and sustainability in both physical and virtual environments․

7․1 Digital Organization and Time Management

Digital organization and time management are crucial for modern professionals․ Tools like digital calendars, task management apps, and cloud storage help streamline workflows․ Implementing these strategies ensures efficient data access, reduces clutter, and enhances productivity․ Effective time management techniques, such as prioritizing tasks and setting boundaries, allow professionals to maintain balance and achieve goals seamlessly in both personal and professional spheres․

7․2 Specialized Organizing for Different Spaces

Specialized organizing adapts to various environments, ensuring functionality and aesthetics․ Homes, offices, and event spaces require tailored strategies․ For homes, focus on decluttering and ergonomic layouts․ Offices prioritize productivity with efficient storage and workflow systems․ Event spaces demand temporary yet impactful setups․ Each space necessitates a unique approach to maximize efficiency, reflect personal style, and meet specific needs, ensuring seamless organization across diverse settings․

Ethical Practices in Professional Organizing

Ethical practices ensure confidentiality, respect, and transparency․ Organizers must maintain client trust, avoid conflicts of interest, and promote sustainable solutions, fostering a professional and responsible approach to organizing․

8․1 Ethical Considerations and Confidentiality

Ethical practices in professional organizing emphasize confidentiality, respect, and transparency․ Organizers must safeguard client information, maintain neutrality, and avoid conflicts of interest․ Respect for clients’ belongings and decisions is paramount․ Confidentiality agreements are often recommended to protect sensitive data․ Ethical organizers also promote sustainable practices, ensuring environmentally friendly solutions․ Adhering to these standards fosters trust and professionalism, essential for a successful organizing career․

8․2 Best Practices for Sustainable Organizing

Sustainable organizing involves eco-friendly practices to minimize waste and environmental impact․ Professional organizers should encourage clients to reuse or repurpose items, donate gently used goods, and recycle responsibly․ Using non-toxic, biodegradable products and energy-efficient solutions is recommended․ Organizers should also guide clients in maintaining organized systems long-term, reducing the need for frequent purchases and promoting a clutter-free, sustainable lifestyle․

Continuous Learning and Growth

Professional organizers must stay updated with industry trends through workshops, certifications, and resources like manuals and guides․ Continuous learning ensures they remain effective and innovative in their practice․

9․1 Staying Updated with Industry Trends

Professional organizers must stay informed about the latest tools, techniques, and best practices․ Manuals like “The Manual for Professional Organizers” and guides such as the “FabJob Guide to Become a Professional Organizer” offer insights into industry trends․ By regularly updating their knowledge, organizers can adapt to changing client needs and maintain high standards in their work, ensuring they remain relevant and effective in their field․

9․2 The Role of Professional Associations

Professional associations play a crucial role in supporting organizers by providing resources, training, and networking opportunities; Organizations like the BCPO foster ethical practices and high standards in the industry․ They offer guidance, certifications, and access to industry trends, enabling organizers to grow professionally and stay connected with peers․ These associations are vital for maintaining excellence and adapting to evolving client needs․

Mastering professional organizing requires dedication and continuous learning․ This manual provides a roadmap to success, equipping you with tools and insights to launch and grow your career effectively․

10․1 Summarizing Key Takeaways

Professional organizing is a rewarding career that transforms spaces and lives․ Key takeaways include mastering essential skills, leveraging practical tools, and adhering to ethical practices․ Success requires continuous learning, adapting to industry trends, and building strong client relationships․ By following the guidance in this manual, aspiring organizers can confidently turn their passion into a fulfilling and sustainable profession, making a meaningful impact every day․

10․2 Encouragement for Aspiring Professional Organizers

Embarking on a career as a professional organizer is a meaningful journey that offers the opportunity to make a lasting impact on people’s lives․ With dedication and passion, you can turn your love for organizing into a fulfilling profession․ The growing demand for organizing services, coupled with the support of resources like this manual, ensures a bright future for those eager to succeed in this field․

florida bar study guide

The Florida Bar Exam is a comprehensive assessment required for licensure to practice law in Florida․ It evaluates knowledge of state and federal laws, as well as analytical, writing, and time-management skills․ The exam includes essay and multiple-choice questions, ensuring a well-rounded evaluation of legal competence․

1․1․ Overview of the Florida Bar Exam

The Florida Bar Exam is a two-day examination designed to assess a candidate’s knowledge of law, analytical abilities, and legal writing skills․ The exam is divided into two main sections: essay questions and multiple-choice questions․ Day one focuses on essay and performance tests, while day two consists of the Multistate Bar Examination (MBE), which includes 200 multiple-choice questions covering subjects like contracts, torts, and evidence․ The exam also includes Florida-specific topics, such as state constitutional law and family law․

To pass, candidates must achieve a minimum score of 136 out of 180 on the MBE and demonstrate competence in the essay portion․ The Florida Bar Exam is administered by the Florida Board of Bar Examiners and is typically held in February and July each year․ The exam is a critical step for aspiring attorneys seeking to practice law in Florida, ensuring they possess the necessary skills and knowledge to serve clients effectively․

1․2․ Key Dates and Registration Process

The Florida Bar Exam is administered twice annually, in February and July․ The registration deadlines are typically November 1 for the February exam and April 1 for the July exam․ Candidates must submit their applications and fees by these dates to avoid late penalties․

The registration process involves several steps, including submitting an application through the Florida Board of Bar Examiners’ website, paying the required fees, and providing necessary documentation, such as law school transcripts and character and fitness evaluations․

Additionally, candidates must register for the Multistate Bar Examination (MBE) separately through the National Conference of Bar Examiners (NCBE)․ This ensures their MBE scores are sent to the Florida Board of Bar Examiners․

It is crucial to review the official study guide provided by the Florida Board of Bar Examiners, as it outlines exam policies, content, and rules․ Staying informed about deadlines and requirements is essential for a smooth registration and exam-taking experience․

Florida Bar Exam Essay Preparation

Mastering essay writing is crucial for success on the Florida Bar Exam․ Practice with past essay questions and review sample answers from the Florida Board of Bar Examiners Study Guide․ Focus on clear structure, legal analysis, and time management to excel․

2․1․ Past Essay Questions and Sample Answers

Analyzing past essay questions and sample answers is a cornerstone of effective Florida Bar Exam preparation․ The Florida Board of Bar Examiners Study Guide provides essay questions from previous exams, dating back to August 2004, along with model answers․ These resources are invaluable for understanding the format, content, and expectations of the exam․ By reviewing these materials, candidates can identify common themes and legal topics frequently tested, such as contracts, torts, and evidence․ Additionally, sample answers offer insights into how to structure responses clearly and concisely, ensuring that all key points are addressed․ Many bar prep courses, such as Quimbee and Celebration Bar Review, incorporate these questions into their study materials, providing detailed explanations and grading criteria․ Regular practice with past essays helps candidates refine their legal writing skills, improve time management, and build confidence in their ability to tackle complex scenarios under exam conditions․ Utilizing these resources ensures a focused and strategic approach to mastering the essay portion of the Florida Bar Exam․

2․2․ Strategies for Writing Effective Essay Responses

Mastering the art of writing effective essay responses is crucial for success on the Florida Bar Exam․ A well-structured approach begins with carefully reading and understanding the question․ Candidates should identify key legal issues and relevant rules of law before outlining their response․ Time management is critical, with allocated time for each essay to ensure thorough answers without sacrificing depth․


Practice is essential, as it helps refine legal writing skills and improves the ability to articulate complex concepts clearly․ Reviewing sample answers from the Florida Board of Bar Examiners Study Guide provides insights into expected formats and grading criteria․ Additionally, focusing on clarity and conciseness ensures that responses are well-organized and free of unnecessary jargon․


Finally, simulated practice exams under timed conditions help build confidence and exam-day readiness․ By combining these strategies, candidates can enhance their ability to deliver compelling and accurate essay responses, significantly improving their chances of passing the Florida Bar Exam․

Florida Bar Exam Multiple-Choice Question Practice

Practicing multiple-choice questions is vital for Florida Bar Exam success․ Focus on real MBE questions and Florida-specific topics․ Resources like BarMax and Bar Exam Masters provide authentic practice questions and detailed explanations to refine your strategy and improve accuracy․

3․1․ Multistate Bar Examination (MBE) Questions

The Multistate Bar Examination (MBE) is a critical component of the Florida Bar Exam, testing seven core areas of law: Civil Procedure, Constitutional Law, Contracts, Criminal Law, Evidence, Property, and Torts․ It consists of 200 multiple-choice questions, with 100 questions administered in the morning and 100 in the afternoon․

To excel on the MBE, candidates must engage in extensive practice with real exam questions․ Resources like BarMax offer 1,950 real MBE questions from past exams, along with detailed explanations to help students understand both correct and incorrect answers․ Additionally, the Florida Board of Bar Examiners Study Guide provides sample multiple-choice questions and answers, allowing candidates to familiarize themselves with the exam format and content․

Time management is essential, as candidates must answer approximately 2 questions per minute․ Practicing under timed conditions helps build speed and accuracy․ Focusing on high-weight topics, such as Evidence and Constitutional Law, can also maximize scores․ By mastering MBE questions, candidates can significantly improve their overall bar exam performance․

3․2․ Florida-Specific Multiple-Choice Questions

The Florida-specific multiple-choice section of the bar exam focuses on state-specific laws and topics unique to Florida․ These questions test a candidate’s understanding of Florida statutes, case law, and regulatory frameworks․ Key areas include Florida Constitutional Law, Domestic Relations, Wills, Trusts, and Estates, and Business Entities, among others․

To prepare effectively, candidates should utilize the Florida Board of Bar Examiners Study Guide, which provides sample multiple-choice questions from past exams․ Additionally, resources like BarMax and Celebration Bar Review offer comprehensive practice materials, including Florida-specific questions with detailed explanations․

Practicing with real past questions helps candidates identify patterns and areas of emphasis in the exam․ Understanding the format and timing of the multiple-choice section is also crucial․ While some topics may overlap with the MBE, the focus here is exclusively on Florida law, requiring targeted study․ By mastering these questions, candidates can achieve success in this section of the exam․

Florida Bar Study Materials and Resources

Essential resources for Florida Bar Exam preparation include the Florida Board of Bar Examiners Study Guide, offering past essay questions and sample multiple-choice questions․ Additional tools like Quimbee and BarMax provide practice questions and expert-written materials․ Comprehensive courses and updated study guides ensure thorough preparation․

4․1․ Official Florida Board of Bar Examiners Study Guide

The Official Florida Board of Bar Examiners Study Guide is a comprehensive resource designed to aid bar examinees in their preparation․ It includes past essay questions from previous exams, dating back to August 2004, along with sample answers to provide clear expectations for response quality․ Additionally, the guide features sample multiple-choice questions, which are essential for understanding the exam’s format and content․ This resource is updated twice annually to reflect the most recent exam changes, ensuring that candidates have access to the latest information․ The study guide covers a wide range of legal topics, including public nuisance, easements, self-defense, and mortgages, aligning with the subjects tested on the exam․ By reviewing past questions and answers, candidates can identify areas for improvement and refine their legal writing and analytical skills․ This guide is a valuable tool for anyone aiming to succeed on the Florida Bar Exam, offering both practical insights and strategic guidance․ Regular use of this resource can significantly enhance a candidate’s readiness and confidence for the exam․

PDF

tongue drum sheet music pdf

Tongue Drum Sheet Music PDF: A Comprehensive Guide

Explore a wide variety of tongue drum sheet music PDF options, perfect for both beginners and experienced players. Discover free resources, printable formats, and MIDI files to enhance your practice. Find collections of folk, Christmas, and popular tunes tailored for 8-note and 13-note tongue drums. Websites, forums, and platforms like Pinterest offer easy access to these materials, helping you master your instrument with clarity and confidence. Start your musical journey today!

Welcome to the world of tongue drum sheet music! This guide is designed to help you navigate the vast array of resources available for playing this unique and captivating instrument. Whether you’re a beginner or an experienced musician, tongue drum sheet music offers a gateway to exploring diverse genres, from traditional folk tunes to modern melodies. The rise in popularity of tongue drums has led to an abundance of free and premium sheet music options, making it easier than ever to start or enhance your musical journey.

Sheet music for tongue drums is typically available in PDF format, ensuring easy access and printing. Many websites, forums, and platforms like Pinterest and YouTube offer downloadable resources tailored for 8-note and 13-note tongue drums. These materials cater to all skill levels, providing a structured approach to learning and mastering the instrument. With a focus on clarity and intuitive notation, tongue drum sheet music empowers players to explore their creativity and bring beautiful sounds to life. Dive into this guide to discover the best resources, tips, and techniques for making the most of your tongue drum experience!

Understanding Tongue Drum Sheet Music Basics

Mastering the basics of tongue drum sheet music is essential for any player, regardless of skill level. Tongue drums typically come in 8-note or 13-note configurations, each tuned to specific scales such as C Major or E Major. The sheet music is designed to reflect these tunings, with notes arranged to match the drum’s layout. Most resources use standard musical notation, with numbers or letters indicating which tongues to strike. For example, an 8-note drum might use notes from C to C, while a 13-note drum expands the range for more complex melodies.

PDF formats are ideal for clarity and portability, allowing players to print and practice anywhere. Many sheets include intuitive notation systems, making it easier to learn and play. Whether you’re exploring folk tunes, Christmas carols, or modern compositions, understanding the basics of tongue drum sheet music will enhance your ability to interpret and perform a wide variety of songs with precision and confidence.

Popular Songs and Tunes for Tongue Drum

The tongue drum is a versatile instrument, and its sheet music encompasses a wide range of popular and traditional tunes. From folk melodies to Christmas carols, players can explore diverse genres to suit their musical preferences. Many resources offer arrangements of recognizable songs, such as Christmas carols, African folk tunes, and even modern compositions, making it easy to find something familiar or exciting to learn.

Beginners often start with simple folk songs or hymns, which are perfect for mastering the basics of the instrument. Advanced players can delve into more complex arrangements, including 13-note compositions that showcase the drum’s full potential. Additionally, traditional African and global melodies are popular choices, as they align well with the tongue drum’s resonant and rhythmic qualities. Websites like Pinterest, MuseScore, and dedicated forums provide access to these tunes, ensuring there’s always something new to discover and play. Whether you’re into classical, seasonal, or cultural music, the tongue drum’s versatility makes it a joy to explore various musical styles.

Where to Find Free Tongue Drum Sheet Music PDF

Locating free tongue drum sheet music PDFs is straightforward, thanks to numerous online resources. Websites like Pinterest and MuseScore offer extensive collections of downloadable sheet music, including arrangements for 8-note and 13-note tongue drums. Additionally, musician forums and dedicated blogs often share free PDF files tailored for tongue drum players. YouTube tutorials and video descriptions frequently link to free sheet music, making it easier to find and print your favorite tunes.

Platforms like Free-scores.com and specialized music forums also provide a wide range of free tongue drum sheet music. Many creators and musicians share their compositions openly, allowing you to explore diverse genres, from folk melodies to Christmas carols. Some resources even include MIDI files for those who prefer digital practice. Whether you’re a beginner or an advanced player, these platforms ensure you have access to high-quality, printable sheet music to enhance your musical journey. Start exploring these resources today and discover the wealth of free tongue drum music available online!

Types of Tongue Drum Sheet Music

Explore various types of tongue drum sheet music, including 8-note and 13-note arrangements, designed for different skill levels. Discover sheets for Christmas carols, folk tunes, and popular songs, offering versatility and creativity for all players.

8-Note Tongue Drum Sheet Music

The 8-note tongue drum sheet music is ideal for beginners and experienced players alike, offering a wide range of musical possibilities. Typically tuned to a C major scale, these drums allow for simple yet expressive melodies. Many free PDF resources are available online, featuring folk tunes, Christmas carols, and popular songs specifically arranged for the 8-note layout. These sheets are designed to be easy to follow, with clear notation that helps users navigate the instrument’s notes effortlessly. The 8-note configuration is perfect for those looking to explore creative compositions or learn recognizable tunes. With its intuitive structure, the 8-note tongue drum enables players to produce harmonious sounds while experimenting with different rhythms and styles. Whether you’re practicing traditional songs or modern arrangements, the 8-note sheet music provides a solid foundation for musical exploration and enjoyment.

13-Note Tongue Drum Sheet Music

The 13-note tongue drum offers a broader musical range and versatility, making it ideal for players seeking more complex and dynamic compositions. These drums are often tuned to various scales, allowing for a wide array of musical expressions. Sheet music for 13-note tongue drums is widely available in PDF and MIDI formats, catering to both beginners and advanced players. Many resources feature arrangements of classical pieces, folk tunes, and modern songs, all tailored to the 13-note layout. This setup is particularly popular for its ability to produce rich, layered sounds and intricate melodies. Players can explore genres like classical, world music, and even experimental compositions with ease. The 13-note drum’s extended range also makes it suitable for creating original music and improvising. Whether you’re mastering traditional songs or experimenting with contemporary styles, the 13-note tongue drum sheet music provides endless opportunities for artistic expression and growth.

Christmas and Folk Tunes for Tongue Drum

Christmas and folk tunes are a delightful way to diversify your tongue drum repertoire, offering a rich selection of timeless melodies. Many websites provide free and printable PDF sheet music for these genres, specifically arranged for 8-note and 13-note tongue drums. Popular Christmas carols like Jingle Bells and Silent Night are beautifully adapted for the tongue drum, capturing the festive spirit. Folk music, including traditional songs from various cultures, adds a unique and nostalgic touch to your playing. These arrangements are often simple yet elegant, making them accessible to players of all skill levels. Additionally, many resources include hymns and traditional melodies, perfect for creating a serene and soulful atmosphere. Whether you’re playing for holiday gatherings or simply enjoying cultural tunes, these sheet music options allow you to connect with timeless music. Beginners will find these familiar melodies easy to learn, while advanced players can add their own flair. Explore these collections to bring joy and tradition to your tongue drum performances.

Benefits of Using PDF Format for Sheet Music

The PDF format offers numerous advantages for tongue drum sheet music. It’s portable, easy to print, and maintains clarity across devices. PDFs are also widely compatible, ensuring accessibility on smartphones, tablets, and computers. This format allows for offline practice, making it ideal for musicians on the go. Enhanced with clear notation and intuitive layouts, PDF sheet music simplifies learning and performance. Its reliability and versatility make it a preferred choice for both beginners and advanced players, ensuring a seamless musical experience.

How to Print and Use Tongue Drum Sheet Music

Printing and using tongue drum sheet music is straightforward and convenient. Start by selecting a high-quality PDF file from reputable sources like dedicated music websites, forums, or platforms such as Pinterest. Ensure your printer settings are configured for the correct paper size, typically A4 or letter, and adjust the orientation for optimal readability. For durability, consider printing on cardstock or matte paper to reduce glare. Once printed, organize the sheets in a binder or folder for easy access during practice. Many PDF files include MIDI versions, allowing you to listen to the melody and practice alongside the audio. Additionally, some resources offer tutorials and tips within the sheet music to guide beginners. Always verify the compatibility of the music with your tongue drum’s note range, whether it’s an 8-note or 13-note model. With these steps, you can seamlessly integrate printed or digital sheet music into your practice routine, enhancing your learning and performance experience.

Beginner Tips for Playing Tongue Drum

Mastering the tongue drum starts with a solid foundation. Begin by familiarizing yourself with the instrument’s layout and note arrangement, which varies depending on whether you have an 8-note or 13-note drum. Start with simple melodies, such as folk tunes or Christmas carols, as they are easier to learn and require fewer notes. Use mallets or your hands to strike the tongues gently but firmly, ensuring clear tones. Practice basic strokes, such as single hits and double hits, to build rhythm and timing. It’s essential to listen to MIDI files or tutorials to mimic the sounds and improve your technique. Many sheet music PDFs include playing tips, so take advantage of these resources. Finally, tune your drum regularly to maintain accurate pitches. With consistent practice and patience, you’ll quickly progress and enjoy playing beautiful music on your tongue drum. Start with these beginner-friendly strategies to make your learning journey smooth and enjoyable.

Advanced Techniques for Tongue Drum Players

Elevate your tongue drum skills with advanced techniques that add depth and complexity to your music. Experiment with dynamic variations by adjusting the force of your strikes to produce softer or louder tones. Master intricate rhythms by incorporating polyrhythms and layered beats, which can be guided by MIDI files or sheet music. Explore harmonic possibilities by playing multiple notes simultaneously or using overtones to create richer sounds. Advanced players can also experiment with improvisation, blending familiar melodies with spontaneous creativity. To expand your range, try incorporating hand techniques alongside mallets for varied timbres. Practice advanced tunings or alternate scales to diversify your sound. Additionally, study professional performances and sheet music arrangements to gain insights into complex compositions. By refining these techniques, you can push the boundaries of your musical expression and develop a unique style. Consistent practice and exploration will help you master these advanced methods and unlock the full potential of your tongue drum.

maplestory bowmaster guide

The Bowmaster is a DEX-based archer class in MapleStory, known for high utility, mobility, and long-range attacks. As part of the Explorers, they specialize in bows, offering unique gameplay.

1.1 Overview of Bowmaster in MapleStory

The Bowmaster is a versatile and dynamic class in MapleStory, specializing in long-range attacks and exceptional mobility. As part of the Explorer Archer jobs, they utilize bows to deliver precise and powerful strikes. Known for their high utility and ability to adapt to various combat situations, Bowmasters are a popular choice for players seeking a balance between damage and versatility. Their unique skill set and progression make them a standout class in the game’s original lineup.

1.2 Role and Playstyle of Bowmaster

The Bowmaster excels as a mobile, utility-focused class, combining long-range attacks with exceptional agility. Their playstyle revolves around precise skill rotations, leveraging abilities like Dragon’s Breath and Concentrate for optimal damage. With high utility skills, they excel in both solo and party play, providing crowd control and consistent damage output. Their role is versatile, making them invaluable in diverse combat scenarios while maintaining a high level of adaptability and effectiveness in MapleStory’s dynamic gameplay.

1.3 Unique Features of Bowmaster

The Bowmaster stands out with its distinctive blend of magic-infused archery and unparalleled mobility. Their ability to summon powerful elemental forces, such as Dragon’s Breath, sets them apart from other archers. Additionally, their skill set emphasizes high utility, including crowd control and buffs, making them a versatile choice for both single-target and area-of-effect damage. This unique combination of offensive and supportive capabilities ensures the Bowmaster is a highly sought-after class in MapleStory for various playstyles and party dynamics.

Job Advancement and Skill Builds

Bowmasters progress through five job advancements, each unlocking unique skills and enhancing their archery prowess. Skill builds focus on maximizing mobility, damage, and utility, ensuring versatility in combat.

2.1 1st Job Skills and Builds

First job Bowmasters start with basic archery skills like Arrow Blow and Power Knock-Back. These skills build the foundation for mobility and damage. Arrow Blow is your main attack, while Power Knock-Back helps manage enemies. Allocations focus on improving attack power and accuracy, ensuring smooth progression. These early skills prepare you for more advanced abilities as you progress through the jobs.

2.2 2nd Job Skills and Builds

In the 2nd job, Bowmasters gain access to Sharp Eyes and Bow Mastery, enhancing critical hits and weapon proficiency. Sharp Eyes boosts crit rate and damage, while Bow Mastery increases bow attack power. Skill builds focus on maximizing damage output and mobility. Allocate points to improve range and accuracy, ensuring a smooth transition to higher job skills. These abilities lay the groundwork for advanced playstyles in later jobs.

2.3 3rd Job Skills and Builds

In the 3rd job, Bowmasters unlock core skills like Arrow Rain and Marksmanship. Arrow Rain delivers high AoE damage, while Marksmanship enhances single-target attacks. Builds focus on maximizing critical damage and attack speed. Invest in skills that improve mobility and utility, such as Quiver Carousel, to enhance gameplay efficiency. This job lays the foundation for advanced damage output and strategic combat in higher levels, making skill allocation crucial for optimal performance.

2.4 4th Job Skills and Builds

The 4th job introduces powerful skills like Dragon’s Breath, which deals massive fire-based damage. To unlock it, you must complete the El Nath party quest with a 4th job warrior lacking Power Stance. Other key skills include Unbound, boosting attack speed, and Snipe, enhancing critical damage. Builds prioritize DEX and critical rate for consistent damage output. These skills elevate the Bowmaster’s capabilities, making them formidable in boss battles and high-tier content.

2.5 5th Job Skills and Builds

The 5th job enhances the Bowmaster’s capabilities with skills like Arrow Stream and Earth Divide, which provide high AoE damage and crowd control. Builds focus on maximizing DEX and critical rate, with hyper stats allocated to attack speed and critical damage. These skills and builds solidify the Bowmaster as a versatile and powerful ranged attacker, excelling in both single-target and party play scenarios.

Key Skills and Mechanisms

The Bowmaster excels with skills like Concentrate, enhancing accuracy, and Dragon’s Breath, adding fire damage. Mobility skills like Flash Jump and Arrow Stream boost versatility and damage output significantly.

3.1 Concentrate Skill and Its Importance

The Concentrate skill is a cornerstone for Bowmasters, enhancing accuracy and critical hit rates. By toggling this skill, players gain improved stability in attacks, ensuring consistent damage output. It is particularly vital in later game content, where enemies have higher avoidability. This skill synergizes well with other abilities, making it indispensable for maximizing the class’s potential. Proper management of Concentrate is key to maintaining high efficiency in both training and boss battles, solidifying its role as a fundamental tool for Bowmasters.

3.2 Dragon’s Breath Skill Guide

Dragon’s Breath is a powerful 4th job skill for Bowmasters, unleashing a fiery area-of-effect attack. It fires multiple arrows infused with dragon flames, dealing significant damage to enemies within its range. To unlock this skill, players must complete the El Nath party quest and obtain the skill book. This ability is crucial for clearing mobs and bossing, making it a cornerstone of the Bowmaster’s late-game toolkit. Proper use of Dragon’s Breath enhances both damage output and utility, making it indispensable in high-level content.

3.3 Bowmaster’s Mobility and Utility Skills

Bowmasters excel in mobility and utility, with skills like Flash Jump enabling quick repositioning and Bowmaster’s Mobility boosting movement speed. Quiver Full Burst enhances attack speed, while Puppet Snare provides crowd control. These abilities make Bowmasters versatile in both PvM and party play, allowing them to adapt to various combat scenarios. Their mobility ensures they can evade threats while maintaining high damage output, making them invaluable in dynamic situations and boss battles.

Hyper Skills and Passive Abilities

Hyper Skills enhance combat effectiveness, while Passive Abilities boost stats and improve overall performance, making the Bowmaster a versatile and powerful class in MapleStory.

4.1 Hyper Skill Explanations

Hyper Skills are advanced abilities unlocked at 4th Job, enhancing the Bowmaster’s combat prowess. Key skills include Quiver Cartilage, which increases arrow capacity, and Arrow Platter, boosting attack speed. Bow Expert enhances weapon mastery, improving accuracy and damage. These skills are crucial for maximizing damage output and mobility, making them essential for high-level play in MapleStory.

4.2 Best Passive Abilities for Bowmaster

The Bowmaster excels with passive abilities like Bow Expert, which boosts weapon mastery, and Sharp Eyes, enhancing critical rates. Physical Training increases stamina and health, improving survival. These passives synergize to maximize damage, mobility, and endurance, making them indispensable for optimal performance in MapleStory.

Character Progression and Training

Bowmaster progression focuses on mastering skills, optimizing EXP gain, and leveraging party play for enhanced efficiency. Training locations and social benefits are key to swift character development.

5.1 Recommended Training Locations

Optimal training spots for Bowmasters vary by level. Early levels thrive in areas like Ludibrium (Levels 50-70) and Leafre (Levels 70-90), with dense monster spawns. Arcana (Levels 90-120) offers strong EXP and Drop rates, while Morass (Levels 120-140) is ideal for high-level farming. Party play in these zones enhances efficiency, especially with strong Night Lords for SE boosts. Lower levels benefit from Ellinia Fairy Garden, perfect for quick kills and skill mastery, ensuring steady progression and skill optimization.

5.2 Tips for Efficient EXP Gain

Maximizing EXP gain as a Bowmaster involves strategic play. Join parties with strong Night Lords for SE boosts, significantly increasing EXP rates. Utilize mobility skills like Shadow Jump and Hero’s Echo to quickly eliminate monster clusters. Optimize Inner Abilities like Critical Hit Rate and Attack Power for better damage output. Activate Legion for passive EXP buffs and focus on high-density monster areas like Arcana and Morass. Consistent training in these zones ensures steady progression and skill mastery.

5.3 Party Play and Social Benefits

Bowmasters are highly sought after in parties due to their exceptional utility and mobility. Their Shadow Elemental skills enhance party performance, boosting EXP gain and damage output. Joining strong parties with Night Lords or other high-DPS classes maximizes efficiency. Social benefits include building relationships, accessing exclusive content, and participating in raids. Party play also accelerates skill mastery and EXP accumulation, making it a win-win for both the Bowmaster and the team.

Equipment and Gear Guide

Bowmasters rely on bows as their primary weapon, prioritizing DEX and LUK for accuracy and damage. Gear progression focuses on enhancing mobility and attack power through upgrades.

6.1 Gear Progression for Bowmaster

As a Bowmaster, gear progression focuses on maximizing DEX and LUK for optimal damage and accuracy. Early-game equipment includes basic bows and armor, which can be upgraded to intermediate gear like the Green Briar set. Mid-game progression involves acquiring Empress weapons and Black equipment, while late-game gear includes Chaos and Root Abyss items, ensuring high mobility and attack power. Accessories like Eye of Fire enhance critical rates, while Hyper Stats further boost weapon and magic attack.

6.2 Best Equipment for Each Job Level

For a Bowmaster, equipment selection varies by job level. Early-game (1st-3rd job) focuses on Green Briar weapons and armor for balanced stats. Mid-game (4th job) introduces Empress weapons and Black equipment for enhanced mobility. Late-game (5th job) prioritizes Chaos and Root Abyss gear for maximum damage. Accessories like Eye of Fire boost critical rates, while Hyper Stats optimize weapon and magic attack, ensuring peak performance at every stage.

Inner Abilities and Hyper Stats

Optimizing Inner Abilities focuses on enhancing mobility and attack power. Allocating Hyper Stats to weapon attack and critical rate maximizes damage output for Bowmaster effectiveness.

7.1 Optimizing Inner Abilities

For Bowmaster, optimizing Inner Abilities is crucial. Focus on Sharp Eyes to boost attack power and Critical Hit to enhance damage output. Pierce increases penetration against bosses, maximizing efficiency in raids. Additionally, Abnormal Status Resistance improves survivability, while Elemental Resistance helps against specific enemies. Balancing these abilities ensures a well-rounded character, enhancing both damage and utility in various gameplay scenarios.

7.2 Allocating Hyper Stats Effectively

For Bowmaster, allocating Hyper Stats effectively is key to maximizing damage and utility. Prioritize DEX to boost attack power and accuracy, as it directly enhances bow attacks. Allocate some points to LUK for higher critical hit rates, amplifying damage output. Consider investing in ATT or ATT% to further increase damage potential. Balancing these stats ensures optimal performance, making the Bowmaster a formidable ranged attacker with both precision and power in combat situations.

The Bowmaster is a fun, high-utility class with excellent mobility and damage potential. Mastering skills like Concentrate and Dragon’s Breath is key to success. Join parties for optimal EXP gain and enjoy the journey to mastery!

8.1 Summary of Key Points

The Bowmaster excels as a DEX-based archer with high utility and mobility. Key skills like Concentrate and Dragon’s Breath enhance damage and efficiency. Party play boosts EXP gain significantly, making it a strategic choice. Mastering mobility and utility skills ensures versatility in combat. Balancing gear progression and hyper stats optimizes performance. Focus on skill mastery and smart gameplay to unlock the Bowmaster’s full potential in MapleStory.

8.2 Advanced Tips for Mastery

To master the Bowmaster, perfect your Concentrate skill for consistent damage boosts and optimize Inner Abilities like Critical Rate and Attack Power. Focus on Hyper Stats like Dex for maximum impact. Join strong parties to leverage your utility and mobility for faster EXP gain. Experiment with skill rotations to minimize cooldowns and maximize damage output; Finally, ensure your gear is optimized for your job level to enhance overall performance in MapleStory.

solar charge controller user manual pdf

Welcome to the Solar Charge Controller User Manual! This guide provides essential information for safe installation, optimal performance, and maintenance of your solar charge controller system. Designed to help you maximize energy efficiency, this manual includes detailed instructions, safety guidelines, and troubleshooting tips to ensure your solar charging experience is seamless and effective. Read carefully to unlock the full potential of your renewable energy setup.

1.1 Purpose and Scope of the Manual

This manual is designed to provide comprehensive guidance for the safe installation, operation, and maintenance of your solar charge controller. It covers essential topics such as system overview, installation steps, safety precautions, and troubleshooting. The scope includes detailed instructions for configuring settings, understanding battery management, and optimizing energy efficiency. This guide ensures users can maximize their solar charging experience while adhering to safety and performance standards.

1.2 Key Features of the Solar Charge Controller

The solar charge controller offers advanced features like automatic system voltage detection for 12V/24V/36V/48V systems, PWM and MPPT technologies for efficient charging, and compatibility with various battery types including lead-acid, lithium, and gel. It features vivid LED indicators for battery status, real-time monitoring via an LCD display, and multiple protection mechanisms against overvoltage, undervoltage, and short circuits. These features ensure reliable performance and optimal energy management for your solar power system.

Features and Functional Characteristics

The solar charge controller incorporates advanced technologies like MPPT and PWM for optimal energy harvesting. It supports automatic voltage detection for 12V, 24V, and higher systems, ensuring compatibility with various setups. With built-in protection against overvoltage, undervoltage, and short circuits, it guarantees safe and efficient battery management while providing real-time monitoring capabilities for enhanced performance tracking.

2.1 Types of Solar Charge Controllers (PWM and MPPT)

Solar charge controllers are primarily categorized into two types: PWM (Pulse Width Modulation) and MPPT (Maximum Power Point Tracking). PWM controllers are cost-effective, suitable for small systems, and ideal for basic applications. MPPT controllers are more advanced, offering higher efficiency by optimizing energy harvest from solar panels, especially in varying conditions. Understanding these types helps users choose the best controller for their specific needs and system requirements.

2.2 Battery Management Systems (Lead-Acid, Lithium, and Gel Batteries)

Battery management systems are crucial for maintaining optimal performance and longevity. Lead-acid batteries are traditional, cost-effective options, while lithium batteries offer higher efficiency and longer lifespans. Gel batteries provide a balance between durability and performance. The controller must be compatible with the chosen battery type to ensure proper charging and discharging, preventing damage and enhancing overall system reliability. Proper configuration is essential for safe and efficient energy storage.

2.3 System Voltage Recognition (12V/24V/36V/48V Auto-Detection)

The solar charge controller features automatic voltage detection for 12V, 24V, 36V, and 48V systems, ensuring compatibility and optimal performance. This intelligent feature eliminates manual configuration, enhancing flexibility and reducing setup time. It supports various configurations, adapting seamlessly to different voltage requirements. The system ensures efficient energy management and safety, providing a reliable solution for diverse applications.

System Requirements and Compatibility

This section outlines the necessary system requirements and compatibility for the solar charge controller. Ensure your solar panels, batteries, and loads meet the specified voltage and current ratings for optimal performance and safety. Compatibility with various battery types and system voltages ensures flexibility in different renewable energy setups. Proper configuration is essential for efficient energy management.

3.1 Compatible Solar Panel and Battery Configurations

The solar charge controller is compatible with a wide range of solar panels and battery types, including lead-acid, lithium, and gel batteries. It supports system voltages of 12V/24V/36V/48V, ensuring flexibility for various renewable energy setups. Proper configuration of solar panel arrays and battery banks is essential to match the controller’s specifications for optimal performance and safety. Always refer to the manufacturer’s guidelines for voltage and current ratings to ensure compatibility and efficient energy management.

3.2 Maximum Power Point Tracking (MPPT) Efficiency

The solar charge controller features advanced MPPT technology, maximizing energy harvest from solar panels by adjusting input voltage and current to optimal levels. With high efficiency ratings of 95-99%, MPPT ensures minimal energy loss, translating to increased energy savings and faster battery charging. This technology optimizes performance across varying solar conditions, making it a critical component for efficient renewable energy systems.

Installation and Wiring Guidelines

Follow proper installation and wiring steps to ensure safe and efficient operation. Connect solar panels, battery, and load correctly, adhering to safety guidelines and manufacturer instructions.

4.1 Connecting Solar Panels to the Controller

Connect solar panels to the controller by matching positive and negative terminals. Ensure proper polarity to avoid damage. Use appropriate cables and secure connections tightly. Verify voltage and current ratings match the controller’s specifications for optimal performance. Avoid overloading the system, and ensure all connections are weatherproof for outdoor installations. Double-check wiring before turning on the system to prevent electrical issues.

4.2 Connecting the Battery and Load to the Controller

Connect the battery to the controller by matching the positive and negative terminals. Ensure secure connections to prevent loose wiring. Next, attach the load (e.g., lights or appliances) to the controller’s output terminals, following the same polarity. Double-check all connections for tightness and compatibility. Turn off the power before connecting to avoid electrical shock. Ensure the battery and load specifications align with the controller’s ratings for safe operation.

4.3 Ensuring Proper Cabling and Safety Precautions

Use appropriately sized cables to prevent overheating and voltage drop. Install circuit breakers or fuses to protect against short circuits. Ensure all connections are secure and tighten terminal screws regularly. Avoid overloading the system by adhering to the controller’s rated capacity. Keep the controller in a well-ventilated area to prevent overheating. Always disconnect the battery before performing maintenance or repairs to ensure personal safety and system integrity.

Safety Precautions and Warnings

Always handle electrical components with caution to avoid shocks or injuries. Ensure proper installation and monitoring to prevent overvoltage and undervoltage conditions. Regularly inspect cables and connections for damage or wear. Keep the system out of reach of children and unauthorized personnel. Follow all safety guidelines to ensure safe and reliable operation of your solar charge controller system.

5.1 General Safety Guidelines for Handling Electrical Systems

When working with electrical systems, always disconnect power sources before performing maintenance. Use insulated tools to prevent shocks and wear protective gear. Ensure all connections are secure to avoid short circuits. Never touch electrical components with wet hands or while standing on conductive surfaces. Regular inspections can help identify potential hazards early, ensuring a safe operating environment for your solar charge controller system.

5.2 Protection Against Overvoltage and Undervoltage

The solar charge controller features built-in overvoltage and undervoltage protection to safeguard your system. It automatically detects and prevents voltage levels that could damage the battery or connected devices. Set the undervoltage protection to 9.5V for lithium batteries and 10.5V for lead-acid to prevent deep discharges. Overvoltage protection at 12.2V ensures the battery doesn’t overcharge. Proper configuration of these settings is crucial for system longevity and reliability.

Operational Parameters and Settings

Adjustable settings optimize charging for specific battery types and voltages. The controller supports lithium, lead-acid, and gel batteries, with customizable charging stages and voltage thresholds for efficiency.

6.1 Charging Stages (Bulk, Absorption, Equalizing, Floating)

The solar charge controller operates through four charging stages: Bulk, Absorption, Equalizing, and Floating. During Bulk, the battery is charged at maximum current until a set voltage is reached. Absorption maintains this voltage to ensure a full charge. Equalizing helps maintain battery health by balancing cells, while Floating keeps the battery topped up at a lower voltage to prevent overcharging. This intelligent process ensures optimal battery performance and longevity.

6.2 Adjustable Settings for Battery Types and Charging Voltages

The solar charge controller offers customizable settings to cater to different battery types and charging requirements. Users can adjust charging voltages, such as bulk, absorption, and float levels, to suit lead-acid, lithium, or gel batteries. The controller also allows setting overcharge protection and low-voltage cut-off points, ensuring compatibility and safety for various battery chemistries. These adjustable parameters enable tailored charging strategies, enhancing system efficiency and battery longevity while preventing potential damage from overcharging or undervoltage conditions.

Monitoring and Indicators

The controller features vivid LED indicators for battery status and charging states. An LCD display provides real-time monitoring of system parameters, ensuring efficient solar energy management always.

7.1 LED Indicators for Battery Status and Charging/Discharging States

The solar charge controller includes LED indicators that visually represent battery status and charging/discharging states. These LEDs provide instant feedback, ensuring users can monitor system performance at a glance. The indicators display battery capacity levels, charging progress, and error notifications, making it easy to assess the system’s operational status and take corrective action if necessary for optimal functionality and safety.

7;2 LCD Display for Real-Time System Monitoring

The LCD display provides real-time monitoring of your solar charge controller’s performance, showing key parameters like battery voltage, charging current, and system temperature. This user-friendly interface allows you to track the charging stages, ensure optimal energy flow, and make adjustments as needed. The display updates continuously, giving you precise control and visibility over your solar power system’s operation for efficient and reliable energy management.

Maintenance and Troubleshooting

Regularly inspect connections and clean solar panels to ensure optimal performance. Troubleshoot issues by checking error codes and resetting the system if necessary. Monitor battery health and adjust settings as needed for reliable operation.

8.1 Regular Maintenance Tips for Optimal Performance

Regularly clean solar panels to remove dirt and debris, ensuring maximum energy absorption. Check all electrical connections for tightness and damage. Inspect battery terminals for corrosion and secure them properly. Keep the controller away from moisture and extreme temperatures. Periodically update the controller’s firmware if available. Perform visual inspections of cables and components for signs of wear. These steps ensure long-term efficiency and reliability of your solar charge controller system.

8.2 Common Issues and Solutions for Faulty Operation

Common issues include overvoltage, undervoltage, or battery connection problems. Check all connections for tightness and corrosion. Ensure proper battery type settings match your system. If error codes appear, refer to the manual for troubleshooting. Reset the controller if necessary. For persistent issues, inspect cables for damage or short circuits. Replace faulty components promptly to avoid system downtime. Consult the manual or contact support for advanced solutions.

Custom Settings and Advanced Features

Explore advanced customization options to tailor your solar charge controller’s performance; Adjust charging parameters, enable/disable specific modes, and optimize settings for your unique energy needs efficiently.

9.1 Adjusting Charging Parameters for Specific Battery Types

Customize your solar charge controller for different battery types by adjusting charging parameters. For lithium batteries, set protection voltage at 9.5V and full protection at 12.2V. Lead-acid batteries may require different settings. Access the menu, select the battery type, and adjust charging voltages as needed. Save changes to ensure optimal charging. Refer to the manual for default settings and advanced customization options to maximize efficiency and battery life. Always follow safety guidelines when modifying settings.

9.2 Enable/Disable Features for Different Operating Modes

Customize your solar charge controller by enabling or disabling features based on operating modes. For example, enable lithium battery mode for precise voltage control or disable equalization for sealed batteries. Access the LCD menu to toggle settings like overvoltage protection or charging stages. Adjust features to match your system requirements, ensuring optimal performance and safety. Refer to the manual for detailed instructions on mode-specific configurations and feature customization.

Compliance and Certifications

This solar charge controller adheres to international standards and certifications, ensuring safety and performance. It meets ISO, CE, and UL requirements, guaranteeing reliability and environmental compliance.

10.1 International Standards and Certifications for Solar Controllers

This solar charge controller meets rigorous international standards, including ISO, CE, and UL certifications, ensuring safety and reliability. Compliance with IEC and RoHS standards guarantees environmental sustainability and performance. These certifications verify the controller’s ability to operate efficiently under various conditions, providing users with assurance of quality and adherence to global safety protocols. Regular audits and testing maintain its compliance with evolving industry requirements.

Congratulations on completing the Solar Charge Controller User Manual! This guide has provided essential insights for safe installation, optimal performance, and troubleshooting. Refer to it regularly for future reference.

11.1 Summary of Key Points

This manual has covered essential aspects of solar charge controllers, including installation, operation, and maintenance. Key points emphasize proper connections, safety precautions, and optimization of charging efficiency. Understanding these elements ensures reliable energy management and system longevity. Regular monitoring and adherence to guidelines will maximize your solar setup’s performance and lifespan.

11.2 Final Tips for Efficient Solar Charging

For optimal performance, regularly clean solar panels to maintain efficiency. Adjust settings based on battery type and environmental conditions. Monitor system performance using LED indicators or LCD displays. Ensure all connections are secure and meet voltage requirements. Use recommended cables to prevent energy loss. Always follow safety guidelines to avoid overvoltage or undervoltage issues. Proper maintenance and adherence to these tips will ensure reliable and efficient solar charging for years to come.

References

For detailed information, refer to the GP-PWM-10-FM User Manual. Visit the manufacturer’s website for downloads. Contact support for further assistance.

12.1 Download Links for Detailed User Manuals

Access comprehensive guides for your solar charge controller by visiting the official manufacturer’s website. Download the GP-MPPT-20 User Manual and GP-MPPT-40 User Manual for detailed instructions. Additionally, refer to the Advanced Solar Controller Guide for troubleshooting and custom settings. For more resources, explore the Solar Charge Controller Support Page. Ensure you have the latest versions for optimal performance and safety.

12.2 Manufacturer Support and Contact Information

For any inquiries or assistance, contact our dedicated support team at support@solarcontrollers.com or call +1-800-SOLAR-01. Visit our official website at www.solarcontrollers.com for comprehensive support resources. Office hours are Monday to Friday, 8 AM to 6 PM EST. Additionally, our 24/7 Helpdesk is available for urgent issues. Refer to the website for regional contact details and to access our Customer Service Portal.

PDF

wishbone offense playbook pdf

The Wishbone Offense is a run-heavy, triple-back formation emphasizing power and misdirection․ It creates a numerical advantage at the point of attack, confusing defenses with its distinctive alignment and play-action possibilities․

1․1 Historical Background and Evolution

The Wishbone Offense originated in the late 1960s, developed by coach Emory Bellard at Texas A&M․ It gained prominence in the 1970s, particularly with the University of Texas, known for its physical, run-oriented style․ The formation’s name comes from its wishbone-like shape, featuring a quarterback and three running backs․ As defenses adapted, its popularity waned by the 1980s, but it influenced modern offenses like the Option and Flexbone․ Today, it remains a nostalgic yet effective formation in football history․

1․2 Key Characteristics of the Wishbone Formation

The Wishbone Formation features a quarterback and three running backs, forming a “Y” shape․ It emphasizes power running, misdirection, and play-action passes․ The fullback and two slotbacks align behind the quarterback, creating a triple threat․ This setup forces defenses to overcommit, allowing for explosive plays․ Its simplicity and physicality make it effective for controlling the clock and dominating on the ground, while its deception keeps defenses guessing․ Playbooks highlight these core elements to maximize execution and success․

Core Elements of the Wishbone Offense

The Wishbone Offense relies on a triple-back alignment, play-action passes, and precise blocking schemes․ It emphasizes physical execution, teamwork, and deception to control the game rhythm․

2․1 Player Positions and Alignments

The Wishbone Offense features a fullback, two slotbacks, and a tailback, forming a triangle behind the fullback․ The quarterback aligns 5 yards deep, with the fullback 3-4 yards behind the center․ Slotbacks position 2-3 yards outside the tackles, creating a balanced, deceptive formation․ The offensive line, including tackles, guards, and center, must execute precise blocks to enable the rushing attack and play-action effectiveness․

2․2 Essential Plays and Strategies

The Wishbone Offense relies on the Dive, Option, and Counter plays to exploit defensive weaknesses․ The Dive Play attacks the middle, utilizing the fullback for power․ The Option Play reads the defense, allowing the quarterback to distribute the ball to the most open runner․ The Counter Play uses misdirection to reverse field and catch defenses off guard, emphasizing execution and deception to maximize yardage and control the game’s tempo effectively․

Wishbone Offense Playbook Breakdown

The Wishbone Offense Playbook outlines base plays, variations, and adjustments․ It provides a comprehensive guide to mastering the formation, focusing on execution, alignment, and strategic play variations․

3․1 Dive Play: Execution and Purpose

The Dive Play is a fundamental running play in the Wishbone Offense, designed to attack the defense’s midline․ It involves the fullback taking the handoff and aiming for the gap between the center and guard․ The play relies on precise blocking from the linemen and wingbacks to create a seam․ Its primary purpose is to establish a physical presence and control the line of scrimmage, setting up larger plays․

3․2 Option Play: Reading the Defense

The Option Play is a cornerstone of the Wishbone Offense, relying on the quarterback’s ability to read defensive alignment and movement․ The quarterback reads the linebackers and defensive ends to determine the handoff or pitch․ The play leverages the triple-back alignment to create confusion, with the quarterback either diving up the middle or pitching to the trailing back, exploiting defensive overcommitment․ This play is designed to stretch defenses and create explosive gains․

3․3 Counter Play: Misdirection and Deception

The Counter Play in the Wishbone Offense uses misdirection to deceive defenses, often involving fake handoffs and reverses․ The quarterback fakes a dive to one side while the ball is handed off in the opposite direction, creating confusion․ This play exploits defensive aggressiveness, forcing players to overcommit, and opens up large gaps for significant gains․ It is a strategic tool to counter aggressive defensive alignments․

Coaching and Teaching the Wishbone Offense

Coaching the Wishbone Offense requires emphasizing proper alignment, ball handling, and execution․ It demands repetition and drills to ensure players master the fundamentals and timing of each play․

4․1 Fundamentals for Youth Football Coaches

Teaching the Wishbone Offense to youth requires focusing on basic blocking, ball handling, and footwork․ Coaches should emphasize proper stances, handoffs, and reads․ Simplifying plays and using drills to build muscle memory helps young athletes execute effectively․ Consistent repetition ensures understanding and confidence, laying a solid foundation for more complex strategies as players progress․

4․2 Drills to Master the Formation

Drills for the Wishbone include alignment exercises, handoff gauntlet runs, and option reads․ Players practice snap counts and footwork in a controlled environment․ Coaches use tackling dummies and cones to simulate game scenarios, ensuring precise execution․ These drills reinforce teamwork and timing, helping players master the formation’s intricacies while building agility and coordination․

Defensive Strategies Against the Wishbone

Defenses counter the Wishbone by aligning in strong, gap-oriented schemes․ They emphasize quick penetration and forcing the ball inside to limit the triple-option threat effectively․

5․1 Alignments to Counter the Wishbone

Defenses must align strategically to counter the Wishbone, often stacking linebackers and safeties deep․ A nose guard occupies the center, while defensive ends contain the edges․ Aligning in heavy formations like heavy right or heavy left limits the offense’s angles and forces runs inside, neutralizing the Wishbone’s strengths․

5․2 Adjustments to Neutralize Key Plays

To neutralize Wishbone key plays, defenses must adjust linebacker depths and defensive linemen alignments․ Defensive ends should crash hard to contain option plays, while linebackers fill gaps aggressively․ Safeties provide over-the-top support to limit big plays․ Additionally, pre-snap reads and blitz packages can disrupt the offense’s rhythm, forcing quick decisions and limiting the effectiveness of dive and option plays․

Advanced Concepts and Variations

Advanced Wishbone concepts include incorporating play-action passes to exploit defensive aggression․ Modern adaptations blend traditional misdirection with contemporary RPOs and formations, enhancing versatility and unpredictability․

6․1 Incorporating Play-Action Passes

Play-action passes in the Wishbone offense exploit defensive aggression by mimicking running plays․ The quarterback fakes a handoff, freezing linebackers and safeties, creating open receivers downfield․ These plays capitalize on defensive overcommitment to the run, offering big-play potential․ Proper execution requires precise timing and convincing fakes, making them a valuable complement to the Wishbone’s ground game․

6․2 Adapting the Wishbone to Modern Football

The Wishbone offense has evolved by incorporating modern spread elements, such as RPOs (Run-Pass Options) and adjustable blocking schemes․ Coaches now blend traditional Wishbone concepts with contemporary strategies to create unpredictability․ The formation remains effective in today’s game by utilizing mobile quarterbacks and versatile skill players, allowing for dynamic play-calling while maintaining its core identity as a powerful, run-oriented attack․

Wishbone Offense Playbook PDF Resources

Discover reliable Wishbone Offense playbook PDFs online, offering detailed strategies, play diagrams, and coaching tips to master the formation and its variations for effective game execution․

7․1 Where to Find Reliable Playbooks Online

Reliable Wishbone Offense playbooks can be found on platforms like Coach’s Clipboard, FootballXOs, and select youth football forums․ These resources offer detailed diagrams, strategies, and drills․ Ensure playbooks are authored by experienced coaches and include comprehensive breakdowns of formations and plays․ Always verify reviews and previews to guarantee quality and relevance for your team’s needs․

7․2 Key Features of a Comprehensive Playbook

A comprehensive Wishbone Offense playbook includes detailed play diagrams, breakdowns of formations, and strategic concepts․ It should offer clear instructions for player alignments, blocking schemes, and execution․ Look for playbooks with coaching tips, drills, and adjustments to counter defensive strategies․ Ensure it includes variations and options to adapt to different skill levels and game situations, providing a versatile toolkit for coaches․

Case Studies and Success Stories

The Wishbone Offense has proven effective in various programs, with teams achieving significant rushing yards and victories․ Its success lies in its ability to dominate ground games consistently․

8․1 Teams That Excelled with the Wishbone

The Wishbone Offense has been instrumental in the success of several prominent football programs․ Teams like the University of Oklahoma and Texas A&M famously utilized the formation to dominate ground games․ Oklahoma, under coach Barry Switzer, perfected the Wishbone in the 1970s, winning multiple championships․ Their ability to control the clock and exploit defensive weaknesses made the formation a cornerstone of their success during this era․

8․2 Coaches Who Mastered the Formation

Coaches like Barry Switzer and Emory Bellard were instrumental in perfecting the Wishbone Offense․ Switzer, at Oklahoma, leveraged the formation to win multiple championships, while Bellard, its creator, emphasized disciplined execution․ Their ability to adapt and innovate within the Wishbone framework made them legends, showcasing the formation’s potential when guided by masterful coaching and strategic play-calling․

Common Mistakes and Solutions

Improper alignment and delayed snap counts often disrupt the Wishbone Offense․ Coaches must emphasize fundamental execution and timing to ensure plays unfold effectively and efficiently․

9․1 Pitfalls in Execution

One common pitfall in executing the Wishbone Offense is improper alignment, leading to defensive mismatches․ Additionally, delayed snap counts can disrupt timing, allowing defenses to adjust․ Coaches must stress precise formation setups and rapid execution to maintain offensive rhythm and exploit defensive weaknesses effectively, ensuring each play starts with a clear advantage․

9․2 Troubleshooting Alignment Issues

Common alignment issues in the Wishbone Offense include improper backfield depth and wingback misalignment․ Coaches should ensure the fullback aligns 3-5 yards deep, with wingbacks 2-3 yards outside the tackles․ Drills focusing on pre-snap adjustments and visual cues can help correct these issues, ensuring the formation’s effectiveness and maintaining offensive balance against defensive schemes․

The Future of the Wishbone Offense

The Wishbone Offense continues to evolve, incorporating modern innovations like RPOs and play-action passes, ensuring its relevance in contemporary football by adapting to new defensive strategies․

10․1 Innovations and Trends

The Wishbone Offense is evolving by integrating modern concepts like RPOs (Run-Pass Options) and play-action passes, enhancing its effectiveness against contemporary defenses․ Coaches are adapting the formation to fit today’s fast-paced games while maintaining its core power-running identity․ Innovations include leveraging spread concepts and motion adjustments to create mismatches, ensuring the Wishbone remains a dynamic and formidable offensive strategy in modern football․

10․2 Its Place in Contemporary Football

The Wishbone Offense remains a strategic option in modern football, valued for its ability to control the clock and dominate on the ground․ While less prevalent at higher levels, it thrives in youth and smaller college programs due to its simplicity and physicality․ Its emphasis on execution and discipline makes it a timeless choice for teams seeking a powerful, run-oriented identity in today’s game․

The Wishbone Offense remains a potent, run-focused system, emphasizing execution and physicality․ Its adaptability and simplicity make it a timeless choice for teams seeking a strong ground game․

11․1 Summary of Key Points

The Wishbone Offense is a run-oriented system with a triple-back alignment, emphasizing misdirection and physical execution․ Its simplicity and adaptability make it effective at all levels of play․ Key elements include the dive, option, and counter plays, requiring precise timing and discipline․ Coaches must focus on fundamentals, drills, and player positioning to maximize its potential․ The Wishbone remains a powerful tool for teams seeking a strong ground game․

11․2 Final Thoughts on the Wishbone Offense

The Wishbone Offense remains a timeless and effective system, particularly for teams emphasizing a strong ground game․ Its simplicity and adaptability make it ideal for youth football while still offering complexity for advanced play․ Coaches who master its fundamentals can unlock consistent success․ The Wishbone’s focus on execution, discipline, and misdirection ensures its relevance in modern football, making it a valuable playbook addition for any program․

Additional Resources and Further Reading

Explore Wishbone Offense playbooks, eBooks, and coaching guides online․Join football forums and communities for shared strategies and expert insights to enhance your playbook knowledge and execution skills․

12․1 Recommended Books and Articles

Essential books include “Wishbone Option Series” and “The Best Youth Football Plays,” offering detailed strategies․ Articles like “Mastering the Wishbone Formation” provide insights into execution and drills․ Resources by experienced coaches and analysts are available online, covering playbook designs, drills, and game strategies to enhance your understanding and implementation of the Wishbone Offense effectively at all levels of play․

12․2 Online Communities and Forums

Online forums like Reddit’s r/footballcoaching and specialized coaching websites offer valuable discussions on the Wishbone Offense․ Communities such as Coach’s Corner and Football Strategy Forum provide insights, shared playbooks, and advice from experienced coaches․ These platforms allow for interaction with experts, access to video tutorials, and downloadable resources, making them indispensable for mastering the Wishbone Offense playbook effectively․

cardo packtalk bold manual

Welcome to the Cardo PackTalk Bold manual, your comprehensive guide to maximizing the potential of your advanced motorcycle communication system. This manual covers installation, features, troubleshooting, and maintenance to ensure optimal performance and user satisfaction.

1.1 Overview of the Cardo PackTalk Bold

The Cardo PackTalk Bold is a premium motorcycle communication system designed for seamless connectivity and enhanced audio quality. Featuring Dynamic Mesh Communication (DMC) technology, it ensures robust and reliable intercom connections. With JBL audio integration, it delivers superior sound quality, making it ideal for riders seeking crystal-clear communication and immersive music experiences on the go.

1.2 Importance of the Manual for Users

This manual is essential for unlocking the full potential of your Cardo PackTalk Bold. It provides detailed instructions for installation, troubleshooting, and customization, ensuring optimal performance. By understanding the device’s features and maintenance tips, users can enhance their riding experience, resolve common issues, and extend the product’s lifespan. The manual also guides users through firmware updates and warranty details, making it an indispensable resource.

Key Features of the Cardo PackTalk Bold

The Cardo PackTalk Bold features Dynamic Mesh Communication (DMC) for seamless connectivity, JBL audio for premium sound quality, and advanced voice command functionality, enhancing rider communication experiences.

2.1 Dynamic Mesh Communication (DMC) Technology

Dynamic Mesh Communication (DMC) technology revolutionizes motorcycle intercom systems by creating a self-healing, adaptive network. It ensures seamless connectivity between riders, allowing for real-time communication without dropped signals, even in challenging environments; DMC automatically adjusts to changing conditions, providing a robust and reliable communication experience for groups of any size, making it ideal for long-distance rides and dynamic group settings.

2.2 JBL Audio and Sound Quality

The Cardo PackTalk Bold features premium JBL audio technology, delivering exceptional sound quality with deep bass and clear highs. The 45mm JBL speakers provide an immersive listening experience, whether you’re enjoying music, GPS navigation, or voice commands. This collaboration ensures that riders can fully appreciate their audio while maintaining seamless communication, enhancing the overall riding experience with rich, distortion-free sound.

Installation and Setup Guide

This section provides a step-by-step guide to installing and setting up your Cardo PackTalk Bold, including mounting, charging, and initial pairing for a seamless experience.

3.1 Step-by-Step Installation Process

Mount the Cardo PackTalk Bold on your helmet using the provided adhesive or clamp kit. Secure the speakers inside the helmet and attach the microphone. Charge the unit fully before first use. Power on the device and follow the voice prompts to complete initial setup. Ensure all components are properly connected and test the system to confirm functionality.

3.2 Pairing Mobile Devices and Bluetooth Connectivity

To pair your Cardo PackTalk Bold with a mobile device, enable Bluetooth on both devices. Search for available devices on your phone and select “PackTalk Bold.” Follow the voice prompts to confirm pairing. Ensure the LED indicator flashes blue to indicate successful pairing. For multiple device connections, repeat the process. Use the Cardo Update App to ensure software compatibility and optimize Bluetooth performance.

Advanced Settings and Customization

Customize your PackTalk Bold experience by configuring voice commands and optimizing settings. Regular firmware updates ensure enhanced functionality and compatibility, while personalized audio settings improve sound quality.

4.1 Configuring Voice Commands and Dialing

Enhance your riding experience by setting up voice commands for hands-free control. Enable voice-activated dialing to make calls safely while on the move. Press and hold the voice command button to activate the feature. Speak clearly to ensure accurate command recognition. Use this function to redial the last number or access your phone’s voice assistant. Refer to the manual for advanced voice command customization options.

4.2 Updating Firmware and Software

Regular firmware and software updates ensure your PackTalk Bold performs at its best. Download the Cardo Update App from the official website to check for updates. Connect your device to a computer and follow the app’s instructions to install the latest software. Always register your device to access exclusive updates and new features. Ensure the device is fully charged and avoid interruptions during the update process;

Troubleshooting Common Issues

This section provides solutions for common issues like connectivity problems and audio distortion. Follow the manual’s troubleshooting guide to restore your device’s optimal performance quickly.

5.1 Resolving Connectivity Problems

Connectivity issues with your PackTalk Bold can often be resolved by resetting the device or re-pairing it with your motorcycle helmet or smartphone. Ensure Bluetooth is enabled and devices are within range. If problems persist, check for firmware updates or restart your device. Physical obstructions, like helmet visors, can also affect signal strength. Refer to the manual for detailed troubleshooting steps to restore seamless communication.

5.2 Addressing Audio Quality Concerns

Ensure the PackTalk Bold is properly fitted in your helmet and free from debris. Clean the speakers and check for obstructions. Adjust volume levels and test in a quiet environment. If issues persist, reset the device or update firmware. For distorted sound, reduce volume on connected devices. Contact Cardo support if problems remain unresolved after these steps.

Maintenance and Care Tips

Regularly clean the PackTalk Bold with a soft cloth and avoid harsh chemicals. Store in a dry, cool place when not in use. Protect from extreme temperatures and moisture to ensure optimal performance and longevity. Follow these care tips to maintain your device’s functionality and extend its lifespan effectively.

6.1 Cleaning and Storing the Device

Use a soft cloth to clean the PackTalk Bold, avoiding harsh chemicals. Gently wipe the speakers and microphone to maintain sound quality. Store in a cool, dry place, away from direct sunlight and moisture. Use original packaging or a protective case to prevent damage. Avoid extreme temperatures and ensure the device is dry before storage. Regular cleaning and proper storage will help maintain performance and extend lifespan effectively.

6.2 Extending Battery Life

The Cardo PackTalk Bold offers up to 13 hours of battery life. To extend it, turn off the device when not in use, avoid extreme temperatures, and charge it fully before storage. Keep the firmware updated for optimized power management. Use power-saving modes during breaks and ensure the battery is drained to 0% occasionally to maintain health. Proper care ensures long-term reliability and performance.

Warranty and Support Information

The Cardo PackTalk Bold comes with a 2-year extended warranty for registered devices. For support, visit cardosystems.com or contact their customer service team for assistance with repairs, updates, and troubleshooting. Ensure your device is registered to access exclusive updates and maintain warranty eligibility for a hassle-free experience.

7.1 Understanding the Warranty Program

The Cardo PackTalk Bold is backed by a 2-year extended warranty program, ensuring coverage for manufacturing defects and repairs. Registration is required to activate warranty benefits. Visit cardosystems.com for details. This program provides peace of mind, knowing your device is protected and supported for two full years from purchase, enhancing your overall ownership experience with reliable customer care.

7.2 Contacting Cardo Customer Support

For assistance, visit the official Cardo support page at cardosystems.com/support. Here, you can access troubleshooting guides, download manuals, and contact the support team directly. Registered users can also benefit from exclusive updates and priority assistance, ensuring a seamless experience with your PackTalk Bold device.

Compatibility with Other Devices

The Cardo PackTalk Bold is compatible with other Cardo models, including Packtalk, Slim, and Black, ensuring seamless integration with various motorcycle helmets for enhanced communication.

8.1 Pairing with Other Cardo Models

The Cardo PackTalk Bold effortlessly pairs with other Cardo models, such as PackTalk, Slim, and Black, using Dynamic Mesh Communication (DMC) technology. This seamless integration allows for robust group communication, ensuring all riders stay connected effortlessly, regardless of the Cardo model they use. The DMC technology enhances stability and range, making it ideal for group rides with multiple participants.

8.2 Integration with Motorcycle Helmets

The Cardo PackTalk Bold seamlessly integrates with various motorcycle helmets, including Shoei Neotec 2, ensuring a secure and stable installation. The manual provides detailed steps for mounting the device, emphasizing noise reduction for clear audio. Proper positioning of speakers and microphones is key for optimal performance. Adhesive plates are included for compatibility with different helmet types, ensuring a snug and reliable fit for all riders.

Future Updates and Enhancements

Stay ahead with the latest Cardo PackTalk Bold updates. Regular software enhancements and new features ensure optimal performance. Visit the official Cardo website to download updates and patches.

9.1 Accessing Software Patches

Accessing software patches for your Cardo PackTalk Bold is straightforward. Visit the official Cardo website and download the latest updates using the Cardo Update App. Ensure your device is registered to receive notifications about new patches. Regular updates enhance performance, fix issues, and add new features. Follow the on-screen instructions to download, install, and restart your device for optimal functionality. Registration ensures you stay updated with the latest improvements.

9.2 Registering Your Device for Updates

Registering your Cardo PackTalk Bold ensures you receive software patches and future updates. Visit the Cardo Community website to complete the registration process. Once registered, your device becomes eligible for free updates, enhancing functionality and performance. Regular registration checks help maintain optimal connectivity and audio quality, keeping your system up-to-date with the latest advancements in motorcycle communication technology.

Mastery of the Cardo PackTalk Bold enhances your riding experience. Always explore advanced features, stay updated, and engage with the Cardo community for optimal performance and connectivity.

10.1 Maximizing Your PackTalk Bold Experience

To fully enjoy your PackTalk Bold, explore its advanced features like JBL audio and DMC technology. Regular software updates ensure you have the latest enhancements. Engage with the Cardo community for tips and support, and refer to the manual for troubleshooting. Proper maintenance, such as cleaning and storing the device, will extend its lifespan and performance quality over time.

10.2 Staying Connected with the Cardo Community

Staying connected with the Cardo community enhances your PackTalk Bold experience. Join forums, attend events, and engage with fellow riders for tips and support. Regularly visit Cardo’s official website for updates and participate in discussions to stay informed. Sharing feedback helps shape future products, making the community a valuable resource for all users.

subarus with manual transmission

Subaru manual transmission vehicles offer a blend of performance, fuel efficiency, and driver control, making them popular among enthusiasts․ Known for their durability and precision engineering, these cars provide a unique driving experience that combines power with handling, appealing to those who value the connection between driver and machine․

Overview of Subaru’s Commitment to Manual Transmissions

Subaru has consistently demonstrated a strong commitment to manual transmissions, offering them in various models like the Forester and BRZ․ This dedication reflects the brand’s belief in the driving engagement and efficiency that manual transmissions provide․ While many automakers have shifted focus to automatic and CVT options, Subaru continues to cater to enthusiasts by retaining manual transmissions in its lineup․ The brand understands the appeal of driver control and the unique connection it fosters between the driver and the vehicle․ Subaru’s manual transmissions are renowned for their smooth shifting and precise engineering, making them a standout choice for both everyday commuting and spirited driving․

Historical Context of Manual Transmissions in Subaru Models

Subaru’s history with manual transmissions dates back to its early models, where they were the primary choice for their rugged, reliable vehicles․ The 1980s and 1990s saw Subaru’s manual transmissions become synonymous with off-road capability and fuel efficiency․ Models like the Subaru Outback and Impreza featured manual transmissions as standard, catering to drivers who valued control and performance․ Over the years, Subaru has refined its manual transmission technology, offering 5-speed, 6-speed, and even sport-tuned gearboxes in models like the BRZ․ This historical emphasis on manual transmissions has helped Subaru build a loyal following among driving enthusiasts who appreciate the tactile connection to the road․

Benefits of Manual Transmissions in Subaru Cars

Manual transmissions in Subaru cars offer enhanced driver control, improved fuel efficiency, and lower maintenance costs compared to automatics, making them a preferred choice for driving enthusiasts․

Improved Driver Control and Performance

Subaru manual transmissions provide drivers with enhanced control and performance, allowing precise gear shifts that optimize acceleration and handling․ This direct connection between driver and vehicle ensures better responsiveness, especially in challenging driving conditions like uphill climbs or winding roads․ The ability to manually select gears enables drivers to maximize engine power and torque, delivering a more engaging and dynamic driving experience․ Additionally, the manual transmission’s mechanical efficiency contributes to improved fuel economy and reduced wear on the engine․ For enthusiasts, this level of control fosters a deeper connection with the car, making every drive more enjoyable and satisfying․ The precision engineering of Subaru’s manual transmissions ensures smooth, reliable shifts, further enhancing the overall performance․

Fuel Efficiency and Cost Savings

Subaru manual transmission vehicles offer significant fuel efficiency and cost savings compared to automatic counterparts․ Manual transmissions typically achieve better MPG ratings due to their mechanical simplicity and direct engine connection․ This translates to lower fuel costs over time, especially for drivers who frequently navigate city traffic or long highways․ Additionally, manual transmissions often have lower purchase prices and reduced maintenance costs, as they lack the complex components found in automatic and CVT systems․ While modern automatics have improved, manuals remain a cost-effective and efficient choice for many Subaru owners․ This combination of fuel savings and lower ownership costs makes manual transmission Subarus a practical option for budget-conscious drivers seeking reliability and performance․

Popular Subaru Models with Manual Transmission

Subaru offers several models with manual transmissions, including the Impreza, Forester, and BRZ․ These vehicles are known for their precise handling and driver engagement․

Subaru Impreza: A Classic Choice for Manual Drivers

The Subaru Impreza stands out as a timeless favorite among manual transmission enthusiasts․ Its 5-speed manual gearbox offers smooth, precise shifts, making it a joy to drive․ Known for its reliability and fuel efficiency, the Impreza is a practical choice for both city commuting and light off-road adventures․ The manual transmission enhances driver engagement, providing better control and a more connected driving experience․ With its robust engineering and all-wheel-drive capability, the Impreza is a versatile vehicle that appeals to first-time car owners and seasoned drivers alike․ Its enduring popularity is a testament to Subaru’s commitment to delivering performance and value in a compact package․

Subaru Forester: Combining Off-Road Capabilities with Manual Shifts

The Subaru Forester uniquely blends off-road prowess with the precision of a manual transmission․ Its 6-speed manual gearbox, available in earlier models, provides drivers with enhanced control over terrain and speed․ The Forester’s all-wheel-drive system pairs seamlessly with the manual transmission, offering improved traction and stability on uneven surfaces․ While newer models have shifted to automatic transmissions, the manual option remains a sought-after feature for enthusiasts․ The Forester’s spacious interior and versatile design make it a practical choice for adventurers, while its manual transmission delivers a more engaging and dynamic driving experience both on and off the road․

Subaru BRZ: A Sporty Option with Manual Precision

The Subaru BRZ stands out as a sporty coupe designed for driving enthusiasts․ Equipped with a precise 6-speed manual transmission, the BRZ delivers a responsive and engaging driving experience․ Its rear-wheel-drive layout and lightweight design make it a joy to handle on twisty roads․ The manual gearbox allows drivers to fully exploit the car’s rev-happy boxer engine, offering crisp shifts and a direct connection to the vehicle’s performance․ While not all BRZ models come with a manual transmission, the ones that do are highly sought after by purists who value driver involvement; The BRZ’s sport-tuned suspension and balanced chassis further enhance its appeal as a track-ready yet street-friendly vehicle․

Maintenance and Care for Subaru Manual Transmissions

Regular fluid checks, clutch inspections, and filter replacements are essential for Subaru manual transmissions․ Avoid aggressive driving habits to prevent premature wear and extend transmission life․

Tips for Extending the Life of Your Manual Transmission

Proper driving techniques are crucial for maintaining your Subaru’s manual transmission; Avoid riding the clutch, as this can cause excessive wear on the clutch and pressure plate․ Shift gears smoothly and gradually, especially when driving uphill or in heavy traffic conditions․ Regular fluid changes are essential to keep the transmission lubricated and functioning smoothly․ Using the correct type of transmission fluid, as specified by Subaru, ensures optimal performance․ Inspect the clutch and gear components periodically for signs of wear․ Avoid aggressive acceleration or deceleration, as sudden shifts can strain the transmission․ By adhering to these practices, you can significantly extend the life of your manual transmission and maintain its reliability over time․

Common Issues and Solutions for Subaru Manual Transmissions

Subaru manual transmissions are generally reliable, but some common issues may arise․ One issue is transmission slipping or hesitation between gears, often caused by worn clutch components or improper adjustment․ Replacing the clutch and ensuring proper alignment can resolve this․ Another problem is difficulty shifting gears, which may stem from a faulty gear synchro or low transmission fluid levels․ Regular fluid checks and replacements can prevent this․ Additionally, unusual noises during shifting, such as grinding or clunking, may indicate worn bearings or gear teeth․ Addressing these issues promptly with professional inspection and repairs can prevent further damage․ Regular maintenance and timely addressing of symptoms are key to ensuring long-term performance and reliability․

Driving Techniques for Subaru Manual Transmission

Mastering smooth acceleration and gear shifts enhances control and reduces wear․ Practice consistent throttle input and timely clutch engagement, especially uphill, to maintain traction and stability effectively․

Mastering Uphill Driving in a Subaru with Manual Transmission

Driving uphill in a Subaru with a manual transmission requires precise control and technique․ Start by selecting the appropriate gear—first or second gear—depending on the incline steepness․ Use the clutch and brake smoothly to maintain control and avoid rolling backward․ As you ascend, keep the engine in the optimal rpm range to ensure consistent power delivery․ Avoid riding the clutch, as this can cause unnecessary wear․ For steeper inclines, consider using the handbrake to assist with control․ Subaru’s all-wheel-drive system enhances traction, but proper gear selection and throttle input are still crucial․ Practice on gentle slopes to build confidence and master the balance between acceleration and control․ This ensures a safe and efficient uphill driving experience․

machine learning mei meng lee pdf

Machine learning enables systems to learn from data, improving over time. Wei-Meng Lee emphasizes hands-on training, providing practical approaches to understanding and implementing ML concepts effectively.

1.1 What is Machine Learning?

Machine learning is a subset of artificial intelligence that enables systems to learn patterns and relationships from data, improving over time. It combines algorithms and statistical models to train systems, allowing them to make decisions or predictions without explicit programming. Wei-Meng Lee highlights its practical applications, emphasizing hands-on training to master ML fundamentals effectively.

1.2 Evolution of Machine Learning

Machine learning has evolved from rule-based systems to data-driven approaches, leveraging advancements in algorithms and computing power. Early systems relied on explicit programming, while modern ML focuses on learning from data. The integration of AI and ML has enabled applications like NLP and computer vision. Wei-Meng Lee’s hands-on training emphasizes practical implementation, reflecting ML’s growth into a versatile, impactful technology across industries.

Data Exploration in Machine Learning

Data exploration is crucial for understanding datasets, identifying patterns, and preparing data for modeling. It involves statistical analysis and visualization to uncover insights, ensuring robust ML outcomes.

2.1 Importance of Data Exploration

Data exploration is vital in machine learning as it helps understand data quality, identify patterns, and uncover insights. It ensures datasets are relevant and prepared for modeling, improving model performance and robustness. Wei-Meng Lee’s practical approach emphasizes exploration to lay a strong foundation for effective ML outcomes.

2.2 Tools and Techniques for Data Exploration

Essential tools for data exploration include Python libraries like Pandas and Matplotlib. Techniques involve statistical analysis, data visualization, and preprocessing. These methods help uncover patterns, outliers, and correlations, ensuring data quality. Wei-Meng Lee’s training emphasizes practical exploration to prepare datasets effectively for machine learning models, enhancing accuracy and reliability in predictions and outcomes.

Supervised and Unsupervised Learning

Supervised learning uses labeled data to train models, while unsupervised learning identifies patterns in unlabeled data. Wei-Meng Lee’s training highlights these techniques as foundational for building accurate models.

3.1 Fundamentals of Supervised Learning

Supervised learning involves training models on labeled data, where inputs are paired with correct outputs. Wei-Meng Lee’s approach emphasizes understanding this process, as it forms the basis for accurate predictions and is crucial for building reliable machine learning models.

3.2 Fundamentals of Unsupervised Learning

Unsupervised learning focuses on identifying patterns and relationships in unlabeled data. Unlike supervised learning, it doesn’t rely on predefined outputs, making it ideal for exploratory data analysis. Techniques like clustering and dimensionality reduction help uncover hidden structures, enabling machines to discover intrinsic data patterns without prior knowledge of the expected results.

Applications of Machine Learning

Machine learning drives innovation in marketing, fraud detection, and healthcare. It enables systems to analyze data, detect patterns, and make informed decisions, enhancing efficiency and accuracy across industries.

4.1 Machine Learning in Marketing

Machine learning revolutionizes marketing by enabling data-driven decisions, customer segmentation, and personalized campaigns. It analyzes consumer behavior, predicts trends, and optimizes strategies, enhancing efficiency and innovation in the field. Wei-Meng Lee’s practical approach highlights its significance in real-world applications, making it indispensable for modern marketers seeking precise and impactful solutions.

4.2 Machine Learning in Fraud Detection

Machine learning is transforming fraud detection by identifying patterns and anomalies in transactions. Techniques like anomaly detection and predictive analytics help flag suspicious activities, reducing financial losses. Wei-Meng Lee’s practical insights highlight how ML algorithms, such as decision trees and neural networks, enhance accuracy in real-time fraud prevention systems, ensuring robust security in financial sectors.

Hands-On Training in Machine Learning

Hands-on training is essential for mastering machine learning. Wei-Meng Lee’s approach emphasizes practical experience, enabling learners to apply ML concepts to real-world problems effectively through interactive exercises.

5.1 Role of Practical Training in ML

Practical training is crucial for mastering machine learning, as it bridges theory and real-world application. Hands-on experience allows learners to experiment, debug, and refine models, enhancing problem-solving skills. Wei-Meng Lee’s approach focuses on interactive exercises and real-world projects, ensuring learners gain confidence and proficiency in implementing ML solutions effectively.

5.2 Wei-Meng Lee’s Approach to ML Training

Wei-Meng Lee’s approach to ML training emphasizes hands-on learning through interactive exercises and real-world projects. His method focuses on breaking down complex concepts into manageable steps, allowing learners to build confidence and proficiency. By combining theoretical foundations with practical implementation, Lee’s training ensures learners can apply ML techniques effectively to solve real-world problems.

Ethical Considerations in Machine Learning

Ethical considerations in ML focus on bias, fairness, and transparency. Addressing these ensures responsible AI systems, fostering trust and accountability in machine learning technologies.

6.1 Bias and Fairness in ML Models

Bias and fairness in ML models are critical ethical concerns. Models may reflect biases present in training data, leading to unfair outcomes. Addressing these issues ensures equitable decision-making, fostering trust and accountability in machine learning systems. Techniques like data preprocessing and fairness metrics help mitigate biases, promoting responsible AI development and deployment across various applications.

6.2 Transparency in Decision-Making

Transparency in machine learning ensures that decisions made by models are understandable and accountable. Techniques like model interpretability and explainability help uncover how predictions are made. This clarity builds trust and ensures ethical compliance. Tools and frameworks are increasingly adopted to promote transparency, enabling users to audit and understand ML systems effectively, fostering responsible AI deployment.

Natural Language Processing (NLP) in ML

Natural Language Processing (NLP) enables machines to understand and process human language. It powers applications like sentiment analysis and language translation, leveraging ML for text insights and communication.

7.1 Basics of NLP

Natural Language Processing (NLP) combines linguistics and computer science to enable machines to interpret human language. It involves tokenization, sentiment analysis, and named entity recognition. NLP uses machine learning to process and generate text, facilitating applications like language translation and text summarization. Wei-Meng Lee’s resources highlight practical approaches to implementing NLP for real-world problem-solving and efficient communication systems.

7.2 NLP Applications in ML

NLP applications in ML include sentiment analysis, text classification, and language translation. These tools enhance decision-making and automation, as seen in surveillance systems and academic research. Wei-Meng Lee’s training emphasizes practical NLP integration, enabling machines to understand and generate human-like text, with applications spanning customer service to personalized learning experiences, driving innovation in communication and problem-solving.

Future Trends in Machine Learning

Future trends include AI assistants enhancing decision-making and emerging technologies like precision medicine. Wei-Meng Lee’s insights highlight ML’s growing role in solving complex problems ethically.

8.1 Emerging Technologies in ML

Emerging technologies in ML include advancements in NLP, precision medicine, and AI-driven decision-making tools. Wei-Meng Lee’s training approaches emphasize practical applications, fostering innovation in these areas while addressing ethical considerations. These technologies aim to enhance problem-solving capabilities, enabling systems to learn and adapt more effectively in complex environments, driving progress across industries.

8.2 The Role of AI Assistants

AI assistants are revolutionizing decision-making by combining expert knowledge with reflective questioning. They enhance problem-solving and learning, particularly in academic and career development. Wei-Meng Lee’s training emphasizes leveraging these tools to improve ML applications, ensuring ethical and practical implementations that empower users to make informed decisions effectively.

Precision Medicine and ML

Machine learning integrates molecular and environmental data to advance precision medicine, enabling personalized treatments. Wei-Meng Lee’s training emphasizes ML’s role in analyzing complex datasets for tailored healthcare solutions.

9.1 Integrating ML in Healthcare

Machine learning enhances healthcare by analyzing vast medical datasets to improve diagnostics and treatments. It enables personalized medicine by predicting diseases and tailoring therapies. Wei-Meng Lee’s practical training highlights ML’s potential in streamlining clinical workflows and advancing precision medicine through data-driven insights and predictive analytics.

9.2 Personalized Medicine Approaches

Personalized medicine leverages machine learning to analyze genetic data, enabling tailored treatments. Wei-Meng Lee’s training emphasizes practical ML applications, helping healthcare professionals develop individualized care strategies. This approach optimizes treatment efficacy and reduces adverse effects, marking a significant advancement in precision medicine.

Machine learning’s evolution and applications, as highlighted by Wei-Meng Lee, demonstrate its transformative potential. Practical training and pioneers like him continue to shape the future of ML.

10.1 Summary of Key Concepts

Machine learning involves systems learning from data to improve over time; Key concepts include supervised and unsupervised learning, data exploration, and ethical considerations. Wei-Meng Lee’s hands-on training emphasizes practical implementation, while applications span marketing, fraud detection, NLP, and precision medicine. These concepts underscore ML’s transformative potential across industries, highlighting the importance of balanced innovation and ethical practices.

10.2 The Future of Machine Learning

Machine learning will integrate advanced technologies like NLP and AI assistants, driving innovation across industries. Ethical practices and transparency will remain critical as ML evolves. Wei-Meng Lee’s hands-on training approaches will continue to empower learners, ensuring a skilled workforce to harness ML’s potential. The future promises transformative applications, with innovators and educators shaping a balanced, ethical, and impactful ML landscape.