Archive: February 26, 2024

tides of war guide

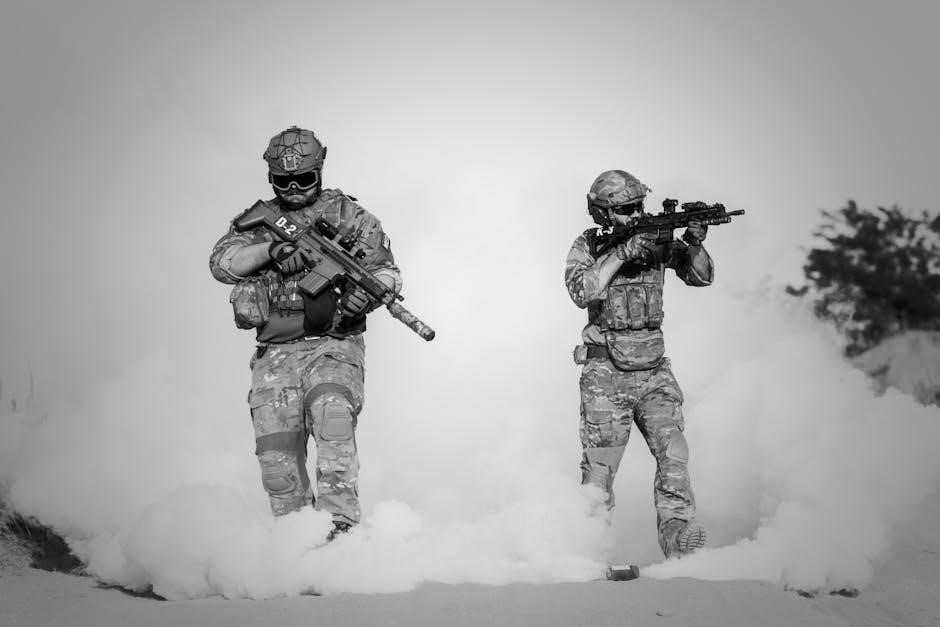
Tides of War is a thrilling combat event featuring six stages, each unlocking daily, where players must raise Grit Value to activate powerful buffs and defeat enemies.

1.1 Overview of the Event

Tides of War is a dynamic combat event divided into six stages, each unlocking daily. Players must progress through challenging waves of enemies, with each stage introducing unique mechanics and boss battles. The event emphasizes raising Grit Value, which activates powerful buffs to aid in combat. Trial characters are provided, making the event accessible to all players. The event runs from April 13 to May 6, 2024, offering rewards like Stellar Jades and Relic Remains for successful completion. Manual play is recommended over auto mode to ensure precise enemy targeting. The event combines strategic planning with intense gameplay, making it a highlight for both new and experienced players. Each stage builds on the last, culminating in a final showdown that tests skill and strategy.

1.2 Importance of Grit Value

Grit Value is a core mechanic in Tides of War, enabling players to activate powerful buffs that enhance combat effectiveness. Accumulated through HP consumption, Grit Value progresses through phases, with each phase unlocking stronger effects. Strategic management of Grit Value is crucial, as it directly impacts the ability to overcome challenging enemies and bosses. Players must balance HP depletion with team survival to maximize Grit gains. The system rewards careful planning and timely buffs, making it essential for success in higher stages. Properly utilizing Grit Value can turn the tide of battle, emphasizing its central role in the event’s strategy and progression.

1.3 Event Schedule and Duration

Tides of War unfolds over six stages, each unlocking daily, giving players a structured progression path. The event begins with the Trotter Effect and concludes with the War of Attrition. Each stage introduces unique mechanics and challenges, requiring adaptation and strategy. The event duration ensures players have ample time to master each phase without feeling rushed. Clear scheduling allows for organized planning, enabling participants to prepare teams and tactics for upcoming stages. This staggered release enhances engagement, keeping the experience fresh and dynamic throughout the event period.

Mechanics of Tides of War

Tides of War revolves around the Grit Phase system, where players accumulate Grit Value to unlock powerful buffs. Each Tide introduces unique mechanics, affecting gameplay and strategy.

2.1 Grit Phase System

The Grit Phase System is central to Tides of War, enabling players to unlock powerful buffs by accumulating Grit Value. This value increases as players defeat enemies or take damage, with higher phases granting enhanced abilities and damage boosts. Each phase transitions automatically once the required Grit Value is reached, offering strategic advantages in combat. Managing Grit effectively is crucial for progressing through challenging stages and defeating tough bosses, making it a key mechanic for success in the event.

2.2 Tide Effects and Buffs

Tide Effects introduce dynamic mechanics that influence gameplay, with each phase bringing unique buffs and challenges. These effects enhance specific abilities, such as increased attack or defense, and provide utility like sped-up movement or enhanced resource generation. Players must adapt strategies to leverage these buffs effectively, ensuring optimal performance in each stage. For instance, certain tides may boost elemental damage, while others enhance healing or stamina recovery. Understanding and utilizing these effects is crucial for overcoming enemies and achieving higher ranks. The interplay between Tide Effects and Grit Phases creates a layered combat system, rewarding players who master these synergies.

2.3 Wave Mechanics and Enemy Types

Tides of War features waves of enemies that spawn in cycles, with each wave introducing different types of foes. Non-boss enemies continuously refresh, while boss enemies appear in specific waves, requiring strategic targeting. Enemy types vary, from standard units to elite variants with enhanced abilities. Players must adapt their team composition and skills to counter these threats effectively. Understanding enemy behavior and wave patterns is key to optimizing damage and survival. Additionally, certain waves may include unique mechanics, such as area-wide effects or priority targets, which demand precise execution. Mastering these wave dynamics and enemy variations is essential for progressing through the event’s challenges and achieving higher ranks.

Combat Stages and Challenges

Tides of War features six distinct combat stages, each introducing unique mechanics and challenges. Players must defeat boss enemies within specific cycles while managing continuous enemy spawns, requiring strategic adaptations and optimal use of Grit mechanics to prevail.

3.1 Stage 1: Trotter Effect

Stage 1: Trotter Effect introduces players to the core mechanics of Tides of War. This stage focuses on defeating Trotters, enemies tied to the Grit system. Players must manually control their characters to ensure accurate targeting, as auto-mode may not prioritize enemies effectively. The stage emphasizes the importance of trial characters, making it accessible to all players. Defeating Trotters rapidly increases Grit Value, essential for unlocking buffs and progressing through phases. Strategies involve manipulating HP levels to maximize Grit accumulation, with team compositions like Acheron and Black Swan proving effective. Completing this stage rewards players with essential resources, including Stellar Jades and Credits, setting the foundation for tackling higher challenges in the event.

3.2 Stage 2: Perpetual Exploit

Stage 2: Perpetual Exploit builds on the foundation of Grit mechanics introduced in Stage 1, with a focus on exploiting enemy weaknesses. This stage introduces more complex enemy patterns and requires precise timing to maximize Grit Value accumulation. Players must strategically manipulate their characters’ HP levels to activate Grit Phase buffs, which are crucial for overcoming the tougher foes in this stage. Recommended team compositions include characters like Kafka and Gallagher, whose abilities synergize well with the Grit system. The stage also introduces periodic enemy refreshes, demanding constant vigilance. Successfully completing Stage 2 rewards players with additional resources and unlocks the path to higher challenges, ensuring progression in the Tides of War event.

3.3 Stage 3: Supreme Leader

Stage 3: Supreme Leader introduces advanced Grit mechanics and intense boss battles, testing players’ mastery of the system. This stage requires maintaining high Grit Value throughout to unlock devastating buffs. Enemies here are more aggressive, with periodic waves that demand quick reflexes and strategic team rotations. Team compositions featuring characters like Acheron and Black Swan are highly effective, as their abilities complement the Grit system. Players must balance HP consumption and buff activation to overcome the formidable foes. The Supreme Leader stage is a pivotal challenge that separates casual players from those committed to mastering the event. Successful completion yields valuable rewards, including rare materials and credits, essential for progressing further in Tides of War.

3;4 Stage 4: Overflowing Wounds

Stage 4: Overflowing Wounds challenges players with relentless enemy waves and unique mechanics that test endurance and strategy. This stage introduces healing mechanics and status effects, requiring precise team rotations to manage. Grit Value accumulation is crucial here, as it enables powerful buffs to counter the overwhelming enemy numbers. Teams with high HP and healing capabilities, such as Kafka and Gallagher, excel in this stage. The “Enduring Effect” and “War of Attrition” Grit Phases are particularly effective, allowing sustained damage output and survivability. Players must balance aggressive attacks with defensive strategies to prevent being overwhelmed. Completing this stage rewards players with essential resources like Stellar Jades and Traveler’s Guide, making it a pivotal checkpoint in the Tides of War event.

3.5 Stage 5: Enduring Effect

Stage 5: Enduring Effect is a challenging phase where players must maintain sustained damage output while managing status effects and enemy healing. The Grit Phase system plays a crucial role here, as activating specific buffs can turn the tide of battle. Teams with high HP and crowd control abilities are recommended, as enemies will continuously heal and spawn additional waves. Players must strategically rotate their characters to maximize Grit Value accumulation, ensuring buffs remain active throughout the fight. The “Enduring Effect” Grit Phase is particularly effective, allowing players to ignore enemy healing and deal consistent damage. Completing this stage rewards players with essential progression items, making it a critical checkpoint in the Tides of War event.

3.6 Stage 6: War of Attrition

Stage 6: War of Attrition is the final and most challenging phase of the Tides of War event, requiring players to defeat three boss waves within six cycles. Enemies will continuously respawn, making sustained damage and crowd control essential. Teams with high HP and endurance are recommended to withstand the prolonged battle. The Grit Phase system reaches its peak here, with Phase 4 granting the ability to ignore enemy healing, allowing for massive damage output. Players must carefully manage their Grit Value to maintain buffs throughout the fight. Success in this stage rewards players with exclusive items, including Stellar Jades and Tracks of Destiny, making it a crucial milestone for progression.

Rewards and Progression

Completing stages in Tides of War rewards players with Stellar Jades, Travelers Guide, Credits, Relic Remains, and Tracks of Destiny, aiding progression and character enhancement.

4.1 Rewards for Completing Stages

Completing each stage in Tides of War rewards players with essential resources and items to enhance their progression. These include Stellar Jades, Travelers Guide, Credits, Relic Remains, and Tracks of Destiny. Each stage offers unique rewards, with higher stages granting rarer items. Additionally, achieving S rank in a stage unlocks exclusive rewards like the Trailblaze Mission Jarilo-VI and the Silent Galaxy set. These rewards not only aid in character enhancement but also provide strategic advantages in subsequent stages. Collecting these rewards is crucial for maximizing character potential and dominating later challenges in the event. Make sure to aim for S rank to unlock the full reward potential and strengthen your team for future battles.

4.2 How to Unlock Maximum Rewards

To unlock maximum rewards in Tides of War, focus on achieving S rank in all stages by optimizing your team and strategy. Use trial characters like Acheron and Kafka for their unique abilities, and enable auto mode selectively to maintain control. Leverage Support Functions such as Enduring Effect and War of Attrition to boost your Grit Phase and clear stages efficiently. Participating in community events and challenges also grants additional rewards. By mastering these strategies, you can maximize your rewards and enhance your progression in the game. Ensure to explore all available bonuses and incentives to fully benefit from the event.

fagor pressure cooker instructions

Safety Precautions for Using the Fagor Pressure Cooker

Always follow these guidelines to ensure safe operation:

  • Close supervision is necessary when using the cooker near children․
  • Never place the cooker in a heated oven or near open flames․
  • Do not touch hot surfaces; use handles or knobs instead․
  • Ensure the safety vent points away from you to avoid burns․
  • Always read the manual before first use for proper handling․

1․1 General Safety Guidelines

Always prioritize safety when using the Fagor Pressure Cooker:

  • Ensure close supervision near children to prevent accidents․
  • Never place the cooker in a heated oven or near open flames․
  • Avoid touching hot surfaces; use handles or knobs instead․
  • Position the safety vent away from you to reduce burn risks․
  • Read the manual thoroughly before first use for proper handling․

Following these guidelines ensures safe and efficient cooking with your Fagor Pressure Cooker․

1․2 Safety Tips for Proper Usage

To ensure safe and efficient use of your Fagor Pressure Cooker, follow these essential tips:

  • Always ensure the lid is properly sealed before cooking to avoid steam leaks․
  • Never overfill the cooker, as this can lead to overflow during cooking․
  • Regularly inspect the gasket and valve for wear and tear․
  • Keep the cooker on a stable, heat-resistant surface away from flammable materials․
  • Avoid using abrasive cleaners that could damage the stainless steel finish․

By adhering to these tips, you can maintain your cooker’s performance and ensure a safe cooking experience․

Components and Features of the Fagor Pressure Cooker

The Fagor Pressure Cooker features a high-quality, heavy-gauge 18/10 stainless steel pot, a pressure indicator, and a regulator for precise control․ The Duo and Rapid Express models offer versatile cooking options․

2․1 Overview of the Pressure Cooker Pot

The Fagor Pressure Cooker Pot is crafted from high-quality, heavy-gauge 18/10 stainless steel, ensuring durability and even heat distribution․ Its robust design allows for versatile cooking methods, including steaming, browning, and pressure cooking․ The pot is dishwasher-safe, though hand washing is recommended for the lid and its components․ Built for long-lasting use, the pot is a key component of Fagor’s efficient and reliable pressure cooker system, designed to handle a variety of culinary tasks with ease․

2․2 Pressure Indicator and Regulator

The Fagor Pressure Cooker features a pressure indicator and regulator, essential for monitoring and controlling cooking pressure․ The indicator shows the current pressure level, while the regulator ensures it stays within safe limits․ Together, they allow precise control over the cooking process, preventing excessive pressure buildup․ This system is crucial for safe operation and achieving optimal cooking results․ The regulator also helps maintain even heat distribution, enhancing the cooker’s efficiency and reliability․

2․3 Fagor Duo vs․ Rapid Express Models

The Fagor Duo and Rapid Express models cater to different cooking needs․ The Duo is known for its durability and versatile features, excelling in steaming, simmering, and browning; It is ideal for everyday cooking․ The Rapid Express, designed for faster cooking, prioritizes speed without compromising on quality․ Both models are built with high-quality materials, ensuring long-lasting performance․ The Duo is preferred for its reliability and multi-functionality, while the Rapid Express is chosen for its efficient and quick results, making it perfect for busy households․

Cooking Modes and Functions

The Fagor Pressure Cooker offers multiple cooking modes, including pressure cooking, steaming, simmering, and browning․ It also allows for sautéing, rice cooking, and preset cooking times for convenience․

3․1 Pressure Cooking Mode

The Fagor Pressure Cooker excels in pressure cooking mode, enabling rapid cooking of various dishes․ It allows for precise control over pressure levels, ensuring even cooking․ With this mode, you can prepare beans, grains, and meats efficiently․ The cooker automatically maintains the desired pressure, reducing cooking time by up to 70%․ It also features a timer for customized settings, making it ideal for both novice and experienced cooks to achieve perfect results every time․

3․2 Steaming, Simmering, and Browning Functions

The Fagor Pressure Cooker offers versatile functions beyond pressure cooking․ For steaming, it allows healthy preparation of vegetables and seafood using the included basket․ Simmering mode is ideal for gentle cooking of soups, stews, or sauces․ Browning mode enables searing meat or vegetables to enhance flavor before pressure cooking․ These functions provide flexibility for diverse recipes, ensuring your cooking experience is both efficient and flavorful․ Adjust heat and time as needed for optimal results in each mode․

Maintenance and Cleaning Tips

Regular cleaning ensures longevity․ The pot is dishwasher-safe, but hand-washing the lid and removing the gasket is recommended․ Dry thoroughly after cleaning to prevent rust․

  • Wash the pot and lid after each use․
  • Check and clean the valve and gasket regularly․
  • Store in a dry place to avoid moisture buildup․

4․1 Cleaning the Pressure Cooker Pot and Lid

Regular cleaning is essential for maintaining your Fagor Pressure Cooker․ The pot is dishwasher-safe, but hand-washing is recommended for the lid and its components․ Always remove the gasket when cleaning the lid to ensure thorough sanitation․ Use mild soap and avoid abrasive cleaners to prevent scratching․ Dry all parts thoroughly after washing to prevent rust․ For tough stains, soak the pot in warm soapy water before scrubbing gently․ This routine will keep your cooker in optimal condition for years․

  • Hand-wash the lid and its components․
  • Remove and clean the gasket regularly․
  • Avoid using harsh chemicals or abrasive materials․
  • Dry thoroughly after cleaning to prevent rust․

4․2 Storage Recommendations

Proper storage ensures your Fagor Pressure Cooker remains in excellent condition․ Store it in a cool, dry place away from direct sunlight and heat sources․ After cleaning, allow the cooker to dry completely before storing․ Remove the gasket from the lid to prevent moisture buildup and odors․ Do not store the cooker with the lid tightly closed, as this can trap air and promote mold growth․ Keep it out of reach of children to ensure safety․

  • Store in a dry, cool environment․
  • Remove the gasket to prevent moisture buildup․
  • Do not store with the lid closed tightly․
  • Keep out of children’s reach․

Troubleshooting Common Issues

Address common problems like lid jamming or pressure issues by consulting the manual․ Check for proper alignment of parts and ensure all components are clean and functional․

  • Inspect for blockages in the steam valve․
  • Ensure the gasket is properly seated․
  • Refer to the troubleshooting section in your manual for guidance․

5․1 Lid Jamming Problems

Lid jamming is a common issue that can occur due to improper alignment or blockages․ To resolve this:

  • Ensure the lid is properly aligned with the pot before locking․
  • Check for food residue or debris blocking the gasket or locking mechanism;
  • Clean the lid and gasket thoroughly after each use to prevent jamming․
  • If the lid still doesn’t close, consult the manual for further troubleshooting steps․

5․2 Pressure Regulation Issues

Pressure regulation issues can occur if the valve or gasket is clogged or damaged․ To resolve:

  • Check the valve for blockages and clean it with water or a soft brush․
  • Ensure the gasket is properly seated and free of food residue․
  • Adjust the heat source to maintain consistent pressure levels․
  • If issues persist, refer to the manual for replacement parts or contact support․

Eco-Efficiency and Sustainability

Fagor pressure cookers are crafted from recycled stainless steel and polished mechanically, reducing environmental impact․ Their energy-efficient design lowers cooking time and energy consumption, promoting sustainability․

  • Eco-friendly materials ensure durability and reduce waste․
  • Energy-saving benefits minimize environmental footprint․

6․1 Energy-Saving Benefits

The Fagor pressure cooker is designed to reduce energy consumption through faster cooking times, which lowers overall power usage․ Its sturdy construction and efficient heat retention minimize heat loss, ensuring less energy is wasted․ By cooking up to 70% faster than traditional methods, it significantly cuts down on electricity or gas consumption․ This eco-conscious design makes it a sustainable choice for modern kitchens while maintaining high performance․

  • Reduces cooking time by up to 70%․
  • Lowers energy consumption with efficient heat retention․
  • Eco-friendly materials promote sustainability․

6․2 Eco-Friendly Materials Used

Fagor pressure cookers are crafted from high-quality, 18/10 stainless steel, which is durable, non-toxic, and fully recyclable․ The manufacturing process incorporates partially recycled materials, reducing environmental impact․ Additionally, the cookers are polished mechanically, avoiding harsh chemicals․ This commitment to eco-friendly materials ensures sustainability while maintaining premium performance, making Fagor pressure cookers a responsible choice for environmentally conscious consumers․

  • Made from 100% recyclable 18/10 stainless steel․
  • Uses partially recycled materials in construction․
  • No chemicals used in the polishing process․

User Manuals and Resources

Access comprehensive guides and troubleshooting tips for Fagor pressure cookers online․ Download PDF manuals for specific models, or visit official support websites for detailed instructions and FAQs․

  • Official Fagor website offers downloadable manuals․
  • Online platforms provide user guides and troubleshooting․
  • Customer support available for additional assistance․

7․1 Accessing the Fagor Pressure Cooker Manual

To access the Fagor pressure cooker manual, visit the official Fagor website or trusted platforms like ManualsLib or ManyManuals․ These resources offer free PDF downloads for various models, including the Fagor Duo, Rapid Express, and Multirapid․ Ensure you select the correct model to match your cooker for accurate instructions․ Manuals include safety guidelines, usage tips, and troubleshooting advice to help you maximize your cooker’s performance and ensure safe operation․

  • Download PDF manuals from official sources․
  • Verify model compatibility for accurate information․
  • Refer to troubleshooting sections for common issues․
  • 7․2 Online Support and FAQ Sections

    Fagor offers comprehensive online support and FAQ sections to assist users with their pressure cookers․ Visit the official Fagor website or platforms like ManualsLib and ManyManuals for detailed troubleshooting guides and answers to common questions․ These resources provide 24/7 access to solutions for issues like lid jamming, pressure regulation, and cooking modes․ FAQs cover topics such as maintenance, cooking times, and safety precautions, ensuring you can resolve problems quickly and efficiently․

    • Access troubleshooting guides for common issues․
    • Find answers to frequently asked questions online․
    • Utilize 24/7 support for convenient problem-solving․
    • The Fagor Pressure Cooker is a versatile and efficient kitchen appliance designed to simplify cooking while promoting sustainability․ With its durable construction and eco-friendly materials, it offers a reliable solution for home chefs․ By following the safety guidelines, maintenance tips, and troubleshooting advice, users can maximize its performance and longevity․ Whether pressure cooking, steaming, or browning, the Fagor Pressure Cooker delivers exceptional results, making it an indispensable tool for modern kitchens․

      Explore its full potential with the provided manuals and online resources for a seamless cooking experience․

PDF

10 green smoothie cleanse pdf

The 10-Day Green Smoothie Cleanse is a popular detox program designed to promote weight loss, boost energy, and improve overall health through nutrient-rich green smoothies․

What is the 10-Day Green Smoothie Cleanse?

The 10-Day Green Smoothie Cleanse is a detox program focused on consuming green smoothies made from leafy greens, fruits, and water․ It aims to help participants lose weight, boost energy, and reduce cravings by eliminating certain foods and rehydrating the body․ Designed by JJ Smith, this cleanse replaces meals with nutrient-rich smoothies, promoting a healthy reset for the body and mind over a 10-day period․

Benefits of the Cleanse: Weight Loss, Energy, and Detox

The 10-Day Green Smoothie Cleanse offers significant benefits, including rapid weight loss of up to 15 pounds, increased energy levels, and improved mental clarity․ By detoxifying the body, the cleanse helps eliminate harmful toxins, reduce cravings, and rehydrate cells․ Participants often report enhanced digestion and a renewed commitment to healthier eating habits, making it a transformative experience for overall well-being․

How the Cleanse Works

Common Mistakes to Avoid

Common mistakes include not preparing ingredients in advance, skipping meals, and insufficient hydration․ Overloading smoothies with sugar or neglecting leafy greens can hinder results․ Consistency is key to detox success․

Understanding the Role of Green Smoothies in Detox

Green smoothies play a central role in detox by flushing harmful substances from the body․ Made with leafy greens, fruits, and water, they provide essential nutrients, fiber, and hydration․ The high water content helps rehydrate the body, while the natural sugars and antioxidants boost energy․ By replacing traditional meals with these smoothies, the body focuses on cleansing and resetting its systems, leading to improved digestion and reduced cravings over the 10-day period․

Key Ingredients: Leafy Greens, Fruits, and Water

Leafy greens like spinach and kale are packed with nutrients and aid detoxification․ Fruits such as apples and berries add natural sweetness and essential vitamins․ Water enhances hydration and digestion, making the smoothies filling and effective․ These ingredients combine to create nutrient-dense, flavorful smoothies that support weight loss, energy, and overall health during the cleanse․

Shopping List for the 10-Day Cleanse

A well-planned shopping list is essential for the 10-Day Green Smoothie Cleanse․ It includes leafy greens like spinach and kale, fruits such as apples and berries, and water․

Essential Items: Leafy Greens, Fruits, and More

Leafy greens like spinach, kale, and collard greens form the base of the smoothies, providing essential nutrients․ Fresh fruits such as apples, bananas, and berries add natural sweetness and flavor․ Additionally, water and detox teas support hydration and cleansing․ These ingredients ensure smoothies are both nourishing and delicious, making them a sustainable choice for the cleanse․

Shopping Tips: Buy Fresh and Plan for 5 Days at a Time

Buy fresh leafy greens, fruits, and vegetables to ensure maximum nutrition and flavor․ Plan your shopping for 5 days at a time to avoid spoilage․ Consider purchasing pre-washed greens for convenience․ Opt for seasonal fruits for better taste and affordability․ Store ingredients properly to maintain freshness throughout the cleanse․ Avoid overbuying to prevent waste and ensure ingredients remain vibrant and nutritious during your 10-day journey․

10-Day Green Smoothie Recipes

Discover delicious and nutritious smoothie recipes, from Berry Green to Tropical blends, packed with leafy greens, fruits, and water for optimal health and detox benefits․

Day 1-10 Smoothie Recipes: Berry Green, Tropical, and More

The 10-day cleanse offers a variety of smoothie recipes, starting with the Berry Green on Day 1, featuring spinach, berries, and apple․ Tropical blends combine mango, pineapple, and coconut water for a refreshing twist․ Each recipe incorporates leafy greens like kale or spinach, mixed with fruits and water, ensuring a balance of nutrients and flavors․ These smoothies are designed to keep you full, support detox, and promote weight loss throughout the cleanse․

Preparation Tips: Blending Leafy Greens and Adding Flavor

Start by blending leafy greens like spinach or kale with water to create a smooth base․ Add fruits such as berries or mango for natural sweetness and flavor․ Use a high-speed blender for consistency and ensure all ingredients are well combined․ For extra creaminess, add a banana or avocado․ Experiment with flavors by incorporating citrus zest or a splash of lemon juice․ Optional additions like protein powder or chia seeds can enhance nutrition and texture․

Daily Meal Plan and Schedule

Replace breakfast, lunch, and dinner with green smoothies․ Drink water throughout the day and start with detox tea․ Stick to the schedule for best results․

Replacing Meals with Smoothies: A Daily Guide

Replace breakfast, lunch, and dinner with green smoothies․ Start your day with a detox tea, then drink water throughout․ Smoothies provide nutrients and hydration, making them a filling alternative to traditional meals․ Customize recipes based on your preferences and ingredient availability․ Consistency is key to achieving the best results during the cleanse․ Stick to the schedule to maximize weight loss and energy gains․

Hydration: Water and Detox Tea Requirements

Stay hydrated by drinking at least 8 glasses of water daily and 1 cup of detox tea, preferably first thing in the morning․ Choose brands like Triple Leaf or Yogi for detox tea․ Water helps flush toxins, while detox tea supports the cleansing process․ Avoid sugary drinks and ensure water intake is spaced throughout the day to prevent bloating․ Proper hydration is essential for maximizing the cleanse’s benefits and maintaining energy levels․

Tips for Success on the Cleanse

Stay committed by adjusting the cleanse to suit your needs․ Prepare ingredients in advance to avoid missed smoothies․ Consistency is key for optimal results and detox benefits․

Staying Committed: Adjusting the Cleanse to Your Needs

Staying committed requires flexibility․ Adjust the cleanse by swapping ingredients or adding protein for variety․ Plan meals, prepare ingredients in advance, and stay hydrated․ Listen to your body and rest when needed․ Incorporate light exercise to boost energy․ Share your journey with a friend for accountability․ Celebrate small victories to stay motivated․ Consistency is key, even with small adjustments, to achieve detox and weight loss goals effectively․

Common mistakes include not drinking enough water, neglecting to follow the meal replacement schedule, and skipping detox tea․ Overloading smoothies with too much sugar or insufficient greens can hinder results․ Not planning meals or buying fresh ingredients regularly leads to failure․ Avoiding these pitfalls ensures a smoother cleanse experience and maximizes weight loss and detox benefits effectively․

Health Benefits of the Cleanse

The cleanse promotes detoxification, improves digestion, and reduces cravings․ It helps rehydrate the body, boosts energy, and supports overall health by eliminating harmful toxins and sugars․

Improving Digestion and Reducing Cravings

The 10-Day Green Smoothie Cleanse aids digestion by providing essential nutrients and fiber from leafy greens․ These smoothies help stabilize blood sugar, reducing cravings for unhealthy snacks and promoting a balanced diet․ The high water content in green smoothies also supports gut health, enhancing the body’s ability to absorb nutrients efficiently and maintain a healthy digestive system throughout the cleanse․

Rehydrating the Body with High-Water Content Smoothies

Green smoothies are rich in water-dense ingredients like leafy greens and fruits, making them excellent for rehydrating the body․ Proper hydration supports detoxification, boosting the body’s ability to flush out toxins․ The high water content also helps maintain skin health, enhances energy levels, and promotes a feeling of fullness, which is beneficial during the cleanse period․ This hydration is key to achieving the cleanse’s weight loss and detox goals․

Weight Loss and Results

The 10-Day Green Smoothie Cleanse promises significant weight loss, with participants often shedding up to 15 pounds in just 10 days, supporting sustainable fat loss and improved health․

Expected Weight Loss: Up to 15 Pounds in 10 Days

The 10-Day Green Smoothie Cleanse can lead to significant weight loss, with many participants losing up to 15 pounds․ This rapid weight loss is achieved through detoxification, improved digestion, and reduced cravings․ The high-water content of green smoothies helps rehydrate the body, promoting sustainable fat loss․ Participants often report feeling lighter and more energized, with visible results that motivate continued healthy habits beyond the cleanse․

Maintaining Weight Loss After the Cleanse

Maintaining weight loss after the 10-Day Green Smoothie Cleanse requires adopting long-term healthy habits․ Incorporate smoothies into your daily routine, focus on whole foods, and avoid processed sugars․ Staying hydrated and continuing to eat nutrient-dense meals helps sustain results․ Gradual lifestyle changes, like mindful portion control and regular exercise, ensure the weight loss achieved during the cleanse is permanent․ This approach fosters a healthier relationship with food and supports overall well-being․

Testimonials and Success Stories

Thousands have achieved remarkable results with the 10-Day Green Smoothie Cleanse, reporting up to 15 pounds lost and improved health․ Participants rave about increased energy and mental clarity, with many adopting healthier lifestyles post-cleanse․ The program’s success is widely praised, making it a popular choice for those seeking transformative weight loss and wellness․

Real People, Real Results: Feedback from the Cleanse

Participants in the 10-Day Green Smoothie Cleanse share inspiring stories of weight loss, increased energy, and improved digestion․ Many report shedding up to 15 pounds, with some experiencing enhanced mental clarity and reduced cravings․ The cleanse has helped individuals kickstart healthier habits, with numerous testimonials highlighting its effectiveness in transforming their overall well-being and lifestyle․ The program’s simplicity and delicious recipes make it a sustainable choice for many․

The 10-Day Green Smoothie Cleanse offers a transformative approach to health, helping participants detox, lose weight, and adopt healthier habits for long-term well-being․

Final Thoughts on the 10-Day Green Smoothie Cleanse

The 10-Day Green Smoothie Cleanse is a powerful tool for transforming your health․ By incorporating nutrient-dense smoothies, you can detoxify your body, boost energy, and kickstart weight loss․ Many participants report feeling more vibrant and motivated to continue healthy habits beyond the cleanse․ It’s a simple yet effective way to reset your diet and embrace a healthier lifestyle․

Next Steps: Continuing a Healthy Lifestyle

After completing the 10-Day Green Smoothie Cleanse, maintaining a healthy lifestyle is key․ Gradually reintroduce whole foods, focusing on fruits, vegetables, and lean proteins․ Incorporate smoothies into your daily routine for ongoing nutrition․ Stay hydrated with water and detox teas, and consider meal prepping to avoid unhealthy choices․ By adopting these habits, you can sustain weight loss and enjoy long-term health benefits․ Consistency is crucial for a vibrant, energetic life․

PDF

yoga strap stretches pdf

Yoga straps are versatile tools that deepen your practice‚ enhance flexibility‚ and improve alignment. They help achieve challenging poses safely‚ making them ideal for all skill levels.

What is a Yoga Strap?

A yoga strap‚ also known as a yoga belt‚ is a versatile prop designed to assist in deepening stretches and improving alignment during yoga practice. Typically made of durable materials like cotton or nylon‚ it features adjustable buckles or loops to customize the fit. Yoga straps are ideal for extending reach‚ enhancing flexibility‚ and safely exploring poses that might otherwise feel out of range. They are particularly beneficial for beginners‚ allowing them to gradually build strength and mobility. The strap acts as an extension of the hands‚ providing support and stability‚ making it an essential tool for both home and studio practices. Its simplicity and functionality make it a must-have accessory for yogis of all levels.

Benefits of Using a Yoga Strap for Stretching

Using a yoga strap offers numerous benefits for stretching‚ including improved flexibility‚ enhanced alignment‚ and increased range of motion. It allows practitioners to safely deepen stretches without strain‚ making poses more accessible. The strap supports the body in maintaining proper form‚ reducing the risk of injury and promoting balance. It is particularly useful for tight muscles‚ as it gently encourages length and relaxation. Additionally‚ the strap can help build strength by providing resistance in certain exercises. Overall‚ incorporating a yoga strap into your practice can lead to a more effective and enjoyable stretching routine‚ suitable for yogis of all levels and experience.

How to Choose the Right Yoga Strap

Select a durable‚ comfortable yoga strap made from materials like cotton‚ nylon‚ or PVC. Consider adjustable loops or a non-slip surface for enhanced grip and control during stretches.

Types of Yoga Straps Available

Yoga straps come in various styles to suit different needs. The most common types include basic straps‚ which are simple and cost-effective‚ and adjustable loop straps‚ offering customizable length. Non-slip straps provide better grip‚ ideal for sweaty hands‚ while multi-loop straps feature multiple loops for varied stretching options. Some straps are made with D-rings for easy adjustment‚ and others are designed with padded handles for comfort. Additionally‚ eco-friendly options like cotton straps or vegan-friendly materials cater to environmentally conscious practitioners. Each type serves unique purposes‚ ensuring there’s a strap to match every yogi’s preference and practice level.

Key Features to Look for in a Yoga Strap

When selecting a yoga strap‚ consider durability‚ adjustability‚ and comfort. Look for high-quality materials like durable cotton or nylon for longevity. Adjustable straps with sturdy buckles or D-rings are ideal for customizable use. Opt for a strap with a non-slip texture to enhance grip‚ especially during sweaty sessions. Length and width are crucial—standard straps are 6-8 feet long and 1-2 inches wide. Some straps feature padded handles for added comfort during deep stretches. Eco-friendly options‚ such as organic cotton or vegan materials‚ are great for environmentally conscious users. Ensure the strap is easy to clean and maintain for hygiene. These features ensure the strap supports your practice effectively and lasts over time.

Step-by-Step Guide to Using a Yoga Strap

Loop the strap around your extremities‚ position it comfortably‚ and gently pull to deepen stretches. Focus on controlled movements to enhance flexibility and maintain proper form.

Seated Hamstring Stretch with a Strap

Begin by sitting on the floor with legs extended. Loop the strap around the ball of your foot‚ holding both ends. Inhale and lengthen your spine. Exhale‚ gently pull the strap to deepen the stretch in your hamstrings. Keep knees slightly bent if necessary. Hold for 20-30 seconds‚ breathing deeply. This stretch improves flexibility and relieves tension in the lower back. Ensure the strap is secure to maintain proper alignment and avoid discomfort. Repeat on the other side for balanced results. This pose is ideal for those with tight hamstrings or limited mobility.

Shoulder-Opening Stretch with a Strap

Sit or stand tall‚ holding the strap behind your back. Loop the ends over your shoulders‚ creating a gentle tension. Inhale‚ lengthening your spine‚ then exhale and gently pull the strap apart‚ opening your chest and shoulders. Keep elbows slightly bent and avoid forcing the stretch. Hold for 20-30 seconds‚ breathing deeply. This stretch improves posture‚ reduces shoulder tension‚ and enhances flexibility. Focus on maintaining proper alignment to avoid discomfort. Repeat as needed and adjust the strap length for comfort. For deeper relief‚ move slowly and mindfully‚ allowing the strap to guide your movement without strain.

Reclining Hand-to-Big-Toe Pose Using a Strap

Lie on your back‚ extending one leg upward. Loop the strap around the ball of your foot‚ holding both ends in your hands. Gently pull the strap to deepen the stretch in your hamstring and calf. Keep your spine neutral and shoulders relaxed. For a deeper stretch‚ slightly flex your foot. Hold for 20-30 seconds‚ then switch sides. This pose enhances flexibility‚ improves circulation‚ and relieves tightness in the legs. Focus on steady breathing and avoid bouncing. Adjust the strap length to maintain comfort and control. Regular practice can lead to greater range of motion and reduced muscle tension.

Safety Tips for Yoga Strap Stretches

Use controlled movements and maintain proper alignment to avoid injury. Practice on a mat or carpet for better grip. Avoid overstretching and stay within your comfort range.

Proper Alignment and Technique

Proper alignment and technique are crucial when using a yoga strap to ensure safe and effective stretching. Always maintain controlled movements and focus on your breath. For seated hamstring stretches‚ loop the strap around the ball of your foot and gently pull toward your head‚ keeping your spine straight. When using the strap for shoulder-opening poses‚ wrap it behind your back and hold each end‚ ensuring your arms are at shoulder height. Avoid overstretching and stay within your comfort range. Keep the strap taut but not overly tight to support your movements without causing strain. Proper technique enhances the benefits of each stretch and prevents potential injuries.

Common Mistakes to Avoid

When using a yoga strap‚ avoid common mistakes to maximize benefits and prevent discomfort. Overstretching is a frequent error; pull the strap gently without forcing beyond your natural range. Poor alignment can strain muscles‚ so ensure proper posture in each pose. Using a strap that’s too tight restricts movement and may cause injury. Conversely‚ a strap that’s too loose won’t provide adequate support. Avoid relying solely on the strap for balance; engage your core and maintain awareness of your body. Bouncing or jerking the strap can lead to muscle strain. Instead‚ move smoothly and hold stretches steadily. Being mindful of these pitfalls enhances safety and effectiveness in your practice.

Caring for Your Yoga Strap

Regularly clean your yoga strap with mild soap and water. Avoid harsh chemicals. Store it in a dry place to prevent damage and extend longevity.

How to Clean and Maintain Your Strap

Cleaning your yoga strap is essential for hygiene and longevity. Hand wash it with mild soap and warm water using a soft cloth. Avoid harsh detergents or bleach‚ as they can damage the material. Gently scrub away dirt‚ rinse thoroughly‚ and pat dry with a soft towel. Allow it to air dry away from direct sunlight to prevent fading or weakening of the fabric. Regular maintenance ensures your strap remains durable and effective for your practice. Store it in a cool‚ dry place to prevent moisture buildup‚ which can lead to mold or mildew. Proper care will extend the life of your yoga strap‚ keeping it clean and functional for years to come.

Storage Tips to Extend Strap Lifespan

Proper storage is crucial for maintaining your yoga strap’s quality and longevity. Roll it neatly after use to prevent creases and tangling. Store it in a cool‚ dry place away from direct sunlight to avoid fading or weakening of the material. Avoid folding or bending the strap excessively‚ as this can cause wear and tear. Consider keeping it in a breathable fabric pouch or bag to protect it from dust and moisture. Never store it in damp environments‚ as this can lead to mold or mildew. By following these simple storage tips‚ you can ensure your yoga strap remains in excellent condition for years of reliable use.

Free Yoga Strap Stretches PDF Resources

Discover free yoga strap stretches PDF guides online‚ offering detailed instructions and visuals for various poses. Perfect for home practice‚ these resources enhance flexibility and alignment safely.

Where to Find Printable Yoga Strap Stretch Guides

Printable yoga strap stretch guides can be found online through various resources. Start with a Google search for “yoga strap stretches PDF” to discover free guides. Websites like Yoga International‚ DoYouYoga‚ and MindBodyGreen often provide downloadable resources. Additionally‚ platforms like Pinterest and Etsy offer a wide range of printable guides‚ some available for free and others for purchase. Many yoga apps‚ such as Down Dog‚ include PDF guides as part of their resources. You can also check YouTube descriptions for creators who share free PDF links. Lastly‚ visit wellness blogs or local yoga studios for printable guides tailored to different skill levels and practices.

How to Use a PDF Guide for Home Practice

Using a PDF guide for yoga strap stretches at home is simple and effective. Start by downloading and printing the guide‚ then gather your strap and a yoga mat. Find a quiet‚ spacious area to practice. Follow the step-by-step instructions‚ beginning with basic stretches like seated hamstring or shoulder-opening poses. Pay attention to the illustrations and written cues to ensure proper alignment. Focus on your breath and move slowly through each stretch. If a pose feels too intense‚ adjust the strap or modify the stretch as needed. After completing the routine‚ cool down with gentle stretches or deep breathing exercises to enhance relaxation and flexibility.

Yoga straps are versatile tools that enhance your practice‚ improve alignment‚ and offer safe stretching options. They are perfect for all skill levels‚ helping you deepen poses and gain flexibility.

Final Thoughts on Incorporating Yoga Straps into Your Routine

Incorporating yoga straps into your practice can significantly enhance flexibility‚ alignment‚ and accessibility. They are ideal for deepening stretches and achieving poses that feel out of reach. Whether you’re a beginner or advanced practitioner‚ yoga straps offer a safe and effective way to progress. Regular use can improve range of motion and strengthen your practice. For home routines‚ printable PDF guides provide structured workouts‚ ensuring consistency and growth. Embrace yoga straps as a versatile tool to elevate your yoga journey and enjoy the benefits of mindful stretching and improved well-being.

ccds study guide

The Certified Clinical Documentation Specialist (CCDS) exam is a professional credential assessing expertise in clinical documentation integrity. The CCDS study guide is a vital resource for exam preparation‚ offering comprehensive insights and practical strategies to succeed.

1.1 Overview of the Certified Clinical Documentation Specialist (CCDS) Credential

The Certified Clinical Documentation Specialist (CCDS) credential validates expertise in clinical documentation integrity‚ ensuring accurate coding and compliant practices. It is designed for professionals working in clinical documentation‚ focusing on ICD-10-CM guidelines‚ query practices‚ and clinical knowledge. The CCDS credential is essential for advancing careers in healthcare documentation‚ demonstrating a commitment to industry standards and continuous improvement.

1.2 Importance of Certification for Clinical Documentation Specialists

Certification as a Clinical Documentation Specialist (CCDS) enhances credibility‚ demonstrates expertise in ICD-10-CM coding‚ and ensures compliance with industry standards. It validates the ability to accurately document patient data‚ improving healthcare outcomes and operational efficiency. Certification also boosts career advancement‚ earning potential‚ and professional recognition‚ making it a valuable asset for clinical documentation professionals in the healthcare industry.

Key Components of the CCDS Study Guide

The CCDS Study Guide includes comprehensive coverage of exam domains‚ ICD-10-CM guidelines‚ anatomy reviews‚ and practical strategies. It also offers practice exams to aid preparation.

2.1 Structure and Content of the CCDS Exam Study Guide

The CCDS Exam Study Guide is structured into chapters aligned with the exam domains‚ covering ICD-10-CM guidelines‚ compliant query practices‚ and clinical knowledge. Each chapter includes summaries‚ practical examples‚ and exam-focused questions‚ ensuring comprehensive preparation. The guide emphasizes key areas such as anatomy‚ physiology‚ and pathophysiology‚ with detailed explanations to enhance understanding and retention.

2.2 Alignment with the 2025 CCDS Exam Domains

The CCDS Exam Study Guide is fully aligned with the 2025 exam domains‚ ensuring comprehensive coverage of all test objectives. It focuses on core skill sets for CDI professionals‚ including ICD-10-CM guidelines‚ compliant query practices‚ and clinical knowledge. The guide follows the exam blueprint‚ providing a structured approach to mastering key competencies required for success in the 2025 CCDS certification.

Important Topics Covered in the Study Guide

The study guide covers essential topics such as ICD-10-CM guidelines‚ compliant query practices‚ and anatomy/physiology reviews. It ensures a strong foundation for clinical documentation integrity and exam success.

3.1 ICD-10-CM Official Guidelines for Coding and Reporting

The CCDS study guide thoroughly covers the ICD-10-CM Official Guidelines‚ emphasizing accurate coding practices‚ sequencing rules‚ and compliance. It focuses on key updates and clarifications to ensure exam readiness‚ helping candidates understand how to apply these guidelines in real-world clinical scenarios effectively.

3.2 Guidelines for Achieving a Compliant Query Practice

The CCDS study guide emphasizes the Guidelines for Achieving a Compliant Query Practice‚ updated in 2016. These guidelines ensure accurate and ethical clinical documentation‚ providing frameworks for effective communication between CDI specialists and healthcare providers. They promote compliance‚ improve patient outcomes‚ and are essential for mastering query practices in the CCDS exam.

3.3 Anatomy‚ Physiology‚ and Pathophysiology Reviews

The CCDS study guide includes detailed reviews of anatomy‚ physiology‚ and pathophysiology to strengthen foundational knowledge. These sections help CDI specialists understand complex clinical conditions‚ ensuring accurate documentation and code assignments. By integrating these reviews with real-world clinical scenarios‚ the guide enhances the ability to analyze disease processes and their implications for patient care and coding accuracy.

Recommended Study Resources

The CCDS Exam Study Guide‚ Fifth Edition‚ is a primary resource‚ along with additional recommended books and materials‚ to ensure comprehensive preparation for the exam.

4.1 CCDS Exam Study Guide‚ Fifth Edition

The CCDS Exam Study Guide‚ Fifth Edition‚ is a comprehensive resource designed to align with the 2025 exam domains. It provides detailed coverage of core competencies‚ real-world clinical scenarios‚ and exam-focused practice questions. Updated with the latest industry standards‚ this guide offers structured learning to help candidates prepare effectively and confidently for the CCDS certification exam.

4.2 Additional Recommended Books and Materials

Beyond the CCDS Exam Study Guide‚ supplementary resources include anatomy and physiology textbooks‚ clinical documentation handbooks‚ and ICD-10-CM coding manuals. Online courses‚ webinars‚ and practice exams are also valuable. These materials provide in-depth knowledge and practical exercises‚ enhancing understanding of clinical scenarios and coding guidelines to support comprehensive exam preparation and professional development in clinical documentation integrity.

Effective Study Strategies

Active learning‚ consistent practice‚ and regular review of guidelines are essential. Focus on weak areas‚ use practice exams‚ and stay organized to enhance knowledge retention and exam readiness.

5.1 Tips for Preparing for the CCDS Exam

Create a study schedule‚ focus on understanding ICD-10-CM guidelines‚ and practice with real-world clinical scenarios. Identify weak areas‚ use practice exams to build confidence‚ and stay updated on industry changes. Join study groups for support and review challenging topics regularly to ensure comprehensive preparation and mastery of the exam content.

5.2 Best Practices for Understanding Clinical Scenarios

Break down clinical scenarios into key components‚ focusing on patient history‚ diagnoses‚ and procedures. Analyze each case to identify relevant coding guidelines and documentation requirements. Practice interpreting ambiguous or complex scenarios‚ and seek feedback to refine your understanding. Regularly review case studies and apply theoretical knowledge to real-world situations for enhanced learning and exam readiness.

Practice Exams and Assessments

Practice exams and assessments simulate real test conditions‚ helping candidates evaluate readiness and identify weak areas. They provide valuable insights to refine study strategies and build confidence.

6.1 Role of Practice Questions in Exam Preparation

Practice questions play a crucial role in exam preparation by familiarizing candidates with the exam format and content. They help identify knowledge gaps‚ improve time management‚ and reduce anxiety. Regularly tackling practice questions enhances problem-solving skills and ensures a thorough understanding of clinical documentation concepts‚ leading to better exam performance and confidence.

6.2 Analyzing Results to Improve Weak Areas

Analyzing practice exam results helps identify weak areas‚ allowing focused study on specific topics. By understanding mistakes‚ candidates refine their knowledge and problem-solving skills. Regular review of incorrect answers ensures comprehension and improves overall performance. This targeted approach strengthens confidence and readiness for the actual CCDS exam‚ ensuring a well-rounded understanding of clinical documentation concepts and best practices.

Real-World Clinical Scenarios

Real-world clinical scenarios in the CCDS study guide simulate practical documentation challenges. These scenarios enhance learning by applying theoretical knowledge to actual patient cases‚ improving decision-making skills and accuracy in clinical documentation practices.

7.1 Application of Knowledge in Practical Situations

The CCDS study guide emphasizes applying knowledge to real-world clinical scenarios‚ bridging theory and practice. Case studies and practical examples help specialists understand how to document accurately‚ ensuring compliance with guidelines and improving patient outcomes. This approach enhances critical thinking and problem-solving skills‚ preparing professionals to handle diverse clinical challenges effectively in their daily roles.

7.2 Case Studies for Enhanced Learning

Case studies in the CCDS study guide provide in-depth analysis of real clinical scenarios‚ fostering enhanced learning and practical application. Each case offers insights into documentation challenges‚ query practices‚ and coding accuracy. By examining these scenarios‚ professionals can refine their skills in identifying gaps and improving documentation quality‚ ensuring compliance and accurate reimbursement in diverse patient care settings.

Time Management and Exam Day Preparation

Effective time management is crucial for exam success. Create a study schedule‚ practice under timed conditions‚ and ensure a restful night before the exam. Stay calm and focused to optimize performance.

8.1 Strategies for Managing Time During the Exam

Allocate time evenly across all questions to avoid rushing. Skim through the exam first to identify easier questions and tackle them promptly. Use the process of elimination for challenging questions and make educated guesses. Review your answers if time permits to ensure accuracy and completeness.

8.2 Final Tips for Success on Exam Day

Arrive early and stay calm to manage exam-day jitters. Bring all required materials‚ including valid ID and snacks for energy. Skim the exam first to identify easy questions. Avoid changing answers unless certain. Stay focused and pace yourself throughout. Most importantly‚ trust your preparation and showcase your knowledge confidently.

Maintaining Certification and Continuous Learning

Maintaining CCDS certification requires ongoing education and adherence to industry updates. Continuous learning ensures professionals stay current with evolving standards and best practices in clinical documentation.

9.1 Requirements for Recertification

Recertification for CCDS involves meeting specific criteria‚ such as completing continuing education hours and adhering to professional standards. Regular updates on industry changes and best practices are essential to maintain certification and ensure ongoing competence in clinical documentation integrity.

9.2 Staying Updated with Industry Changes

Staying current with industry updates is crucial for CCDS professionals. Regularly reviewing ICD-10-CM guidelines‚ attending webinars‚ and participating in professional forums ensures awareness of new coding practices and compliance standards. Continuous learning through these resources helps maintain expertise and supports ongoing certification requirements.

Common Mistakes to Avoid

Avoiding common pitfalls‚ such as inadequate preparation‚ misinterpreting guidelines‚ and poor time management‚ is essential for success. Stay focused on key concepts and practice consistently.

10.1 Pitfalls in Study Preparation

Common pitfalls include neglecting to review updated guidelines‚ overfocusing on practice questions without understanding concepts‚ and poor time management. Ensure a balanced study approach‚ prioritize weak areas‚ and avoid cramming. Utilize the CCDS study guide effectively to cover all domains and reinforce learning with real-world applications and regular assessments.

10.2 Avoiding Errors During the Exam

Minimize exam errors by carefully reading each question‚ avoiding rushed decisions‚ and using the process of elimination. Manage time effectively‚ skip challenging questions initially‚ and review answers if possible. Stay calm and focused to ensure accurate responses and optimal performance during the CCDS exam.

PDF

army nco creed pdf

The Army NCO Creed is a guiding statement for non-commissioned officers, emphasizing leadership, professionalism, accountability, and commitment to soldiers and the Army, shaping military culture and values.

Background and Significance of the NCO Creed

The NCO Creed was developed in the 1970s to establish a shared identity and standard of excellence for non-commissioned officers. It reflects the Army’s commitment to leadership, professionalism, and accountability, serving as a cornerstone of military culture. The Creed emphasizes the NCO’s role as a leader, mentor, and steward of Army values, ensuring continuity and cohesion across generations. It is not just a statement but a living philosophy that guides NCOs in their daily duties, shaping their identity and the Army’s collective mission.

History of the NCO Creed

The NCO Creed was created in 1973 by a group of non-commissioned officers at Fort Benning, Georgia, to define their role and standards, providing a foundation for leadership and professionalism.

Development of the Creed in the 1970s

The NCO Creed was developed in 1973 by a group of non-commissioned officers at Fort Benning, Georgia. This period marked a significant shift in the Army’s focus on enhancing NCO professionalism. The creed was created to establish a clear standard of conduct and leadership for NCOs, who had previously lacked a formal oath like officers. It emphasized accountability, professionalism, and dedication to soldiers, serving as a foundational document to guide NCOs in their roles. The creed’s creation reflected the Army’s commitment to strengthening its leadership core during a transformative era. Today, it remains a cornerstone of NCO identity and responsibility, widely accessible in PDF formats for reference and training.

Evolution of the NCO Creed Over Time

The NCO Creed has undergone refinement since its inception in the 1970s, adapting to the evolving needs of the Army. Initially developed to establish a standard for NCO professionalism, it has been updated to reflect modern military values and challenges. Today, it remains a foundational document, widely accessible in PDF formats, guiding NCOs in leadership and accountability. The creed’s enduring relevance ensures it continues to inspire and shape the identity of non-commissioned officers across generations.

Key Principles of the NCO Creed

The NCO Creed emphasizes professionalism, leadership, accountability, and unwavering commitment to soldiers and the Army, upholding its values and traditions as the backbone of the force.

Professionalism and Leadership

The NCO Creed underscores the importance of professionalism and leadership, emphasizing that no one is more professional than the NCO. As leaders, NCOs are expected to set the standard, guide soldiers, and embody the Army’s values. The Creed highlights the NCO’s role as a mentor and a figure of integrity, ensuring that leadership is both effective and ethical. By upholding professionalism, NCOs foster a culture of excellence, inspiring soldiers to strive for their best and maintaining the trust of their teams and the institution;

Accountability and Responsibility

Accountability and responsibility are central tenets of the NCO Creed, emphasizing that NCOs must uphold the highest standards of duty and ethics. They are accountable for their actions and decisions, ensuring the integrity of their leadership. By leading by example, NCOs foster a culture of responsibility within their units, inspiring soldiers to embrace accountability. This commitment ensures trust and discipline, vital to the Army’s mission and the advancement of its values.

Commitment to Soldiers and the Army

Commitment to soldiers and the Army is a cornerstone of the NCO Creed, reflecting a deep dedication to the welfare and growth of subordinates and the organization. NCOs prioritize the development and well-being of their soldiers, ensuring they are prepared to meet the Army’s mission demands. This commitment extends to upholding Army values and fostering unit cohesion. By dedicating themselves to their soldiers’ success, NCOs embody the Creed’s promise to lead, mentor, and serve with unwavering loyalty, strengthening the Army’s foundation and legacy.

The Role of NCOs in the Army

NCOs are the backbone of the Army, serving as leaders, mentors, and role models. They are responsible for training, guiding, and inspiring soldiers to achieve mission success.

Leadership and Mentorship

Leadership and mentorship are central to the role of NCOs, who lead by example and foster a culture of professionalism and accountability. They guide soldiers in developing skills, making sound decisions, and adhering to Army values. NCOs take a hands-on approach to mentorship, ensuring soldiers grow personally and professionally. This commitment to leadership not only strengthens individual soldiers but also enhances unit cohesion and mission readiness, reflecting the principles outlined in the NCO Creed.

Role in Maintaining Army Values and Traditions

NCOs are entrusted with upholding and preserving Army values and traditions, serving as role models who embody the principles of respect, integrity, and selfless service. They ensure adherence to the Army’s core values, fostering a culture of professionalism and discipline. By leading by example, NCOs reinforce time-honored traditions, maintaining unit identity and cohesion. Their commitment to these values strengthens the Army’s legacy and mission, ensuring continuity and excellence across generations of soldiers.

Impact of the NCO Creed on Army Culture

The NCO Creed fosters professionalism, leadership, and accountability, shaping a culture of excellence. It influences daily operations, decision-making, and the collective identity of soldiers, promoting unity and discipline.

Influence on Daily Operations and Decision-Making

Influence on Daily Operations and Decision-Making

The NCO Creed significantly impacts daily operations by guiding leaders to uphold professionalism, accountability, and commitment. It fosters a culture of responsibility, influencing decisions at all levels. Soldiers are reminded to lead by example, prioritize mission success, and maintain high ethical standards. The Creed’s principles ensure consistency in leadership, promoting unity and discipline. By embedding these values, NCOs shape a cohesive and effective force, enabling the Army to achieve its objectives with integrity and excellence.

Role in Shaping the Identity of NCOs

The NCO Creed plays a pivotal role in shaping the identity of non-commissioned officers, defining their purpose and responsibilities. It emphasizes professionalism, leadership, and accountability, fostering a sense of pride and unity among NCOs. By embodying the Creed, NCOs affirm their commitment to the Army’s values and traditions, reinforcing their role as the backbone of the organization. This shared philosophy strengthens their identity, ensuring they lead by example and uphold the highest standards, both personally and professionally, while inspiring future generations of leaders.

How to Live by the NCO Creed

Living the NCO Creed requires leading by example, mentoring soldiers, and upholding Army values and standards in daily actions and decisions consistently.

Practical Application in Daily Life

Living the NCO Creed involves demonstrating leadership, accountability, and professionalism in daily interactions. NCOs should consistently lead by example, fostering a culture of trust and excellence. Mentorship and training soldiers to meet Army standards are crucial. Ethical decision-making and upholding Army values in every action ensure credibility. By prioritizing mission success and soldier welfare, NCOs embody the Creed’s principles, creating a positive impact on unit cohesion and operational effectiveness. Daily adherence to these standards reinforces the Creed’s relevance and strengthens military culture.

Importance of Personal and Professional Development

Personal and professional growth are vital for NCOs to uphold the Creed’s standards. Continuous learning, self-improvement, and staying updated on military tactics and leadership skills ensure effectiveness. NCOs must pursue higher education and certifications to enhance their expertise. Professional development fosters adaptability and resilience, enabling NCOs to lead diverse teams and tackle complex challenges. By prioritizing growth, NCOs set an example for soldiers, reinforcing the Army’s commitment to excellence and maintaining the Creed’s principles in their daily roles.

The Army NCO Creed remains a cornerstone of military leadership, guiding NCOs in upholding professionalism, responsibility, and excellence. Its enduring relevance ensures continued inspiration for future leaders.

The Enduring Relevance of the NCO Creed

The NCO Creed remains a vital foundation for non-commissioned officers, embodying timeless principles of leadership, professionalism, and responsibility. Its relevance endures as it continues to inspire NCOs to uphold Army values and traditions. By fostering a culture of accountability and excellence, the Creed ensures NCOs remain the backbone of the Army. Its adaptability to modern challenges solidifies its importance, guiding NCOs in shaping the future of military leadership while honoring their heritage.

artiss gas lift bed assembly instructions

Welcome to the Artiss Gas Lift Bed Assembly guide! This modern bed frame features a sleek design, gas lift mechanism, and storage solutions․ Follow this guide for a smooth assembly process and enjoy your new bed․

Overview of the Artiss Gas Lift Bed

The Artiss Gas Lift Bed is a versatile and stylish bedroom solution designed for modern homes․ It features a sleek, low-profile frame with a gas lift mechanism, allowing easy access to under-bed storage․ Constructed from durable materials, this bed offers stability and comfort․ Available in various sizes and finishes, it caters to different preferences․ The bed’s design emphasizes functionality, with smooth gas struts enabling effortless lifting․ Its compact footprint makes it ideal for small or large spaces․ Packed with practical features, the Artiss Gas Lift Bed combines aesthetics and utility, making it a popular choice for homeowners seeking efficient storage and a modern look․

Importance of Proper Assembly

Proper assembly of the Artiss Gas Lift Bed is crucial to ensure stability, safety, and functionality․ Improper assembly can lead to structural issues, compromising the bed’s durability and performance; A well-assembled bed guarantees smooth operation of the gas lift mechanism, preventing accidental collapses․ It also ensures even weight distribution, enhancing comfort and extending the product’s lifespan․ Additionally, correct assembly prevents potential hazards, such as sharp edges or loose parts, creating a safe environment for users․ Following the provided instructions meticulously is essential to achieve a secure and professional-grade setup, allowing you to enjoy your bed confidently for years to come․

Safety Precautions and Preparation

Ensure a safe assembly process by clearing the workspace, wearing protective gloves, and keeping tools organized․ Avoid over-tightening bolts to prevent damage or injury․

Essential Safety Tips Before Starting

Before assembling your Artiss Gas Lift Bed, ensure a safe working environment․ Clear the workspace of clutter and tripping hazards․ Wear protective gloves and safety glasses to prevent injuries․ Use the correct tools as specified in the manual to avoid damaging components or causing accidents․ Lay out all parts and hardware on a flat surface to organize and verify completeness․ Avoid over-tightening bolts, as this may damage the gas lift mechanism․ Keep children and pets away from the assembly area to prevent accidents․ Follow the instructions carefully and take your time to ensure accuracy․ Never force parts together, as this could lead to breakage or injury․ Finally, double-check all connections before using the bed to ensure stability and safety․

Tools and Materials Required

To assemble the Artiss Gas Lift Bed, gather essential tools and materials․ You will need an Allen wrench, screwdriver, and a rubber mallet for tapping parts into place․ Ensure all bolts, screws, and washers are included in the packaging․ The bed frame, gas lift mechanism, slats, and support legs are the primary components․ Check for any additional hardware like brackets or clips․ A measuring tape can help verify alignment․ Place a soft cloth on the floor to protect the bed frame during assembly․ Keep the instruction manual handy for reference․ Make sure all tools are within reach to streamline the process․ Having a second person assist can be helpful, especially when lifting or aligning heavier parts․ Organize all components before starting to ensure a smooth assembly experience․

Step-by-Step Assembly Instructions

Begin by unpacking and organizing all components․ Assemble the bed frame, attach the gas lift mechanism, and secure the slats․ Follow the manual for precise alignment and tightening․ Ensure all bolts are firmly fastened and double-check for stability before use․

Unpacking and Organizing Components

Start by carefully unpacking the Artiss Gas Lift Bed box․ Ensure all components, including the bed frame, gas lift mechanism, slats, and hardware, are accounted for․ Refer to the assembly manual for a detailed list of parts․ Lay out the components on a flat, stable surface to avoid confusion․ Separate the hardware, such as bolts and screws, and store them in labeled containers for easy access․ Inspect each part for damage or defects before proceeding․ Organizing the components neatly will streamline the assembly process and reduce the risk of missing or misplaced items․ Double-check the manual for specific instructions on identifying each part․

Assembling the Bed Frame and Gas Lift Mechanism

Begin by attaching the side rails to the bed frame using the provided Allen key․ Align the pre-drilled holes and secure with bolts․ Next, connect the gas lift mechanism to the frame, ensuring it is evenly balanced; Tighten the bolts firmly to avoid any wobbling․ Attach the lifting arms to the bed frame and link them to the gas lift pistons․ Use the socket wrench to tighten all connections properly․ Finally, test the gas lift mechanism by gently lifting and lowering the bed to ensure smooth operation․ Make sure all bolts are tightened securely before proceeding to the next step․ Proper alignment and tight connections are crucial for the bed’s stability and functionality․

Attaching the Bed Slats and Mattress Support

After assembling the frame, lay out the bed slats evenly across the base․ Secure each slat to the side rails using the provided screws and Allen key․ Tighten firmly to ensure stability․ Install the mattress support panel on top of the slats, aligning it with the frame․ Use the screws to fasten it securely, ensuring a snug fit․ Double-check all connections to prevent any shifting․ Once complete, the bed is ready for the mattress․ Make sure all slats and supports are tightly secured for optimal support and durability․ Proper installation ensures a comfortable and sturdy sleeping surface․ Ensure all steps are followed carefully for the best results․ Always refer to the manual for specific fastening patterns and torque requirements․ This step is crucial for the overall structural integrity of the bed․

Troubleshooting Common Issues

Identify common assembly issues like misaligned parts or loose connections․ Tighten all bolts and ensure proper alignment for smooth functionality and stability․

Identifying and Resolving Assembly Challenges

During assembly, challenges may arise such as misaligned parts or difficulty engaging the gas lift mechanism․ To resolve these, ensure all components are correctly matched according to the manual․ If the gas lift doesn’t function, check for proper connection and lubrication․ Tightening all bolts firmly can address wobbling or instability․ If issues persist, refer to the troubleshooting section of the manual or contact customer support for assistance․ Regularly inspecting the bed frame can prevent future problems, ensuring optimal performance and longevity of your Artiss Gas Lift Bed․

Maintenance and Care

Regularly clean the bed frame and gas lift mechanism to ensure smooth operation․ Lubricate moving parts and tighten bolts periodically to maintain stability and functionality over time․

Regular Maintenance for Optimal Performance

To keep your Artiss Gas Lift Bed functioning smoothly, regular maintenance is essential․ Start by dusting and vacuuming the frame, paying attention to crevices where debris accumulates․ Inspect the gas lift mechanism monthly, ensuring it moves freely without resistance․ Lubricate the hinges and moving parts with a silicone-based spray to prevent squeaking and wear․ Check all bolts and screws for tightness, as they may loosen over time․ Additionally, polish metal components with a gentle cleaner to maintain their appearance․ By following these steps, you can extend the lifespan of your bed and ensure its continued reliability and functionality․

Congratulations! Your Artiss Gas Lift Bed is now assembled․ Double-check all parts for stability and functionality․ Enjoy your new bed with its sleek design and storage features․

Final Checks and Enjoying Your New Bed

Once the assembly is complete, perform a final inspection to ensure all components are securely fastened and the bed is stable․ Test the gas lift mechanism to confirm smooth operation․ Place your mattress on the bed frame, ensuring it fits properly and is evenly supported․ Double-check that all screws, bolts, and connectors are tightened to avoid any wobbling or instability․ Finally, add your bedding and enjoy the comfort and functionality of your new Artiss Gas Lift Bed․ Take pride in your accomplishment and relax in your newly assembled bed, knowing it provides both style and practical storage solutions for your bedroom․

PDF

2 chronicles study guide pdf

The Book of 2 Chronicles is a theological history of the kingdom of Judah‚ focusing on the temple and revival. It covers the reign of Solomon‚ the division of the kingdom‚ and key events like the Ark of the Covenant. Unlike 2 Kings‚ it emphasizes spiritual renewal and God’s presence‚ offering lessons on faithfulness and disobedience. This guide explores its themes‚ key figures‚ and practical applications for modern readers.

1.1 Overview of the Book

The Book of 2 Chronicles focuses on the kingdom of Judah‚ highlighting the temple’s significance and spiritual revivals. It begins with Solomon’s reign‚ the temple’s construction‚ and transitions to the divided kingdom. The book emphasizes God’s presence‚ faithfulness‚ and the consequences of disobedience‚ offering insights into leadership and renewal. It serves as a guide for understanding historical and spiritual lessons.

1.2 Historical Context and Purpose

The Book of 2 Chronicles is a theological history written after the Babylonian exile‚ focusing on Judah’s kings‚ the temple‚ and spiritual revivals. Its purpose is to remind post-exilic Jews of their spiritual heritage‚ emphasizing God’s faithfulness and presence. It highlights the temple as a symbol of God’s covenant and the importance of obedience‚ serving as a guide for renewal and restoration in their community.

Key Themes in 2 Chronicles

The Book of 2 Chronicles highlights two central themes: the construction of the temple and the recurring theme of spiritual revival.

2.1 The Building of the Temple

The construction of the temple is a central narrative in 2 Chronicles‚ showcasing King Solomon’s divine mandate to build a sacred space for worship. The text details the gathering of materials‚ the assembly of leaders‚ and the Levites’ role in transporting the Ark of the Covenant. This event symbolizes God’s presence among His people and serves as a pivotal moment in Israel’s spiritual history.

2.2 The Theme of Revival

Revival is a central theme in 2 Chronicles‚ emphasizing spiritual renewal and restoration. The book highlights moments of national repentance‚ such as under King Hezekiah‚ where God’s people returned to faithful worship. A key verse‚ 2 Chronicles 7:14‚ underscores the importance of humility‚ prayer‚ and seeking God‚ illustrating the transformative power of revival in restoring His people and renewing their covenant with Him.

The Reign of King Solomon

King Solomon’s reign is marked by wisdom‚ prosperity‚ and the construction of the Temple. His leadership highlights God’s promise and the significance of the Ark of the Covenant.

3.1 Preparations for Building the Temple

Solomon meticulously prepared for the Temple’s construction‚ gathering materials and skilled laborers. He organized the Levites and priests‚ ensuring everything was ready for the Ark’s placement‚ reflecting God’s detailed plan.

3.2 The Temple Dedication and Solomon’s Prayer

The dedication of the Temple was a solemn event‚ with Solomon praying for God’s presence and mercy. He acknowledged God’s promise to David and asked for forgiveness for future sins. The prayer emphasized obedience and revival‚ setting a spiritual tone. This moment highlights Solomon’s humility and the people’s joy‚ marking a pivotal point in Israel’s history‚ as recorded in 2 Chronicles 6-7.

The Division of the Kingdom

The division occurs after Solomon’s death‚ with Rehoboam refusing to lighten the people’s burden‚ leading to the split. Jeroboam rules Israel‚ while Rehoboam leads Judah. Chronicles highlights the spiritual and covenantal implications.

4.1 The Rise of the Kingdom of Judah

The kingdom of Judah emerges after the division‚ with Rehoboam as its first king. Chronicles highlights Judah’s spiritual journey‚ emphasizing revival under leaders like Hezekiah. The temple remains central‚ symbolizing God’s presence. Judah’s history reflects cycles of faithfulness and disobedience‚ offering lessons on covenant loyalty and divine judgment. Key events include Rehoboam’s leadership and the restoration of worship practices.

4.2 The Fall of the Kingdom of Israel

The kingdom of Israel fell due to division and idolatry after Rehoboam’s reign. Chronicles focuses on Judah but notes Israel’s spiritual decline. The northern kingdom’s disobedience led to Assyrian conquest‚ highlighting consequences of turning from God. This serves as a cautionary tale about the importance of covenant faithfulness and the dangers of spiritual complacency and rebellion against divine authority.

Major Events in 2 Chronicles

Key events include the Ark of the Covenant’s placement in the Temple‚ Solomon’s reign‚ and revivals under Hezekiah. These highlight God’s presence and judgment‚ emphasizing obedience and spiritual renewal as central themes in Judah’s history.

5.1 The Ark of the Covenant and the Temple

The Ark of the Covenant‚ a symbol of God’s presence‚ was brought into the Temple by Solomon and the Levites‚ marking a pivotal moment in Israel’s history. This event emphasized the Temple as the central place of worship and God’s dwelling among His people‚ highlighting the importance of obedience and reverence in maintaining a right relationship with God.

5.2 The Revival Under King Hezekiah

King Hezekiah led a significant spiritual revival in Judah‚ destroying idolatrous high places and reinstating the Passover. His efforts brought unity among the people and restored true worship‚ emphasizing obedience to God’s commands. This revival highlighted the importance of repentance and faithfulness‚ demonstrating how spiritual renewal can transform a nation and bring divine favor.

Key Figures in 2 Chronicles

King Solomon‚ King Hezekiah‚ and King Rehoboam are central figures in 2 Chronicles. Solomon built the Temple‚ embodying God’s presence. Hezekiah led a revival‚ restoring worship. Rehoboam’s decisions divided the kingdom‚ highlighting leadership’s impact on faith and legacy.

6.1 King Solomon

King Solomon‚ the son of David‚ is central to 2 Chronicles. He built the Temple‚ a symbol of God’s presence‚ and his prayer at its dedication emphasized humility and repentance. Solomon’s wisdom and wealth marked his 40-year reign‚ though later compromises affected his legacy. His story highlights divine grace and the importance of faithful leadership in aligning with God’s purposes.

6.2 King Rehoboam and the Division

King Rehoboam‚ Solomon’s son‚ faced a critical moment when the kingdom divided. His refusal to ease the people’s burdens led to the ten northern tribes rebelling under Jeroboam‚ forming Israel. Rehoboam ruled over Judah‚ and this division‚ prophesied earlier‚ marked a turning point. The event underscores the importance of leadership and the consequences of ignoring wise counsel‚ highlighting spiritual lessons of humility and obedience.

6.3 King Hezekiah and Revival

King Hezekiah led a significant spiritual revival in Judah‚ dismantling idolatry and restoring true worship. Hezekiah’s reforms included rebuilding the Temple and reinstating the Passover‚ uniting the people in renewed devotion. His humility and reliance on God brought fleeting peace with Assyria‚ showcasing the transformative power of genuine repentance and the importance of seeking divine guidance in leadership and life.

Lessons from the Kings of Judah

The kings of Judah teach us about the importance of trusting God‚ leading with integrity‚ and facing consequences for disobedience‚ highlighting faith’s transformative power in leadership and life.

7.1 The Importance of Faithfulness to God

Faithfulness to God is highlighted as a cornerstone of effective leadership and personal life in 2 Chronicles. Kings like Solomon and Hezekiah exemplify how trust in God leads to prosperity‚ while disobedience results in turmoil. The book underscores the cause-and-effect relationship between faithfulness and divine favor‚ encouraging believers to prioritize loyalty to God and seek His will in all circumstances‚ mirroring its timeless relevance today.

7.2 The Consequences of Disobedience

The book of 2 Chronicles vividly illustrates the consequences of disobedience through the lives of Judah’s kings. When leaders like Rehoboam abandoned God’s ways‚ it led to division‚ turmoil‚ and eventual captivity. Disobedience resulted in loss of divine favor‚ internal strife‚ and external threats. This serves as a timeless warning‚ emphasizing the importance of seeking God’s will and remaining faithful to His commandments to avoid similar downfall.

The Historical and Spiritual Significance

The Book of 2 Chronicles highlights the temple as a symbol of God’s presence and covenant with His people‚ emphasizing its historical and spiritual importance in worship and revival.

8.1 The Temple as a Symbol of God’s Presence

The temple in 2 Chronicles represents God’s dwelling place among His people‚ symbolizing His covenant and presence. Its construction and the Ark’s placement emphasize divine worship and sovereignty‚ reinforcing the temple’s role as a sacred space for connecting with God and honoring His promises to Israel.

8.2 The Role of Revival in Restoring God’s People

Revival in 2 Chronicles highlights spiritual renewal‚ often sparked by prayer‚ humility‚ and repentance. Events like Hezekiah’s revival demonstrate how returning to God restores His people‚ showcasing His mercy and faithfulness. These accounts emphasize the importance of seeking God collectively‚ underscoring the transformative power of revival in maintaining covenant faithfulness and communal spiritual health.

Practical Applications for Modern Readers

2 Chronicles teaches the importance of prayer‚ humility‚ and seeking God. Modern readers can apply these principles by prioritizing spiritual renewal and faithfulness in daily life.

9.1 The Importance of Prayer and Humility

2 Chronicles emphasizes prayer and humility as vital for divine favor. Solomon’s temple dedication prayer (2 Chron 6) and Hezekiah’s humble revival (2 Chron 34:27) illustrate their transformative power. Modern readers are encouraged to prioritize prayer and humility‚ seeking God with sincerity to experience spiritual renewal and restoration in their lives‚ just as the kings of Judah did.

9.2 The Need for Spiritual Revival Today

The Book of 2 Chronicles underscores the timeless lessons of spiritual revival. Just as King Hezekiah’s reforms restored Judah‚ modern believers are called to seek renewal. The book highlights the importance of returning to God’s Word and living with humility. Today’s world desperately needs revival‚ encouraging individuals and communities to align with God’s will‚ fostering transformation and spiritual awakening‚ as seen in Judah’s history.

Study Resources and Guides

Dr. Constable’s Notes on 2 Chronicles and systematic study guides provide deep insights. Online resources like Scholars Crossing offer free access to comprehensive study materials and commentaries.

10.1 Recommended Commentaries and Study Materials

Dr. Constable’s Notes on 2 Chronicles provide excellent explanations of omitted and added material compared to Kings. A study guide by Scholars Crossing offers free access to systematic study materials. Additionally‚ commentaries and resources like The 2nd Book of Chronicles: The Temple vs. The Throne and A Guide to the Systematic Study of the Bible are highly recommended for deeper understanding and practical application.

10.2 Online Resources for Deeper Study

Online resources like Dr. Constable’s Notes on 2 Chronicles and study guides from Scholars Crossing offer comprehensive insights. Websites such as BibleStudyTools and Logos Bible Software provide downloadable PDFs‚ commentaries‚ and systematic study materials. Additionally‚ online platforms like Precept Austin and Bible Gateway feature detailed notes and guides for in-depth exploration of 2 Chronicles.

The book of 2 Chronicles emphasizes God’s presence and restoration. Reflect on its lessons‚ apply them to your life‚ and seek spiritual renewal as encouraged in this study guide.

11.1 Summarizing the Key Takeaways

The Book of 2 Chronicles highlights the temple’s significance‚ the importance of revival‚ and the consequences of disobedience. It emphasizes faithfulness to God‚ spiritual renewal‚ and the need for humility. These lessons inspire modern readers to seek God’s presence and live faithfully‚ applying the book’s timeless truths to their lives today.

11.2 Encouragement to Apply the Lessons

As you conclude your study of 2 Chronicles‚ remember that seeking God’s presence and remaining faithful are paramount. Reflect on the revivals and downfalls of kings‚ urging you to prayerfully align your life with His will. Embrace humility‚ pursue revival‚ and trust in God’s grace for personal growth. Let these lessons inspire you to live faithfully‚ seeking His presence and experiencing His blessings daily.