Archive: July 31, 2023

smog check reference guide 2023

A Smog Check ensures vehicles meet emission standards‚ reducing pollution. The 2023 reference guide provides essential details for compliance‚ aiding in cleaner air and public health protection.

What is a Smog Check?

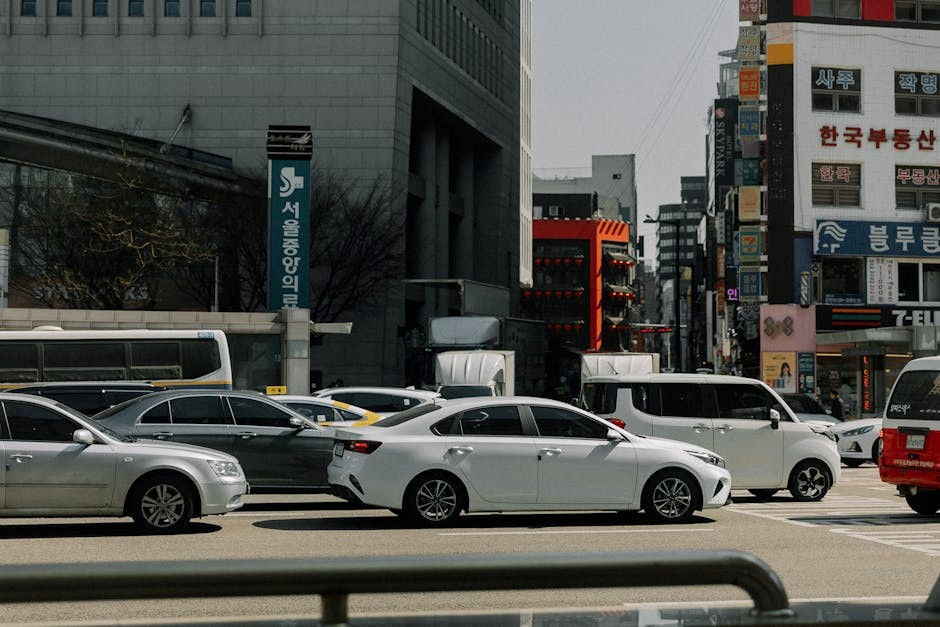
A Smog Check is a mandatory inspection in California to ensure vehicles meet state emission standards. It involves visual‚ functional‚ and OBD-II tests to monitor pollution levels. Required every two years for most vehicles‚ it helps reduce air pollution and ensures public health protection. The 2023 reference guide outlines procedures‚ exemptions‚ and requirements for compliance.

Why is a Smog Check Important?

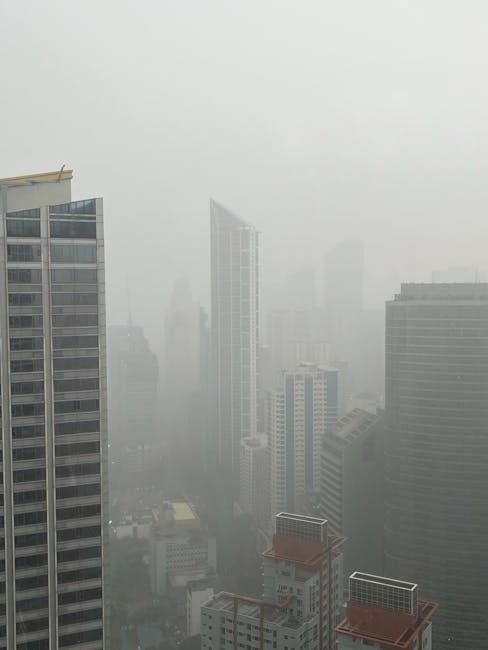
A Smog Check is crucial for reducing vehicle emissions and pollutants‚ protecting public health‚ and ensuring environmental quality. It helps identify faulty emissions systems‚ requiring repairs that improve air quality. Compliance with Smog Check requirements is mandatory for vehicle registration‚ promoting accountability and maintaining California’s strict emissions standards to combat climate change and safeguard communities.

California Smog Check Program Overview

California’s Smog Check Program ensures vehicles meet emission standards‚ promoting cleaner air and public health through regular inspections‚ including visual‚ functional‚ and OBD-II tests.

History and Purpose of the Program

California’s Smog Check Program began in 1984 to reduce vehicle emissions and improve air quality. Its purpose is to ensure vehicles meet state emission standards through regular inspections‚ promoting public health and environmental protection. The program has evolved‚ incorporating advanced technologies like OBD-II tests‚ to maintain its effectiveness in reducing pollution and enhancing the state’s air quality standards.

Key Components of the Program

The Smog Check Program includes biennial inspections for most vehicles‚ exemptions for newer models‚ and the use of certified test-and-repair stations. It employs technologies like OBD-II and BAR-97 to measure emissions efficiently. The program also offers repair assistance and ensures compliance through standardized procedures‚ maintaining California’s strict air quality regulations and promoting a cleaner environment.

Vehicle Exemptions and Requirements

Newer vehicles within the first eight model years are typically exempt‚ while others require regular Smog Checks. Exemptions exist for certain hybrids and electric vehicles.

Vehicles That Require a Smog Check

Most vehicles in California require a Smog Check every two years during registration renewal. Newer vehicles‚ within the first eight model years‚ are typically exempt unless directed otherwise by the DMV. Hybrid and electric vehicles may also qualify for exemptions. The Smog Check Reference Guide 2023 provides detailed eligibility criteria and exemptions for specific vehicle types‚ ensuring compliance with state emissions standards.

Vehicles Exempt from Smog Check

Certain vehicles are exempt from Smog Checks‚ including new vehicles within their first eight model years. Additionally‚ electric and hybrid vehicles‚ as well as some classic or historical cars‚ may be exempt. The 2023 Smog Check Reference Guide outlines specific exemptions‚ ensuring owners understand which vehicles qualify for waiver from emissions testing requirements in California.

Types of Smog Checks

The 2023 reference guide outlines three main types: Visual Inspection‚ Functional Inspection‚ and On-Board Diagnostics (OBD-II) Test‚ each ensuring vehicles meet emissions standards efficiently.

Visual Inspection

The Visual Inspection is a straightforward process where certified technicians examine a vehicle for obvious issues like leaks‚ damaged components‚ or tampering. This step ensures compliance with emissions standards by identifying visible defects in key systems‚ such as the exhaust‚ fuel‚ and emission control devices‚ before proceeding to further testing.

Functional Inspection

The Functional Inspection evaluates how well a vehicle’s emissions systems operate under specific conditions. Technicians check the performance of components like the catalytic converter and oxygen sensors while the engine is running. This step ensures that emissions control systems are functioning correctly‚ complementing the visual inspection and OBD-II test for comprehensive assessment.

On-Board Diagnostics (OBD-II) Test

The OBD-II Test uses a vehicle’s onboard computer to assess emissions system performance. It checks for fault codes‚ monitors readiness status‚ and ensures all emissions components are functioning. This test is efficient and provides detailed data‚ making it a crucial part of modern Smog Checks for accurate and reliable results;

The Smog Check Process

The Smog Check involves a series of steps‚ including visual inspections‚ functional tests‚ and OBD-II scans. Technicians ensure compliance with emissions standards efficiently and accurately.

Preparation for the Smog Check

Ensure your vehicle is properly maintained before the Smog Check. Check the battery‚ tire pressure‚ and gas cap. Avoid extreme driving conditions and allow the engine to cool. Verify all dashboard warning lights are off‚ as illuminated lights can cause a fail. A well-prepared vehicle improves the likelihood of passing the inspection efficiently.

Step-by-Step Inspection Process

The inspection begins with a visual check of emissions-related components. Technicians then perform an OBD-II test to analyze the vehicle’s onboard diagnostics. Functional tests‚ such as checking the catalytic converter and fuel evaporative system‚ follow. Finally‚ an emissions test using the BAR-97 system measures exhaust pollutants. The process ensures compliance with California’s standards‚ providing a detailed report of the vehicle’s emissions status.

Understanding Smog Check Results

Smog Check results indicate whether a vehicle meets emissions standards. The test measures pollutants like hydrocarbons and nitric oxide‚ ensuring compliance with California’s environmental regulations.

Passing the Smog Check

Passing a Smog Check ensures your vehicle meets California’s emissions standards. A passing result confirms your vehicle emits acceptable levels of pollutants‚ complying with state regulations. Once passed‚ you’ll receive a certification‚ allowing you to renew your registration without further emissions testing for the next two years. This certification is mandatory for registration renewal in California.

Failing the Smog Check

Failing a Smog Check indicates your vehicle does not meet emissions standards. You’ll receive a failure report detailing the issues‚ such as excessive emissions or malfunctioning systems. Repairs must be made by a certified technician to address the problems. Once fixed‚ the vehicle must be retested. If repairs exceed $450‚ you may qualify for a waiver to register your vehicle without passing the test.

Repair Options and Requirements

Repairs must address issues identified in the Smog Check failure report. Common fixes include replacing the catalytic converter or oxygen sensor. Costs vary‚ but financial assistance is available for eligible vehicles to help cover expenses and ensure compliance with emissions standards.

Common Repairs Needed After a Failed Smog Check

Common repairs include replacing faulty oxygen sensors‚ catalytic converters‚ or ignition coils. Addressing these issues ensures compliance with emissions standards and improves vehicle performance. The BAR-97 system and OBD-II tests help identify necessary repairs‚ guiding technicians to resolve underlying problems effectively. Regular maintenance can prevent future failures‚ reducing the need for costly fixes and promoting cleaner air quality.

Cost Estimates and Financial Assistance

Smog Check repairs vary in cost‚ with inspections averaging $50 and repairs ranging from $100 to $1‚000. The Consumer Assistance Program (CAP) offers financial aid up to $1‚200 for eligible low-income vehicle owners. This program helps cover repair costs‚ ensuring compliance with emissions standards while alleviating financial burdens for qualifying individuals.

Failing a Smog Check: What to Do Next

If your vehicle fails‚ review the failure report to identify needed repairs. Contact a licensed repair shop to address issues and obtain a retest. Financial assistance may be available through state programs for eligible vehicles.

Understanding the Failure Report

A failure report outlines the reasons your vehicle did not pass the Smog Check. It includes diagnostic codes‚ emissions data‚ and identifies faulty components. Reviewing this report helps pinpoint necessary repairs. Use it to guide discussions with repair shops and ensure compliance with state standards. Understanding the report is crucial for addressing issues efficiently and obtaining a passing certification.

Next Steps After a Failed Smog Check

If your vehicle fails‚ review the failure report to identify the issues. Schedule repairs with a licensed mechanic‚ focusing on the highlighted problems. Once repairs are done‚ return to a Smog Check station for a retest. Some stations offer free retests if repairs are done on-site. Keep all repair receipts for potential financial assistance programs. Retesting is required to complete the process and obtain certification.

Smog Check Fees and Payment

Smog Check fees vary by station‚ with average costs ranging from $29 to $49. Payment methods include credit cards‚ cash‚ or checks. Refunds are typically unavailable.

Cost of a Smog Check

The cost of a Smog Check in California typically ranges between $29 and $49‚ varying by station and location. Some stations offer discounts for certain vehicles or repeat customers. Additional fees may apply for diagnostics or repairs. The 2023 reference guide outlines standard pricing to ensure transparency and fairness for vehicle owners statewide.

Payment Methods and Refunds

Smog Check stations accept various payment methods‚ including credit cards‚ cash‚ and checks. Some stations also offer online payment options for convenience. Refunds are typically provided only if the Smog Check service was not completed. The 2023 reference guide outlines refund policies‚ ensuring clarity and fairness for vehicle owners statewide‚ with most refunds processed within 30 days of the request.

Smog Check Stations: Finding a Licensed Provider

Use the BAR-97 system or online directories to locate licensed Smog Check stations. Ensure the provider is certified by the California Bureau of Automotive Repair for accurate inspections.

How to Locate a Licensed Smog Check Station

To find a licensed Smog Check station‚ visit the California Bureau of Automotive Repair (BAR) website or use their online directory. You can also search for “Smog Check near me” or check the official Smog Check website. Verify the station’s certification and ensure they display the official BAR-97 or OBD-II equipment. Always call ahead to confirm their hours and availability.

Verifying the Credentials of a Smog Check Station

Verify a Smog Check station’s credentials by checking for BAR certification and a valid license. Look for the official BAR-97 or OBD-II equipment on site. Visit the California Bureau of Automotive Repair (BAR) website to confirm their status. Additionally‚ ensure the station displays a “Licensed Smog Check Station” sign and ask for their BAR number to cross-reference in the BAR database.

Smog Check Reference Guide: Key Documents

The California Smog Check Manual and Reference Guide PDF are essential resources. They provide detailed procedures‚ legal requirements‚ and program descriptions for compliance and inspections in 2023.

California Smog Check Manual

The California Smog Check Manual is a comprehensive guide outlining procedures for official inspections. Incorporated into state regulations‚ it ensures licensed stations comply with legal standards. The manual details inspection protocols‚ including the BAR-97 Emission Inspection System and OBD-II testing. It serves as a primary resource for technicians‚ ensuring accurate and efficient Smog Check processes in 2023.

Smog Check Reference Guide PDF

The Smog Check Reference Guide PDF is an essential resource for licensed stations and technicians. It provides detailed program descriptions‚ repair instructions‚ and inspection guidelines. The guide ensures compliance with California’s emissions standards‚ offering a comprehensive overview of smog check procedures. Available for download‚ it serves as a key tool for understanding and implementing effective smog check operations in 2023.

Smog Check Technology and Innovations

BAR-97 and OBD-II technologies enhance emissions testing accuracy‚ while advanced diagnostic tools support compliance with California’s strict regulations‚ as detailed in the 2023 reference guide.

BAR-97 Emission Inspection System

The BAR-97 Emission Inspection System is a critical tool in California’s Smog Check program‚ designed to measure vehicle emissions accurately. It combines a gas cap test‚ tailpipe emissions analysis‚ and a visual inspection to ensure compliance with state regulations. This system is particularly used for vehicles that do not have OBD-II technology‚ providing a reliable method for assessing emissions. The 2023 reference guide details its operation and requirements‚ ensuring effective emissions reduction.

OBD-II and Advanced Diagnostic Tools

OBD-II (On-Board Diagnostics II) systems monitor vehicle emissions in real-time‚ detecting issues and storing trouble codes. Advanced diagnostic tools enhance the Smog Check process by streamlining inspections and improving accuracy. These tools integrate with OBD-II to provide detailed emissions data‚ ensuring compliance with California’s strict standards. The 2023 reference guide outlines updated procedures for using these technologies effectively‚ aiding technicians in maintaining emissions control and reducing pollution.

The Smog Check program remains vital for reducing emissions and ensuring clean air. Regular inspections promote environmental health and compliance with California’s strict regulations‚ benefiting public well-being and future sustainability.

Importance of Regular Smog Checks

Regular Smog Checks are crucial for maintaining air quality and public health by ensuring vehicles emit minimal pollutants. They enforce compliance with emission standards‚ prevent environmental damage‚ and promote the use of cleaner technologies. By identifying and addressing issues early‚ Smog Checks help extend vehicle life and reduce costly repairs‚ benefiting both drivers and the environment effectively.

Future of Smog Check Programs in California

California is advancing its Smog Check programs by adopting enhanced diagnostic technologies like OBD-II for accurate emission testing. The state is implementing stricter standards to reduce pollution and improve air quality. Regular updates to reference guides and performance reports ensure the program remains effective. Continuous improvement by the Bureau of Automotive Repair reflects California’s commitment to environmental protection through efficient vehicle inspections and maintaining cleaner air for future generations.

chef’s choice knife sharpener instructions

The Chef’s Choice Knife Sharpener is a versatile, easy-to-use tool designed for various knife types, ensuring razor-sharp edges with minimal effort and maximum efficiency always.

Overview of the Product

The Chef’s Choice Knife Sharpener is a high-quality tool designed to restore and maintain knife edges efficiently. It features advanced diamond abrasive technology and a 3-stage sharpening system for precise edge restoration. Suitable for various knife types, including straight-edge and serrated blades, it ensures professional-grade sharpness. The sharpener is user-friendly, requiring minimal effort while delivering consistent results. Its compact design and durable construction make it a practical addition to any kitchen or workshop setting.

Popularity and Features

The Chef’s Choice Knife Sharpener is highly regarded for its efficiency and precision. It features advanced diamond abrasive technology and a 3-stage sharpening system, ensuring razor-sharp edges. Its popularity stems from its versatility, accommodating straight-edge, serrated, and specialty knives. The sharpener is praised for its ease of use, delivering professional-grade results without requiring extensive skill. Its durable design and compact footprint make it a favorite among chefs and home cooks alike.

Types of Chef’s Choice Sharpeners

Chef’s Choice offers a variety of sharpeners, including manual, electric, and hybrid models, each designed to cater to different knife types and user preferences effectively.

Manual vs. Electric Models

Chef’s Choice offers both manual and electric sharpeners, each with unique benefits. Manual models are portable, noise-free, and require no power, while electric sharpeners are faster and often feature preset angles for precision. Both types are designed to deliver sharp edges but cater to different user preferences and needs, ensuring versatility in sharpening experiences.

Hybrid Sharpeners

Chef’s Choice hybrid sharpeners combine electric and manual sharpening stages for ultimate versatility. These models offer precise angle control and diamond abrasive technology, ensuring ultra-sharp edges. They cater to both home cooks and professionals, providing ease of use and efficiency. Hybrid sharpeners are ideal for maintaining various knife angles and types, delivering consistent results with minimal effort, making them a practical choice for sharpening needs.

Safety Precautions

Always handle the Chef’s Choice Knife Sharpener with care and follow safety guidelines to prevent accidents. Ensure proper technique and avoid unsafe practices while sharpening knives.

General Safety Tips

Always operate the Chef’s Choice Knife Sharpener on a stable, flat surface. Keep fingers away from sharp edges and moving parts. Avoid loose clothing that could get caught. Ensure children are kept at a safe distance. Handle knives by the handle, not the blade, during sharpening. Maintain focus and avoid distractions while using the sharpener. Properly store the sharpener when not in use to prevent accidents.

Protective Measures

Wear protective gloves and safety glasses when sharpening to prevent injury from accidental cuts or debris. Ensure loose clothing is secured and long hair is tied back. Keep children and pets away from the sharpening area. Always handle knives with care, gripping the handle firmly. Avoid touching the sharp edge after sharpening, as it can cause cuts. Proper protective measures ensure safe and effective sharpening.

Step-by-Step Usage Guide

Start by placing the knife in the sharpening slot, aligning the blade with the guides. Gently draw it through each stage, maintaining the correct angle for optimal results. Repeat as needed for a razor-sharp edge, following the instructions for your specific model to ensure safety and efficiency.

Preparation and Setup

Before sharpening, ensure the knife is clean and dry. Place the sharpener on a stable surface and select the appropriate angle for your knife type. For straight-edge knives, set the angle between 20-30 degrees. Align the blade with the sharpening slot, ensuring proper guide alignment. If using a model with adjustable settings, refer to the manual for specific configurations. Always follow safety guidelines to avoid accidents during setup.

Sharpening Process

Begin by placing the knife blade into the sharpening slot at the recommended angle. Gently draw the knife through the stage(s) with light pressure, repeating as needed. For dull knives, start with the coarsest stage, then progress to finer stages for polishing. Ensure the blade exits the slot cleanly. For serrated knives, use the dedicated slot to maintain the edge without damaging the teeth. Always inspect the edge after each stage to achieve the desired sharpness.

Maintenance and Care

Clean the sharpener regularly with a dry cloth and avoid submerging it in water. Never use harsh chemicals, as they may damage the components. Proper care ensures optimal performance and extends the sharpener’s lifespan.

Cleaning the Sharpener

To maintain the Chef’s Choice Knife Sharpener, clean it regularly with a dry cloth to remove metal particles and debris. For electric models, unplug the device before cleaning. Avoid submerging it in water or using harsh chemicals, as this may damage the components. For manual sharpeners, wipe with a soft, slightly damp cloth, but avoid abrasive cleaners. Regular cleaning ensures optimal performance and prevents rust or residue buildup, extending the sharpener’s lifespan.

Storage Tips

Store the Chef’s Choice Knife Sharpener in a cool, dry place to prevent rust or damage. For electric models, unplug and place in a protective case or secure location. Manual sharpeners can be stored in a drawer, away from direct sunlight. Ensure the sharpener is clean and dry before storage to maintain its effectiveness. Proper storage extends the lifespan of the sharpener and keeps it ready for future use.

Selecting the Right Sharpener

Choose a sharpener based on your knife type, sharpening needs, and preferred method—manual, electric, or hybrid—for optimal results and ease of use.

Factors to Consider

When selecting a Chef’s Choice sharpener, consider your knife type, edge angle, and bolster design. Electric models like the 15XV suit 15-degree knives, while hybrid sharpeners offer versatility. Opt for diamond abrasives for durability and ensure compatibility with your knife’s features, such as full bolster designs. The 3-stage system ensures precise sharpening. Choose between manual, electric, or hybrid based on your preference and sharpening frequency for optimal performance and ease of use.

Knife Type and Angle

When using a Chef’s Choice sharpener, consider your knife’s type and edge angle. Models like the 15XV are designed for 15-degree edges, ideal for Asian-style knives, while others suit 20-degree European knives. The sharpener adapts to various blade types, ensuring proper alignment and sharpening. For knives with a full bolster, opt for a sharpener with extended slots to maintain the blade’s profile without damage. This ensures precise sharpening tailored to your knife’s specific needs.

Troubleshooting Common Issues

Common issues include knives not sharpening properly, often due to incorrect angle or improper stage use. Check alignment guides and ensure the sharpener is clean for optimal results.

Identifying Problems

Common issues with the Chef’s Choice sharpener include improper knife alignment, uneven sharpening, or failure to achieve desired sharpness. Check if the knife is placed correctly in the slots and ensure the sharpener is clean. Over-sharpening can also occur, leading to excessive metal removal. Always sharpen in short strokes and monitor progress to avoid damaging the blade. If issues persist, consult the manual or adjust the sharpening angle.

Resolving Issues

To resolve sharpening issues, clean the sharpener regularly and ensure knives are properly aligned. For blades with full bolsters, use manual sharpeners with extended slots. Check for worn-out abrasives and replace them if necessary. If knives become dull quickly, repeat the sharpening process in shorter strokes. For complex problems, refer to the user manual or contact customer support for guidance.

Customer Feedback and Ratings

Customer feedback highlights the Chef’s Choice Knife Sharpener’s ease of use and effectiveness, with high ratings and strong recommendations from satisfied users and experts alike.

Reviews and Testimonials

Customers consistently praise the Chef’s Choice Knife Sharpener for its ease of use and ability to restore knives to razor-sharp condition. Many highlight its effectiveness across various knife types, including European, Asian, and American styles. The hybrid technology and precision guides are frequently commended for ensuring accurate angles and consistent results. Both home cooks and professional chefs appreciate its versatility and reliability in maintaining sharp edges effortlessly.

Awards and Recognition

The Chef’s Choice Knife Sharpener has earned numerous accolades, including “Product of the Year” awards and high ratings from culinary experts. Its innovative hybrid technology and consistent performance have made it a favorite among both professionals and home cooks. Recognized for its ability to deliver razor-sharp edges effortlessly, it continues to be a top choice in the culinary world for knife sharpening needs.

Comparison with Other Methods

Chef’s Choice sharpeners outperform traditional whetstones and steel rods, offering precision and ease of use. They ensure consistent results with minimal effort, making them a superior choice.

Whetstones and Steel Rods

Whetstones and steel rods are traditional sharpening tools requiring skill and time. While effective for experienced users, they lack the precision and consistency of Chef’s Choice sharpeners, which automate the process for superior results with minimal effort, making them ideal for both professionals and home cooks seeking reliable knife maintenance.

Advantages of Chef’s Choice

Chef’s Choice sharpeners offer unmatched convenience, precision, and efficiency. Their 3-stage electric system ensures razor-sharp edges with minimal effort, while the diamond abrasives provide superior durability. Unlike traditional whetstones or steel rods, Chef’s Choice sharpeners are faster, easier to use, and deliver consistent results for all knife types, making them a top choice for both professional chefs and home cooks seeking reliable knife maintenance.

The Chef’s Choice Knife Sharpener delivers exceptional results, combining ease of use with precise sharpening technology, making it an indispensable tool for maintaining sharp, high-performance knives effortlessly.

Final Thoughts

The Chef’s Choice Knife Sharpener stands out for its ease of use and effectiveness, making it a valuable tool for home cooks and professionals alike. Its ability to accommodate various knife types and angles ensures versatility, while its multiple stages provide a precise sharpening process. The combination of electric and manual features offers flexibility, and the use of diamond abrasives guarantees a razor-sharp edge. With proper care and maintenance, this sharpener delivers long-lasting results, making it a worthwhile investment for anyone seeking to maintain their knives in peak condition. Its user-friendly design and consistent performance make it a top choice for sharpening needs.

Recommendation

The Chef’s Choice Knife Sharpener is highly recommended for its simplicity and effectiveness. It suits both professionals and home cooks, offering precise sharpening for various knife types. Its hybrid technology and diamond abrasives ensure a sharp, durable edge. For those seeking a reliable, easy-to-use sharpener, this model is a top choice, delivering consistent results and long-term value for knife maintenance needs.

PDF

world war 1 worksheet answer key pdf

1.1. Key Alliances of World War I

World War I began in 1914, involving major global powers divided into the Allies and Central Powers. Known as the Great War, it was driven by complex alliances like the Triple Alliance and Triple Entente, which escalated the conflict into a worldwide catastrophe.

World War I was heavily influenced by the complex system of alliances that divided Europe into two opposing groups. The Triple Alliance, formed in 1882, included Germany, Austria-Hungary, and Italy, while the Triple Entente consisted of France, Great Britain, and Russia. These alliances created a delicate balance of power that escalated tensions and contributed to the outbreak of war in 1914.

The alliances were not merely defensive but also reflected the imperialist and nationalist rivalries of the time. For instance, the Triple Alliance was formed to counterbalance the growing power of France and Russia, while the Triple Entente aimed to contain German expansion. When Archduke Franz Ferdinand was assassinated, the intricate web of alliances drew more nations into the conflict, transforming a regional crisis into a global war.

These alliances played a pivotal role in shaping the war’s dynamics, as countries honored their commitments to their allies, even when it led to devastating consequences. The system of alliances remains a critical topic in understanding the causes and progression of World War I.

Multiple Choice Questions

Test your understanding of World War I with these multiple-choice questions.

  • What event triggered the start of World War I?

    A. Assassination of Archduke Franz Ferdinand

    B. Invasion of Belgium

    C. Sinking of the Lusitania

    D. Treaty of Versailles
  • Which group of nations formed the Central Powers?

    A. France, Britain, and Russia

    B. Germany, Austria-Hungary, and Italy

    C. United States, Canada, and Australia

    D. Ottoman Empire, Bulgaria, and Romania

2.1. Major Events of the War

World War I was marked by several pivotal events that shaped its course and outcome.

  • Assassination of Archduke Franz Ferdinand (1914): This event triggered the war, as the heir to the Austro-Hungarian throne was killed by a Serbian nationalist, leading to Austria-Hungary’s declaration of war on Serbia;
  • Invasion of Belgium (1914): Germany’s invasion of neutral Belgium prompted Britain to enter the war, expanding the conflict beyond the initial dispute between Austria-Hungary and Serbia.
  • Battle of the Marne (1914): This battle halted the German advance on Paris, marking a turning point and leading to the stalemate of trench warfare on the Western Front.
  • Russian Revolution (1917): The overthrow of Tsar Nicholas II and the rise of the Bolsheviks led to Russia’s withdrawal from the war, freeing German forces to focus on the Western Front.
  • Entry of the United States (1917): The U.S. joined the Allies after Germany resumed unrestricted submarine warfare and sank American ships, including the Lusitania.
  • Armistice and Treaty of Versailles (1918-1919): The war ended on November 11, 1918, with the Armistice. The Treaty of Versailles imposed harsh penalties on Germany, contributing to long-term tensions.

These events highlight the complexity and far-reaching consequences of World War I, which left millions dead and reshaped global politics.

Short Answer Questions

What were the main causes of World War I?


The main causes of World War I included the complex system of alliances, militarism, imperialism, and nationalism. The assassination of Archduke Franz Ferdinand triggered the war, but underlying tensions between European powers had been building for years.

Describe the significance of the Treaty of Versailles.


The Treaty of Versailles ended World War I and imposed harsh penalties on Germany, including heavy reparations and territorial losses. It contributed to widespread resentment in Germany, which later fueled the rise of Adolf Hitler and the outbreak of World War II.

How did trench warfare impact the soldiers?


Trench warfare exposed soldiers to brutal and unsanitary conditions, leading to the spread of diseases and psychological trauma. The use of machine guns and barbed wire made crossing no man’s land nearly impossible, resulting in massive casualties.

What role did propaganda play during the war?


Propaganda was widely used by all sides to shape public opinion, recruit soldiers, and demonize the enemy. It helped maintain morale and justified the war effort, often distorting the reality of the conflict.

Why was the sinking of the Lusitania significant?


The sinking of the passenger ship Lusitania by a German U-boat in 1915 outraged neutral nations, particularly the United States, and played a key role in America’s eventual entry into the war.

These questions require students to demonstrate their understanding of key events, causes, and impacts of World War I.

Essay Questions

Analyze the role of the alliance system in the outbreak of World War I. How did the complex web of alliances contribute to the escalation of the conflict?

Discuss the impact of trench warfare on soldiers and the overall course of the war. What were the psychological and physical challenges faced by soldiers in the trenches?

Explain the significance of the Treaty of Versailles. How did its terms affect Germany, and what role did it play in the rise of Nazi Germany?

What were the main causes of World War I? How did nationalism, imperialism, and militarism contribute to the war’s outbreak?

Describe the role of the United States in World War I. Why did the U.S. initially maintain neutrality, and what events led to its entry into the war?

How did World War I impact society and politics in Europe? What were the short- and long-term consequences of the war?

Compare and contrast the military strategies of the Central Powers and the Allies. How did these strategies influence the outcome of the war?

What was the significance of the sinking of the Lusitania, and how did it influence public opinion and the war effort?

These essay questions require students to demonstrate a deep understanding of the causes, events, and consequences of World War I through detailed analysis and critical thinking.

Map Activities

Label the countries involved in World War I and identify the theatres of war. Use map A to locate key battle zones and analyze territorial changes. This activity helps visualize the geopolitical landscape during the conflict.

  • Label Central Powers and Allied nations.
  • Identify major battlefronts like the Western and Eastern Fronts.
  • Highlight neutral countries and their significance.

5.1. Identifying Theatres of War

World War I was fought across multiple theatres, each with distinct battlefields and strategic importance. The Western Front, primarily in France and Belgium, saw intense trench warfare between the Allies and Central Powers. The Eastern Front, involving Russia, Germany, and Austria-Hungary, was marked by massive movements of troops and frequent territorial shifts. The Italian Front focused on the conflict between Italy and Austria-Hungary in the Alps, while the Gallipoli Campaign in Turkey was a failed Allied attempt to capture Constantinople. Additionally, naval warfare played a crucial role in controlling sea routes and blockades. Students should locate these regions on historical maps, understanding their geographical significance and how they influenced the war’s outcome. By analyzing these theatres, one can grasp the scale and complexity of the conflict, as well as the diverse strategies employed by each side. This activity enhances spatial awareness and historical comprehension, linking geography to military and political decisions during the war.

  • Western Front: France and Belgium.
  • Eastern Front: Russia, Germany, and Austria-Hungary.
  • Italian Front: Italy and Austria-Hungary.
  • Gallipoli Campaign: Turkey.

5.2. Labeling Countries Involved

Labeling the countries involved in World War I is essential for understanding the conflict’s global scope. The Central Powers included Germany, Austria-Hungary, Bulgaria, and the Ottoman Empire, while the Allies comprised France, Great Britain, Russia, Italy, and later the United States. Neutral nations like Belgium, the Netherlands, and Switzerland played significant roles despite not joining the war initially. Students should identify these countries on a map, highlighting their geographical positions and alliances. This activity helps visualize how the complex system of alliances drew more nations into the war. By labeling these countries, learners can better grasp the political and military dynamics that shaped the conflict. Understanding the involvement of each country provides insight into their motivations, contributions, and the war’s eventual outcome. This exercise is crucial for mapping activities and comprehension of historical events.

  • Central Powers: Germany, Austria-Hungary, Bulgaria, Ottoman Empire.
  • Allies: France, Great Britain, Russia, Italy, United States.
  • Neutral Countries: Belgium, Netherlands, Switzerland.

True or False Section

True or False: World War I began in 1914 after the assassination of Archduke Franz Ferdinand.

True or False: Germany, Austria-Hungary, and Italy formed the Triple Alliance.

True or False: The United States joined World War I in 1914.

True or False: The Treaty of Versailles ended the war in 1918.

True or False: Britain joined the war on August 4, 1914.

True or False: The war was fought only in Europe.

True or False: The Central Powers included France and Great Britain.

True or False: The assassination of Archduke Franz Ferdinand was the main cause of the war.

True or False: The Russian Revolution occurred during World War I.

True or False: The war resulted in the rise of the United States as a global power.

Answers: 1. True, 2. True, 3. False, 4; True, 5. True, 6. False, 7. False, 8. True, 9. True, 10. True.

Students should verify their answers with the provided answer key for accuracy.

Fill in the Blanks

The assassination of __________ by a Serbian nationalist triggered the start of World War I.

The alliance system, including the Triple Alliance and Triple Entente, played a significant role in __________ the war.

The United States entered World War I in __________ after Germany resumed unrestricted submarine warfare.

The Treaty of __________ officially ended World War I in 1919.

The war was primarily fought on the __________ and Eastern Fronts.

__________ withdrew from the war in 1917 following the Russian Revolution.

The introduction of __________ and poison gas marked significant developments in military technology.

Over __________ million people lost their lives during the war.

Answers: 1. Archduke Franz Ferdinand, 2. escalating, 3. 1917, 4. Versailles, 5. Western, 6. Russia, 7. tanks, 8. seventeen million.

World War I, known as the Great War, was a global conflict that lasted from 1914 to 1918. It was triggered by the assassination of Archduke Franz Ferdinand and escalated due to complex alliances. The war saw unprecedented destruction, with over 17 million deaths and widespread economic devastation. Key events included the introduction of new military technologies like tanks and poison gas, as well as the U.S. entry in 1917. The Russian Revolution led to Russia’s withdrawal in 1917, while the Treaty of Versailles officially ended the war in 1919, imposing harsh penalties on Germany. This treaty sowed seeds for future conflicts, including World War II. The war reshaped global politics, leading to the rise of new nations and the decline of empires. It remains a significant historical event, teaching lessons on diplomacy, alliances, and the horrors of war. By understanding its causes and consequences, we can better appreciate the importance of international cooperation and peace.

nebraska learners permit study guide

The Nebraska Learners Permit is a crucial step toward obtaining a driver’s license, allowing new drivers to practice under supervision․ This guide provides essential insights and preparation materials to help applicants understand the rules of the road, traffic laws, and safe driving practices․

1․1 Overview of the Learners Permit in Nebraska

A Nebraska Learners Permit is a temporary license allowing new drivers to practice under supervision․ It is designed for individuals of specific age groups seeking to gain driving experience․ The permit authorizes operation of passenger cars and certain farm vehicles under strict conditions․ Applicants must meet eligibility criteria, pass a vision test, and provide required documentation to obtain this permit, serving as a pathway to a full driver’s license․

1․2 Importance of the Study Guide

The study guide is a vital resource for preparing for the Nebraska Learners Permit test, offering detailed insights into traffic laws, road signs, and safe driving techniques․ It helps applicants understand the rules of the road and ensures they are well-prepared for the written exam․

By using the guide, new drivers can build confidence and improve their knowledge, ensuring a smooth transition to obtaining a full driver’s license while adhering to Nebraska’s driving regulations․

Eligibility Requirements for a Nebraska Learners Permit

To qualify for a Nebraska Learners Permit, applicants must meet specific criteria, including age requirements and providing necessary documentation, such as proof of identity and residency․

2․1 Age Requirements

In Nebraska, applicants for a Learners Permit must meet specific age criteria․ The minimum age to apply for a School Learners Permit (LPE) is 15 years old, while the standard Learners Permit (LPD) requires applicants to be at least 16 years old․ Applicants under 18 must complete a state-approved driver education course or a 50-hour certification, including nighttime driving hours․ Supervised driving is mandatory during this period․

2․2 Documentation Needed

To apply for a Nebraska Learners Permit, you must provide specific documentation․ This includes proof of identity, such as a birth certificate or valid passport, and proof of residency, like a utility bill or bank statement․ Additionally, you must submit a Social Security number verification and a completed parental consent form if you are under 18․ All documents must be originals or certified copies․

Steps to Apply for a Nebraska Learners Permit

Applying for a Nebraska Learners Permit involves submitting your application, passing a vision test, and completing a written exam․ Approval leads to receiving your permit․

3․1 Completing the Application Form

Completing the application form is the first step in obtaining a Nebraska Learners Permit․ You must provide proof of identity, residency, and legal status․ The form can be filled out online or in person at the DMV․ Ensure all information is accurate, as errors may delay processing․ Minors require parental or guardian consent․ This step sets the foundation for the rest of the application process․

3․2 Vision Test and Written Exam

A vision test is required to ensure applicants can safely operate a vehicle․ The written exam covers traffic laws, signs, and safe driving practices․ Study materials, such as the Nebraska Driver’s Manual, are essential for preparation․ The test is multiple-choice, and a passing score is necessary to obtain the Learners Permit․ Proper preparation helps applicants succeed on their first attempt․

What to Study for the Nebraska Learners Permit Test

Focus on understanding traffic laws, road signs, and safe driving practices․ Study the Nebraska Driver’s Manual to master these key areas and ensure readiness for the exam․

4․1 Traffic Laws and Signs

Understanding Nebraska’s traffic laws and road signs is essential for safe driving․ Study regulatory signs like stop and yield, warning signs for curves or intersections, and guide signs for directions․ Familiarize yourself with laws on speed limits, right-of-way rules, and prohibited actions․ Reviewing the Nebraska Driver’s Manual will help master these concepts and ensure readiness for the written exam․ Focus on common violations to avoid mistakes․

4․2 Safe Driving Practices

Safe driving practices are critical for reducing accidents and ensuring roadway safety․ Topics include defensive driving techniques, sharing the road with pedestrians and cyclists, and managing speed limits․ Learn how to maintain a safe following distance and adjust driving habits for varying weather conditions․ Understanding the risks of distracted driving and the importance of seatbelt use is also emphasized․ These practices help build responsible driving habits․

Practice Tests and Resources

Online practice tests and study guides are essential for preparing for the Nebraska Learners Permit exam․ They provide realistic questions and detailed explanations to ensure readiness․

5․1 Online Practice Tests

Online practice tests are an excellent way to prepare for the Nebraska Learners Permit exam․ These tests simulate real exam conditions, offering questions on traffic laws, road signs, and safe driving practices․ They provide immediate feedback and detailed explanations, helping learners identify areas for improvement․ Many platforms offer free or paid practice tests, making it convenient to study at home․ Regular use of these resources significantly boosts exam readiness and confidence․

5․2 Study Materials and Guides

Official Nebraska DMV study guides and handbooks are indispensable resources for preparing for the Learners Permit exam․ These materials cover essential topics such as traffic laws, road signs, and safe driving practices․ Additional resources, including DVDs and mobile apps, offer interactive learning experiences․ These guides provide detailed explanations and practical examples, ensuring a comprehensive understanding of driving rules and regulations․ They are ideal for both visual and hands-on learners․

Restrictions on a Nebraska Learners Permit

A Nebraska Learners Permit imposes specific driving restrictions to ensure safety and proper learning․ These rules help new drivers gain experience gradually and responsibly․

6․1 Driving Hours and Accompaniment Rules

In Nebraska, learners permit holders must be accompanied by a licensed driver aged 21 or older in the front passenger seat․ Driving is restricted to daylight hours unless supervised by a licensed driver․ These rules ensure new drivers gain experience safely and responsibly, minimizing risks on the road while learning essential driving skills․ Adhering to these guidelines is crucial for progressing to a full license․

6․2 Prohibited Actions While Driving

Holders of a Nebraska Learners Permit are prohibited from using cell phones while driving, including texting․ They must not drive without a licensed adult in the front seat․ Additionally, they are not allowed to carry more than one passenger unless supervised․ These restrictions aim to minimize distractions and ensure a safe learning environment for new drivers․

Moving from a Learners Permit to a Drivers License

Transitioning from a learners permit to a drivers license in Nebraska requires meeting specific requirements, including completing supervised driving hours and passing a driving test․ This process ensures new drivers are prepared for unsupervised driving privileges․

7․1 Requirements for a Provisional License

To qualify for a provisional license in Nebraska, applicants must be at least 16 years old, hold a learners permit for six months, and complete 50 hours of supervised driving, including 10 hours of nighttime driving․ A parent or guardian must certify the completion of these requirements․ Additionally, passing a vision test and providing all necessary documentation is mandatory․

7․2 Scheduling and Passing the Driving Test

Once eligible, schedule the driving test with the Nebraska DMV by phone or online․ During the test, demonstrate safe driving skills, such as proper vehicle control, signaling, and adherence to traffic laws․ A licensed driver must accompany you to the test․ Passing the test allows progression to a provisional license, moving closer to full driving privileges․ Proper preparation and practice are key to success․

Common Mistakes to Avoid

Common mistakes include misinterpreting traffic signs, forgetting to signal, and errors in parallel parking․ Avoid distractions and ensure proper vehicle control during the driving test․

8․1 Errors During the Written Test

Common errors on the written test include misreading questions, neglecting traffic laws, and misunderstanding road signs․ Carefully review each question and ensure a thorough understanding of Nebraska’s driving rules and regulations before answering․ Time management is key, so allocate enough time to each section to avoid rushed decisions․ Practice with online tests to identify and correct these mistakes․

8․2 Errors During the Driving Test

Common mistakes during the driving test include failure to check mirrors, improper lane changes, and insufficient signaling․ Many applicants also struggle with parallel parking, three-point turns, and maintaining consistent speeds․ Examiners pay close attention to adherence to traffic laws and safe driving practices․ To improve, practice these maneuvers regularly and focus on smooth, deliberate actions․ Arrive early and stay calm to ensure the best performance․

Additional Resources and Support

For further assistance, the Nebraska DMV offers detailed guides and contact information․ Community groups and online forums provide peer support and shared experiences to aid in your learning journey․

9․1 Nebraska DMV Contact Information

The Nebraska Department of Motor Vehicles (DMV) offers multiple ways to contact them․ Visit their official website for detailed information, or call their customer service hotline․ You can also visit a local DMV office in person for assistance with your learner’s permit application or any related inquiries․ Additionally, they provide online forms and email support for convenient communication․

9․2 Community and Online Support Groups

Joining community and online support groups can provide valuable resources and encouragement for learners permit applicants․ These groups often share study tips, personal experiences, and advice on preparing for the exam․ Online forums and social media communities dedicated to driver education can also offer helpful insights and answers to common questions․ Engaging with these networks can enhance your learning experience and build confidence․

PDF

cocktail recipe book pdf

Cocktail recipe books in PDF format offer a convenient and accessible way to explore a wide variety of classic and modern drink recipes, perfect for both beginners and experienced mixologists.

Why Cocktail Recipe Books Are Popular

Cocktail recipe books, especially in PDF format, are widely popular due to their convenience and accessibility. They provide a comprehensive guide to crafting both classic and modern cocktails, appealing to both novice mixologists and experienced bartenders. The ability to download and carry these books digitally makes them portable and easy to reference. Many PDFs include high-quality images, detailed instructions, and creative variations, enhancing the user experience. Additionally, they often feature tips and tricks from professional bartenders, offering insights into techniques and ingredient pairings. The rise of home mixology has further fueled their popularity, as people seek to recreate bar-quality drinks in the comfort of their own homes. This trend highlights the enduring appeal of cocktail recipe books as essential resources for anyone passionate about mixology.

Benefits of Using a PDF Format for Cocktail Recipes

The PDF format offers numerous advantages for cocktail recipe books, making it a preferred choice for many users. PDFs are easily downloadable and accessible across various devices, ensuring that recipes are always within reach. They retain high-quality visuals and formatting, providing a professional and visually appealing presentation of ingredients and instructions. PDFs are also searchable, allowing users to quickly find specific recipes or ingredients. Moreover, they can be shared effortlessly, making them ideal for home bartenders and professionals alike. The ability to print selected pages further enhances their practicality, enabling users to create personalized recipe collections. Overall, PDF cocktail recipe books combine convenience, portability, and clarity, making them an indispensable tool for mixology enthusiasts.

Structure of a Cocktail Recipe Book

A well-organized cocktail recipe book typically includes sections for classic and modern recipes, essential tools, key ingredients, and design tips, ensuring easy navigation and inspiration for mixologists.

Classic Cocktail Recipes

Classic cocktail recipes form the foundation of mixology, offering timeless drinks that have stood the test of time. These recipes, such as the Margarita, Mojito, and Cosmopolitan, are celebrated for their simplicity and balance of flavors. Originating from iconic bars and historical periods, they often feature traditional spirits like tequila, rum, and vodka. Their enduring popularity lies in their versatility and the ability to evoke a sense of nostalgia. Many cocktail recipe books dedicate entire sections to these classics, providing precise measurements and step-by-step instructions. With high-quality images and historical context, these recipes are not only educational but also inspiring for both home enthusiasts and professional bartenders. Their inclusion in PDF formats ensures easy access and clarity, making them a cornerstone for any mixologist.

Modern Cocktail Creations

Modern cocktail creations push the boundaries of traditional mixology, incorporating innovative techniques and ingredients. These contemporary recipes often feature smoked elements, fermented components, and unique flavor combinations. Bartenders today experiment with house-made syrups, fresh fruits, and unexpected pairings to craft distinctive drinks. Modern creations emphasize presentation and storytelling, with intricate garnishes and creative glassware. PDF recipe books highlight these trends, offering detailed guides for replicating these innovative cocktails at home. From molecular mixology to sustainable practices, modern cocktail recipes reflect a dynamic evolution in the culinary world, appealing to adventurous palates and inspiring new generations of mixologists. Their inclusion in digital formats ensures accessibility and ease of exploration for enthusiasts worldwide.

Essential Tools and Equipment

Equipping your home bar with the right tools is crucial for crafting exceptional cocktails. A cocktail shaker, jigger, and muddler are indispensable for mixing, measuring, and infusing flavors. Peelers and knives are essential for preparing fresh garnishes, while tins and strainers ensure smooth pouring. Invest in quality glassware, such as highball and Martini glasses, to enhance the drinking experience. Ice is a critical component, so ensure it’s odor-free to preserve drink quality. These tools, often detailed in PDF cocktail books, provide the foundation for creating professional-grade drinks at home. Having the right equipment not only simplifies the process but also elevates your mixology skills, making every cocktail a delight to prepare and enjoy.

Key Ingredients for Cocktail Recipes

Cocktails rely on base spirits like gin, rum, and vodka, paired with mixers such as lime juice, syrups, and fresh fruits, ensuring a balanced and flavorful drink.

Alcoholic Base Spirits

Alcoholic base spirits are the foundation of most cocktails, providing the primary flavor and strength. Common base spirits include gin, rum, vodka, whiskey, tequila, and brandy. Each spirit offers a unique profile: gin is botanical and versatile, rum adds tropical sweetness, vodka is neutral and adaptable, while whiskey and bourbon bring rich, smoky notes. Tequila is ideal for vibrant, citrusy drinks, and brandy offers a sophisticated touch. These spirits are often combined with mixers, syrups, and fresh ingredients to create balanced and flavorful cocktails. Whether crafting a classic Gin & Tonic or a modern variation, the choice of base spirit significantly influences the final taste and character of the drink.

Mixers and Syrups

Mixers and syrups play a crucial role in enhancing the flavor and texture of cocktails. Common mixers include tonic water, soda water, and fruit juices like lime or grapefruit, which add acidity and freshness. Syrups such as simple syrup, agave syrup, and grenadine provide sweetness and depth, balancing the boldness of base spirits. These ingredients are essential for creating harmonious flavor profiles, whether in a classic Margarita or a modern creation. Cocktail recipe books often emphasize the importance of using high-quality mixers and syrups to elevate drinks, offering recipes for homemade versions to ensure optimal taste and customization. They are versatile tools that allow bartenders to experiment and innovate, making them indispensable in any cocktail repertoire.

Fresh Fruits and Garnishes

Fresh fruits and garnishes are essential components in cocktail recipes, adding flavor, texture, and visual appeal. Commonly used fruits include lemons, limes, oranges, and berries, which provide acidity, sweetness, and vibrant colors. Garnishes like citrus peels, mint leaves, and edible flowers enhance the aromatic profile and presentation of drinks. Many cocktail recipe books emphasize the importance of using ripe, high-quality fruits for optimal taste. From the zesty lime in a Margarita to the fragrant orange peel in a classic Martini, fresh ingredients elevate cocktails to a new level. Proper preparation, such as juicing or slicing, ensures flavors are maximized. Fresh fruits and garnishes also allow for creativity, enabling bartenders to craft unique and visually stunning drinks. They are a cornerstone of modern mixology, offering endless possibilities for experimentation and innovation.

Popular Cocktail Recipes

Cocktail recipe books feature timeless classics like Margaritas and Mojitos, alongside modern creations such as smoked cocktails, offering something for every taste and skill level.

Classic Cocktails: Margarita, Mojito, and Cosmopolitan

These iconic cocktails are staples in every bartender’s repertoire. The Margarita, made with tequila, lime juice, and triple sec, is a zesty, refreshing classic. The Mojito, blending rum, lime, mint, and soda water, offers a revitalizing twist with its herbal notes. The Cosmopolitan, featuring vodka, cranberry juice, lime, and triple sec, is a fruity and elegant choice. Each recipe is simple yet sophisticated, making them favorites for gatherings and special occasions. Whether you’re a novice or an expert, these timeless drinks are easy to prepare and always impress. Find detailed instructions and variations in free PDF cocktail recipe books online.

Modern Variations: Smoked Cocktails and Fermented Drinks

Modern mixology has introduced innovative techniques like smoked cocktails and fermented drinks, offering unique flavor profiles. Smoked cocktails infuse smoky notes through methods like wood-chip smoking or smoked salt rims, adding depth to classics. Fermented drinks utilize ingredients such as kefir, kombucha, or fermented fruits to create tangy, complex flavors. These trends redefine cocktail crafting, blending tradition with creativity. Bartenders and home mixologists alike experiment with these methods, inspired by global culinary practices. Free PDF guides provide detailed recipes and tips for mastering these modern twists, making them accessible to everyone. These variations keep cocktail culture fresh and exciting, encouraging experimentation and innovation behind the bar.

Non-Alcoholic Cocktails: Mocktails and Virgin Drinks

Non-alcoholic cocktails, known as mocktails and virgin drinks, are gaining popularity as flavorful alternatives to traditional cocktails. These drinks often feature fresh juices, herbs, and syrups, offering creative twists without the alcohol. Mocktails are perfect for those who prefer not to drink alcohol or are looking for lighter options. Virgin drinks provide the same sophistication as their alcoholic counterparts, making them ideal for all audiences. With the rise of health-conscious lifestyles, these recipes are increasingly included in PDF cocktail books, offering bartenders and home enthusiasts inspiration to craft delicious, alcohol-free beverages. Their versatility and fresh flavors make them a staple in modern drink menus, ensuring everyone can enjoy the art of mixology.

Designing Your Cocktail Recipe Book

Designing your cocktail recipe book involves balancing visual appeal with clarity, ensuring recipes are easy to follow while maintaining a professional and engaging format, especially in PDF versions.

Visual Layout and Formatting Tips

When designing your cocktail recipe book, prioritize a clean and visually appealing layout to enhance readability. Use a clear, readable font for recipe instructions and bold headings for titles. Ensure ingredients are listed in bullet points for easy scanning, and include step-by-step instructions for clarity. High-quality images of cocktails can be placed near their respective recipes to inspire creativity. Maintain consistent spacing between sections to avoid clutter. Use a color scheme that complements the theme of your book, whether modern or classic. Incorporate placeholders for images and ensure proper alignment of text and visuals. Finally, optimize the PDF for digital viewing by ensuring text is legible on all screen sizes and devices.

Adding High-Quality Images and Illustrations

High-quality images and illustrations are essential for making your cocktail recipe book visually appealing. Include vibrant, high-resolution photos of finished cocktails to inspire creativity and showcase presentation styles. Add images of fresh ingredients, garnishes, and tools to help readers visualize the process. Illustrations can enhance the design, such as sketches of glassware or step-by-step mixing techniques. Place images strategically near relevant recipes to avoid clutter. Use a consistent color scheme and style throughout the book for a professional look. Ensure images are optimized for PDF viewing, maintaining clarity without excessive file size. This will make your cocktail recipe book both informative and visually stunning, appealing to both novice and experienced mixologists.

Optimizing for PDF Viewing

Optimizing your cocktail recipe book for PDF viewing ensures a seamless reading experience across devices. Use clear, legible fonts and maintain consistent formatting throughout the document. Ensure text and images are properly aligned and scaled for both mobile and desktop screens. Compress high-resolution images to reduce file size without sacrificing quality, making the PDF easier to download and share. Organize content with bookmarks and hyperlinks for easy navigation. Test the PDF on various devices to ensure compatibility and readability. Avoid overly complex layouts that may not render well digitally. By optimizing your cocktail recipe book for PDF viewing, you create a user-friendly resource that is accessible and enjoyable for everyone, whether they’re browsing on a phone, tablet, or computer.

A cocktail recipe book in PDF format offers a versatile and accessible guide to crafting drinks, combining classic and modern recipes with practical advice for mixologists of all levels.

Final Tips for Creating a Comprehensive Cocktail Recipe Book

When crafting a cocktail recipe book in PDF format, ensure it includes a diverse range of recipes, from classics to modern creations. Organize content clearly, with step-by-step instructions and measurements for accuracy. Incorporate high-quality images to inspire and guide readers. Consider adding personal anecdotes or historical context to enhance engagement. Use consistent formatting and indexing for easy navigation. Optimize the PDF for digital viewing, ensuring readability on various devices. Finally, test recipes to guarantee reliability and flavor balance. These elements will make your cocktail recipe book a valuable resource for both novices and seasoned bartenders, providing endless inspiration for crafting delicious drinks at home or professionally.

jbl speaker user manual

Welcome to the JBL Speaker User Manual! This guide helps you set up, operate, and maintain your speaker․ Explore features, troubleshooting, and safety tips for optimal performance․ Enjoy your JBL audio experience!

1․1 Overview of the Manual

This manual provides comprehensive guidance for setting up and using your JBL speaker․ It covers installation, connectivity options, advanced features, and troubleshooting․ Designed for both new and experienced users, the manual ensures optimal performance and safety․ Refer to this guide for detailed instructions on maintaining your speaker and resolving common issues․ It’s your go-to resource for enhancing your audio experience․

1․2 Importance of Reading the Manual

Reading this manual is essential for maximizing your JBL speaker’s potential․ It provides crucial information for proper setup, safety precautions, and troubleshooting․ Understanding the guidelines ensures optimal performance and longevity of your device․ By following the instructions, you can avoid common issues and enjoy a seamless audio experience․ Take the time to review this manual carefully to get the most out of your JBL speaker․

Unpacking and Inventory

Unpack your JBL speaker carefully and verify all components are included․ This section helps ensure nothing is missing and prepares you for setup․

2․1 What’s in the Box

Inside the box, you’ll find your JBL speaker, a power adapter, USB charging cable, and a quick-start guide․ Some models may include additional accessories like a carrying strap or warranty card․ Ensure all items are present and undamaged․ Refer to the manual for a detailed list specific to your model․ Verify each item to ensure completeness before proceeding with setup․

2․2 Initial Inspection and First Impressions

Upon unboxing, inspect the speaker for any visible damage․ Check the build quality, buttons, and ports․ Note the sleek design and durable materials․ Familiarize yourself with the control panel and LED indicators․ Ensure the grille is secure and evenly aligned․ Take a moment to appreciate the speaker’s aesthetic and ergonomic design․ Your first impression should leave you excited to start using your new JBL speaker․

Connectivity Options

Explore various ways to connect your JBL speaker, including Bluetooth pairing and Wi-Fi setup․ Compatible with smartphones, tablets, and PCs, offering seamless A2DP and AVRCP profile support for enhanced audio streaming․

3․1 Bluetooth Pairing Instructions

Pair your JBL speaker via Bluetooth by turning it on and pressing the Bluetooth button until the LED flashes․ Enable Bluetooth on your device, select the speaker from the list, and enter the passcode if prompted․ If pairing fails, restart both devices and try again․ Refer to the user manual for troubleshooting steps or contact JBL support for assistance․ Ensure your speaker is fully charged for a smooth pairing process․ For more details, visit the JBL website or download the manual․

3․2 Wi-Fi Setup for Smart Speakers

To set up Wi-Fi for your JBL smart speaker, ensure it is connected to the same network as your device․ Open the JBL app, select your speaker, and follow the in-app instructions to configure Wi-Fi settings․ If pairing fails, restart your router and speaker, then retry․ For detailed guidance, refer to the user manual or visit the JBL support website․ Ensure your network password is correct for a seamless connection․

Battery and Charging

Charge your JBL speaker using the provided USB cable and adapter․ Avoid overcharging to maintain battery health․ For optimal performance, update your speaker’s firmware regularly․ Ensure the speaker is fully charged before extended use for uninterrupted listening sessions․

4․1 Charging Instructions

To charge your JBL speaker, connect the provided USB cable to a compatible power source․ Ensure the speaker is powered off during charging for optimal efficiency․ The charging indicator will light up, typically turning off once fully charged․ Avoid exposing the speaker to moisture while charging․ Charge for 3-4 hours for a full battery․ Use only JBL-approved chargers to prevent damage․ Keep the charging port clean and dry for uninterrupted performance․

4․2 Battery Life and Optimization Tips

Maximize your JBL speaker’s battery life by adjusting volume levels and disabling unnecessary features like Bluetooth discovery when not in use․ Store the speaker in a cool, dry place to preserve battery health․ Avoid overcharging, as it can reduce battery longevity․ Update firmware regularly to benefit from performance improvements and efficiency optimizations․ For extended playtime, keep the speaker away from direct sunlight and extreme temperatures․

Advanced Features

Explore custom equalizer settings, multi-speaker connectivity, and voice assistant integration․ Firmware updates ensure optimal performance, while advanced audio technologies enhance your listening experience․ Discover more in the following sections․

5․1 Custom Equalizer Settings

Custom Equalizer Settings allow you to tailor your audio experience․ Using the JBL QuantumENGINE software, you can adjust bass, treble, and mid levels to your preference․ Select from predefined sound profiles like Movie, Music, or Game modes for optimized listening; Create a personalized sound profile to enhance your audio enjoyment․ This feature ensures your speaker delivers the exact sound you desire, making every listening session unique․

5․2 Firmware Updates and Software Management

Regular firmware updates ensure your JBL speaker performs at its best․ Use the JBL app to check for updates and install the latest software․ Updates often include new features, bug fixes, and performance improvements․ Connect your speaker to Wi-Fi, open the app, and follow prompts to update․ Always keep your speaker’s software current to enjoy enhanced functionality and optimal audio quality․ Updating is quick and ensures you have the latest advancements․

Safety Precautions

Keep the speaker away from water and moisture to prevent damage․ Clean only with a dry cloth and avoid blocking ventilation openings․ Follow all safety guidelines for optimal performance and longevity․

6․1 Handling and Placement Guidelines

Handle the speaker with care to avoid physical damage․ Place it on a stable, flat surface away from water and direct sunlight․ Ensure proper ventilation to prevent overheating․ Avoid exposing it to extreme temperatures or humidity․ Clean only with a dry cloth, as moisture can damage internal components․ Follow these guidelines to maintain performance and longevity․

6․2 Moisture and Environmental Considerations

Avoid exposing the speaker to direct moisture or high humidity, as this can damage the internal components․ Do not place the speaker near water sources or in damp environments․ Clean only with a dry cloth to prevent liquid ingress․ Avoid direct sunlight and extreme temperatures to protect the electronics․ Ensure proper ventilation to prevent overheating․ Keep the speaker away from corrosive substances for optimal durability and performance․

Troubleshooting Common Issues

Welcome to the troubleshooting section․ Address common issues like connectivity problems, low volume, or distorted sound․ Refer to specific guides for detailed solutions and fixes․

7․1 Diagnosing Connection Problems

Experiencing connection issues? Start by restarting your speaker and device․ Ensure Bluetooth is enabled and devices are within range․ Check for interference from other devices․ Verify Wi-Fi network settings and ensure the speaker is connected to the correct network․ For physical connections, inspect cables for damage and ensure secure connections․ Refer to specific troubleshooting guides for detailed solutions․

7․2 Resetting the Speaker

To reset your JBL speaker, press and hold the “Volume Up” and “Play/Pause” buttons for 10 seconds․ Release when the indicator light flashes․ This restores factory settings․ Note: Resetting will clear all custom settings and paired devices․ The speaker will restart automatically․ For some models, press “Volume Down” and “Power” instead․ Consult your specific model’s manual for exact steps․ Ensure the speaker is turned off before resetting for best results․

Technical Specifications

Explore detailed specs, including Bluetooth versions, frequency response, power output, and driver sizes․ This section provides technical insights for optimal performance and compatibility with your JBL speaker․

8․1 Speaker Drivers and Frequency Response

The JBL speaker features high-quality drivers designed for clear sound reproduction․ With a transducer size of 44 x 80mm and a frequency response of 65Hz–20kHz, it delivers balanced bass, midrange, and highs․ The speaker’s rated power of 20W RMS ensures robust audio output․ These specifications ensure immersive sound quality, making it ideal for various music genres and listening environments, while maintaining clarity and depth in audio playback experiences․

8․2 Supported Audio Codes and Formats

Your JBL speaker supports various audio codecs and formats, including AAC, SBC, and aptX for high-quality Bluetooth streaming․ It is compatible with WAV, MP3, and FLAC file formats, ensuring versatility in music playback․ The speaker also supports A2DP V1․3 and AVRCP V1․6 profiles for seamless device connectivity and control․ These features allow you to enjoy your favorite tracks with optimal audio fidelity and convenience across different devices and platforms․

Maintenance and Care

Regularly clean your JBL speaker with a dry cloth to prevent dust buildup․ Avoid exposing it to moisture or harsh chemicals․ Update software periodically for optimal performance․ The durable exterior is built to last with proper care․

9․1 Cleaning the Speaker

To maintain your JBL speaker’s performance, clean it regularly with a dry, soft cloth․ Avoid using harsh chemicals or moisture, as they can damage the finish or electrical components․ For stubborn dust, lightly dampen the cloth but ensure it is not soaking wet․ Gently wipe the exterior and grille, taking care not to push debris into the speaker openings․ Regular cleaning prevents dust buildup and ensures optimal sound quality; Always power off the speaker before cleaning․

9․2 Updating Software

Regular software updates enhance your JBL speaker’s performance and add new features․ To update, visit the JBL website or use the JBL app․ Ensure your speaker is connected to a stable internet connection․ Download the latest firmware and follow the on-screen instructions․ Updates may require the speaker to restart․ Always use the correct software version to maintain compatibility and optimal functionality․

Warranty and Support

Your JBL speaker is backed by a warranty ensuring quality and reliability․ For assistance, visit the JBL support website or contact their customer service team for help․

10․1 Understanding the Warranty

Your JBL speaker is protected by a limited warranty, typically covering manufacturing defects for one year from purchase․ This warranty ensures repairs or replacements for faulty components․ Exclusions include damage from misuse, normal wear, or unauthorized modifications․ For detailed terms, refer to the warranty document provided with your purchase or visit the JBL website․

10․2 Contacting JBL Support

basic principles of curriculum and instruction

The curriculum serves as a structured plan guiding teaching and learning, ensuring alignment with educational goals and standards․ It emphasizes clarity, coherence, and inclusivity, addressing diverse learning needs while fostering critical thinking and creativity․ Effective curriculum design promotes continuous improvement, reflecting societal changes and educational research․

Instructional strategies are tailored to meet curriculum objectives, ensuring learners achieve desired outcomes․ The curriculum acts as a roadmap, balancing academic rigor with practical application, and is regularly assessed to maintain relevance and effectiveness in fostering student growth and understanding․

1․1 Definition and Key Concepts

A curriculum is a structured plan outlining what students should learn, encompassing content, skills, and values․ It serves as a blueprint guiding teaching and learning processes to achieve educational goals․ Key concepts include learning objectives, content selection, and assessment methods, ensuring alignment with educational standards and principles․ The curriculum reflects societal values, promoting equity, inclusivity, and critical thinking․ It is dynamic, adapting to evolving educational needs and research advancements․

Understanding curriculum principles involves recognizing its purpose as a tool for student development, fostering academic and personal growth․ It integrates theoretical knowledge with practical application, ensuring relevance and coherence in educational experiences․

1․2 The Relationship Between Curriculum and Instruction

The curriculum and instruction are deeply interconnected, with the curriculum serving as the foundation for teaching and learning․ It provides the content, goals, and structure that guide instructional practices, ensuring alignment between what is taught and what students are expected to learn․ Instruction, in turn, brings the curriculum to life through strategies, methods, and activities designed to engage students and promote understanding․ This relationship ensures that educational goals are met effectively․

A well-designed curriculum informs instructional decisions, while effective instruction ensures the curriculum is implemented successfully․ Together, they create a cohesive educational experience, fostering student growth and achieving desired learning outcomes․ This dynamic interplay is essential for meaningful and impactful education․

Major Theories and Models of Curriculum Development

Curriculum development is shaped by theories like the Tyler Rationale and progressive education, emphasizing purposeful design, student-centered approaches, and alignment with educational goals and societal needs․

2․1 The Tyler Rationale

The Tyler Rationale, developed by Ralph Tyler, is a foundational framework for curriculum design․ It emphasizes four key questions: What are the educational purposes? What content is most suitable? What methods are best? How can outcomes be evaluated? This model stresses alignment between learning objectives, content selection, instructional methods, and assessment strategies․ It prioritizes clarity and purpose in curriculum development, ensuring that education is goal-oriented and systematic․ Tyler’s approach remains influential, offering a practical guide for educators to design coherent and effective learning experiences․ Its focus on measurable outcomes and structured planning has made it a cornerstone of modern curriculum design․

2․2 Progressive Education and Its Impact on Curriculum Design

Progressive education emphasizes student-centered learning, focusing on critical thinking, creativity, and real-world applications․ It advocates for integrating subjects into interdisciplinary studies, fostering a holistic understanding․ This approach encourages active participation, where students explore topics aligned with their interests, making learning relevant and engaging․ Progressive education impacts curriculum design by promoting flexibility and adaptability, allowing educators to tailor instruction to individual needs and societal changes․ By valuing experiential learning and collaboration, it prepares students for dynamic environments․ Key figures like John Dewey have shaped this philosophy, influencing curriculum to be more inclusive and responsive, ensuring education is a transformative experience that empowers students to thrive in diverse contexts․

Effective Curriculum Design

Effective curriculum design involves creating a structured, inclusive plan aligned with educational goals, ensuring clarity and addressing diverse learning needs through critical thinking and adaptability․

3․1 Clarity and Focus in Curriculum Development

Clarity and focus are essential in curriculum development to ensure educational goals are well-defined and achievable․ A clear curriculum provides a structured roadmap, guiding teachers and learners alike; It avoids ambiguity, ensuring that learning objectives are understandable and measurable․ Focus ensures that the curriculum is streamlined, free from unnecessary content, and aligned with educational standards․ This clarity helps in allocating appropriate time and resources to each learning objective, fostering a cohesive learning experience․

Additionally, clarity and focus involve engaging stakeholders, such as teachers and students, to ensure the curriculum remains relevant and practical․ This approach promotes effective instruction, assessment, and continuous improvement, ultimately enhancing student outcomes and academic success․

3․2 Aligning Curriculum with Educational Standards

Aligning curriculum with educational standards ensures consistency and accountability in teaching and learning․ Standards serve as benchmarks, defining what students should know and be able to do at each stage․ A well-aligned curriculum integrates these standards into its design, ensuring that instructional strategies and assessments directly address them․ This alignment guarantees that the curriculum is both rigorous and relevant, preparing students to meet expectations and achieve long-term success․

Regular reviews and updates are crucial to maintain this alignment, reflecting changes in educational policies and advancements in knowledge․ By aligning the curriculum with standards, educators ensure a cohesive and purposeful learning experience, fostering student growth and readiness for future challenges․

Instructional Strategies

Instructional strategies are methods teachers use to enhance learning experiences, ensuring content delivery is engaging and effective․ They adapt to diverse student needs, fostering active participation and deeper understanding․

4․1 Differentiated Instruction

Differentiated instruction tailors teaching methods to meet diverse student needs, ensuring each learner engages meaningfully․ Teachers assess learning styles, abilities, and interests to adapt content, pace, and delivery․ Strategies include personalized learning plans, flexible grouping, and tiered assignments․ This approach promotes inclusivity, fostering academic growth and higher engagement; By addressing varied learning preferences, differentiated instruction creates a supportive environment where all students can thrive․ It emphasizes flexibility and creativity in teaching, aligning with curriculum goals while respecting individual differences․ Regular assessment and feedback loops guide instructional adjustments, ensuring personalized support․ This method enhances equity and effectiveness in education, helping students reach their full potential․

4․2 The Role of Technology in Instruction

Technology plays a transformative role in instruction, enhancing accessibility, engagement, and personalization․ Tools like educational software, online platforms, and multimedia resources enable interactive learning experiences․ Technology facilitates real-time feedback, allowing teachers to track student progress and adjust instruction dynamically․ It also supports differentiated instruction by providing tailored resources for diverse learners․ Collaborative opportunities, such as virtual labs and group projects, foster innovation and problem-solving․ Additionally, technology bridges gaps by connecting students to global resources and expertise․ Integrating technology into instruction not only enriches the learning environment but also prepares students for a digitally driven world․ By leveraging these tools, educators can create dynamic, inclusive, and effective learning experiences that cater to modern educational needs․

Assessment and Evaluation

Assessment and evaluation are crucial for measuring student learning outcomes, guiding instruction, and improving educational programs․ They ensure accountability and continuous improvement in teaching and learning processes․

5․1 Formative and Summative Assessment

Formative assessment monitors student progress during learning, providing timely feedback to improve understanding and performance․ It involves quizzes, discussions, and observational checks․

Summative assessment evaluates learning at the end of a lesson, unit, or term, often through tests or projects․ It measures achievement against learning objectives․

Both types are essential for effective instruction․ Formative assessment guides instructional adjustments, while summative assessment ensures accountability and measures long-term outcomes․

5․2 Using Assessment to Guide Instruction

Assessment data provides insights into student learning, helping educators refine instructional strategies․ By analyzing results, teachers can identify gaps in understanding and adjust lessons accordingly․

Formative assessments, in particular, offer real-time feedback, enabling immediate adjustments to teaching methods․ This data-driven approach ensures interventions are targeted and effective, ultimately enhancing student outcomes and alignment with curriculum goals․

swindon – highworth bus 7 timetable pdf

The Swindon ― Highworth Bus 7 provides essential transport links between Swindon Town Centre and Highworth, offering multiple daily departures. Recently updated on May 28, 2025, this route operates seven days a week, including holidays, making it a vital service for locals and visitors alike.

Overview of the Bus Route and Its Importance

The Swindon ― Highworth Bus 7 route connects Swindon Town Centre with Highworth, serving key locations like Swindon Bus Station, Greenbridge Retail Park, and Highworth Swindon Street. This service is vital for residents and visitors, providing affordable and reliable transport. Operating seven days a week, it links urban and rural areas, supporting daily commutes and leisure trips. Recent timetable updates aim to enhance reliability and better meet community needs. The route’s frequency, especially during peak times, makes it a cornerstone of local public transport, ensuring accessibility to employment, education, and amenities. Its importance grows as it bridges Swindon’s bustling centre with quieter, picturesque areas like Highworth, fostering connectivity across the region.

Recent Changes to the Timetable (Effective May 28, 2025)

As of May 28, 2025, the Swindon ⸺ Highworth Bus 7 timetable has been updated to improve service reliability and better meet passenger needs. These changes include adjustments to departure times, with Monday services now starting at 5:00 AM and Sunday operations running from 5:45 AM to 6:15 PM. Peak-time services on weekdays have been refined, with buses departing more frequently from Swindon Bus Station Bay 10. The revised timetable ensures smoother connections for commuters and aligns with demand during busy periods. These updates aim to enhance the overall efficiency of the route, providing a more dependable service for users traveling between Swindon and Highworth.

Accessing the Swindon ― Highworth Bus 7 Timetable

The Swindon ― Highworth Bus 7 timetable is available as a downloadable PDF. Visit the official Swindon Bus website or contact Traveline at 0871 200 2233 for assistance.

How to Find and Download the PDF Timetable

To access the Swindon ⸺ Highworth Bus 7 timetable in PDF format, visit the official Swindon Bus Company website. Navigate to the “Timetables” section and select the Bus 7 route. Click on the “Download PDF” option to save the document; Alternatively, use the website’s journey planner tool to customize your search by date and time. For assistance, contact Traveline at 0871 200 2233 or visit the Swindon Bus Station. Ensure to check for the latest updates, as timetables may change periodically. This PDF provides detailed timing points, stops, and service frequencies for efficient trip planning.

Key Features of the Timetable Document

The Swindon ― Highworth Bus 7 timetable PDF provides comprehensive details about the route, including timing points, major stops, and service frequencies. It outlines departure times from Swindon Bus Station and Highworth Swindon Street, with clear indications of peak and off-peak schedules. The document also highlights special timetables for holidays like Christmas and Boxing Day, ensuring passengers are informed of any service adjustments. Additionally, it includes maps and route summaries, making it easier to plan journeys. The PDF is updated regularly to reflect any changes, such as the recent adjustments effective May 28, 2025. This resource is essential for both regular commuters and occasional travelers, offering a user-friendly format for quick reference.

Understanding the Bus Route

The Swindon ― Highworth Bus 7 connects Swindon Bus Station to Highworth Swindon Street, covering 24 stops. It operates seven days a week, including holidays, with regular frequency.

Major Stops and Timing Points

The Swindon ⸺ Highworth Bus 7 route includes several key stops that serve as timing points, ensuring reliable service. Starting from Swindon Bus Station (Bay 11), the bus travels through Highworth Swindon Street, with intermediate stops like Highworth Marlborough Road, Swindon Fleming Way, and Swindon Bus Station. These points are crucial for maintaining schedule accuracy. Timing points are where drivers may wait briefly to align with the timetable, ensuring consistency across the route. Passengers can board or alight at these stops, which are clearly marked on the PDF timetable. The route operates with a frequency of approximately 30 minutes during peak times and less frequently during off-peak hours. These stops and timing points are essential for planning journeys effectively.

Service Frequency and Peak Times

The Swindon ― Highworth Bus 7 operates with a regular frequency, offering services throughout the day. On weekdays, buses run approximately every 30 minutes during peak times, typically between 7:00 AM and 9:00 AM, and again between 4:00 PM and 6:00 PM. Off-peak times see a reduced frequency, with buses running every 60 minutes. On Saturdays, the service mirrors weekday frequencies, while Sundays operate on a slightly reduced schedule. Peak times are designed to accommodate commuters, with buses departing Swindon Bus Station (Bay 11) and Highworth Swindon Street at intervals aligned with passenger demand. The timetable ensures reliable connections, making it easier for passengers to plan their journeys during busy periods. Detailed departure times are available in the PDF timetable.

Service Details and Variations

Weekday, Weekend, and Holiday Schedules

The Swindon ― Highworth Bus 7 operates on distinct schedules for weekdays, weekends, and holidays. Weekday services run from 5:00 AM to 11:35 PM, while weekends have reduced frequencies.

The Swindon ― Highworth Bus 7 operates on a structured timetable, with weekday services running from 5:00 AM to 11:35 PM, ensuring frequent departures during peak hours. On weekends, the service starts later, with buses operating from approximately 7:45 AM to 6:15 PM, catering to leisure and essential travel needs. Holidays, including Christmas and Boxing Day, feature special timetables, with Christmas Eve services ending earlier at 8:00 PM. Boxing Day follows a Sunday schedule, with additional adjustments for routes like the 10, 55, and S6. Passengers are advised to consult the latest PDF timetable for exact timings, as variations may occur during bank holidays or special events.

Special Timetables for Christmas and Boxing Day

During the holiday season, the Swindon ― Highworth Bus 7 service operates on special timetables to accommodate festive travel needs. On Christmas Eve, all Swindon bus services, including the Bus 7, will finish earlier at 8:00 PM. For Boxing Day, the Bus 7 will follow its Sunday timetable, while other routes like the 10, 55, and S6 will have unique schedules. Passengers are encouraged to check the PDF timetable for exact Christmas and Boxing Day journey details, as timings may vary slightly from the regular weekday or weekend schedules. This ensures reliable travel planning during the holidays;

Planning Your Journey

Use online journey planners or download the PDF timetable for precise Bus 7 schedules. Check key timings, including first and last departures, to plan your trip efficiently.

Using Online Resources for Trip Planning

Plan your journey efficiently using online resources like the Swindon Bus Company website or journey planner tools. Visit www.swindonbus.info to access the Bus 7 timetable in PDF format, view route maps, and track real-time updates. Use the journey planner to input your start and end points for personalized travel details. Additionally, download the Swindon Bus app for on-the-go trip planning, live bus tracking, and service alerts. Check for any special timetables, especially during holidays like Christmas and Boxing Day, when schedules may vary. For assistance, contact Traveline on 0871 200 2233 or visit the website for FAQs and more information.

Important Tips for Catching the Bus 7

Arrive at your stop early to avoid missing the bus, especially during peak times. Check the Swindon ⸺ Highworth Bus 7 timetable PDF for exact departure times. Note that buses may depart from different bays at Swindon Bus Station, such as Bay 10 or 11, so verify the correct bay before boarding. Plan your journey during off-peak hours for a smoother ride. Carry a valid ticket or pass, as fare inspections may occur. Be aware of special timetables on holidays like Christmas and Boxing Day, when services may operate on reduced schedules. Use real-time tracking tools or apps to monitor delays or changes. Finally, notify the driver of your destination stop to ensure a convenient journey.

Future Updates and Service Improvements

Planned improvements include increased frequency during peak hours and additional stops. Passengers are advised to check the Swindon ⸺ Highworth Bus 7 timetable PDF for updates. Visit the official website for the latest service enhancements.

Planned Changes and Enhancements

The Swindon ― Highworth Bus 7 service is expected to undergo improvements to enhance passenger experience and reliability. Future updates include extended operating hours, additional stops, and increased frequency during peak times. These changes aim to better align the service with commuter needs and reduce congestion. New timing points will be introduced to improve punctuality, while the Swindon ⸺ Highworth Bus 7 timetable PDF will be updated to reflect these modifications. Passengers are encouraged to check the official Swindon Bus Company website for the latest updates and downloadable timetables. These enhancements are part of a broader strategy to modernize public transport in the region.